Introduction
The first time I made homemade perogies, I’ll admit—I was intimidated. Could I really pull off these tender, pillowy dumplings stuffed with creamy potato and cheese goodness? But once I rolled up my sleeves and got started, I realized how incredibly simple and fun the process could be. Now, it’s one of my favorite family traditions, and trust me, this easy homemade perogies recipe is perfect for beginners.
There’s something magical about making a batch of perogies from scratch. The dough is soft, pliable, and so forgiving, while the filling is a cozy blend of mashed potatoes, sharp cheddar, and just the right touch of seasoning. Whether you’re cooking them for a weeknight dinner or a special occasion, these perogies are guaranteed to bring smiles to the faces around your table.
This recipe is a labor of love, but don’t let that scare you—it’s totally doable, even if you’ve never made homemade dumplings before. Plus, the rewards are well worth it: a plate full of tender, golden-brown perogies that taste way better than store-bought. Let’s dive into the details so you can get started and make perogies like a pro!
Why You’ll Love This Recipe
- Beginner-Friendly: This recipe breaks everything down into simple, manageable steps, so you’ll feel confident the whole way through.
- Classic Comfort Food: These perogies are the ultimate cozy meal, with a creamy potato and cheese filling wrapped in tender homemade dough.
- Budget-Friendly: Made with pantry staples like flour, potatoes, and cheese, this dish is easy on the wallet without sacrificing flavor.
- Customizable: Get creative with the fillings! Add caramelized onions, bacon, mushrooms, or even spinach and feta for a modern twist.
- Perfect for Any Occasion: Whether it’s a holiday, a casual dinner, or a potluck, these perogies will be the star of the show.
- Make-Ahead Magic: You can prepare these perogies in advance and freeze them, making them a lifesaver for busy weeknights!
What sets this recipe apart is its simplicity. I’ve tested it over and over to ensure you get perfect results every time. Plus, there’s something nostalgic and heartwarming about making perogies—it’s food that brings people together, and that’s exactly what I love about it.
What Ingredients You Will Need
This recipe uses simple, accessible ingredients to create a truly irresistible dish. You likely already have most of these in your kitchen!
- For the Dough:
- 2 cups all-purpose flour (plus extra for rolling)
- 1/2 teaspoon salt
- 1 large egg
- 1/2 cup sour cream
- 1/4 cup unsalted butter, softened (adds richness)
- For the Filling:
- 2 medium-sized russet potatoes, peeled and cubed
- 1 cup sharp cheddar cheese, shredded
- 1/4 teaspoon black pepper (or more to taste)
- Salt, to taste
- Optional Toppings:
- Sour cream
- Chopped fresh chives
- Caramelized onions
- Cooked crumbled bacon
If you’re looking for substitutions, you can use whole wheat flour for a nuttier flavor or dairy-free cheese and yogurt to make it vegan. You could even swap out the potatoes for sweet potatoes or use ricotta instead of cheddar to change things up.
Equipment Needed
- Large mixing bowl
- Rolling pin (a clean wine bottle works in a pinch!)
- Potato masher
- Large pot for boiling
- Slotted spoon
- Clean tea towel or parchment paper
- Skillet or frying pan
If you don’t have a rolling pin, don’t worry—anything cylindrical like a bottle or even a sturdy glass will do the trick. Just make sure it’s clean and easy to roll!
Preparation Method
- Make the Dough: In a large mixing bowl, combine the flour and salt. Add the egg, sour cream, and softened butter. Mix until the dough comes together, then knead it on a floured surface for about 5 minutes until smooth. Wrap the dough in plastic wrap and let it rest for 30 minutes.
- Prepare the Filling: While the dough is resting, boil the cubed potatoes in salted water until tender, about 15 minutes. Drain and mash the potatoes until smooth. Stir in the shredded cheddar cheese, black pepper, and a pinch of salt. Taste and adjust seasoning if needed. Allow the filling to cool.
- Roll Out the Dough: After resting, divide the dough into two portions. Roll one portion out on a floured surface until it’s about 1/8 inch thick. Use a round cutter (or a glass) to cut out circles, about 3 inches in diameter.
- Fill the Perogies: Place a teaspoon of filling in the center of each dough circle. Fold the dough over to create a half-moon shape, and pinch the edges together to seal. You can use a fork to crimp the edges for an extra decorative touch.
- Boil the Perogies: Bring a large pot of salted water to a boil. Drop the perogies in, a few at a time to avoid overcrowding the pot. Cook until they float to the surface, about 3-5 minutes. Use a slotted spoon to transfer them to a plate lined with a tea towel.
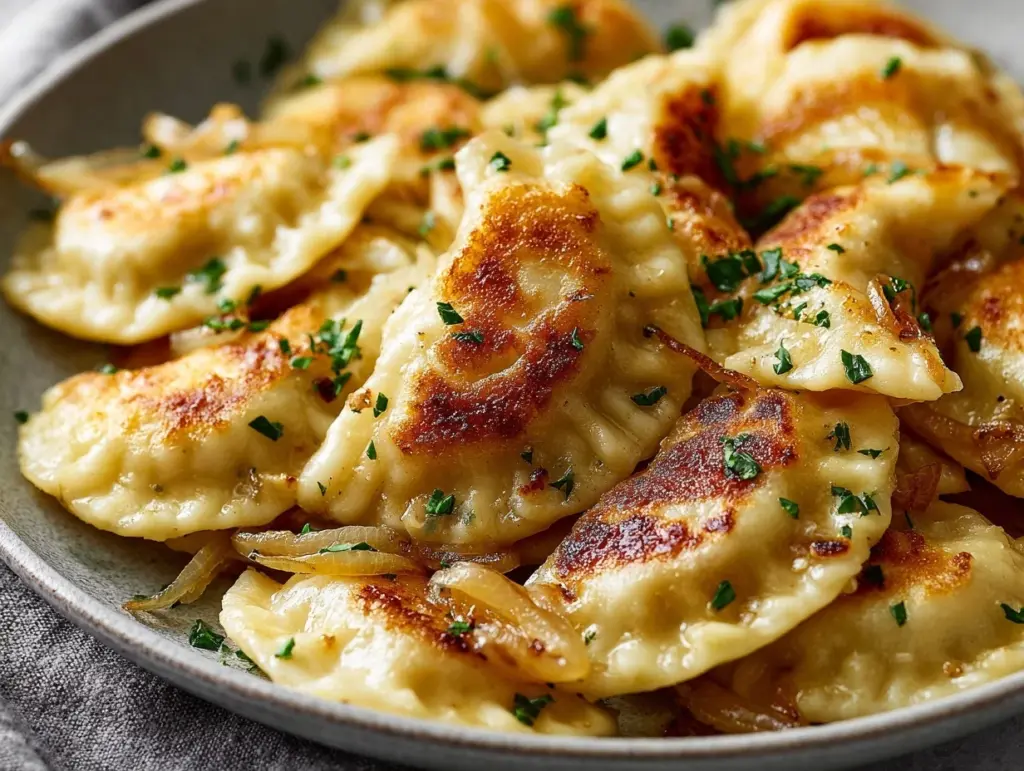
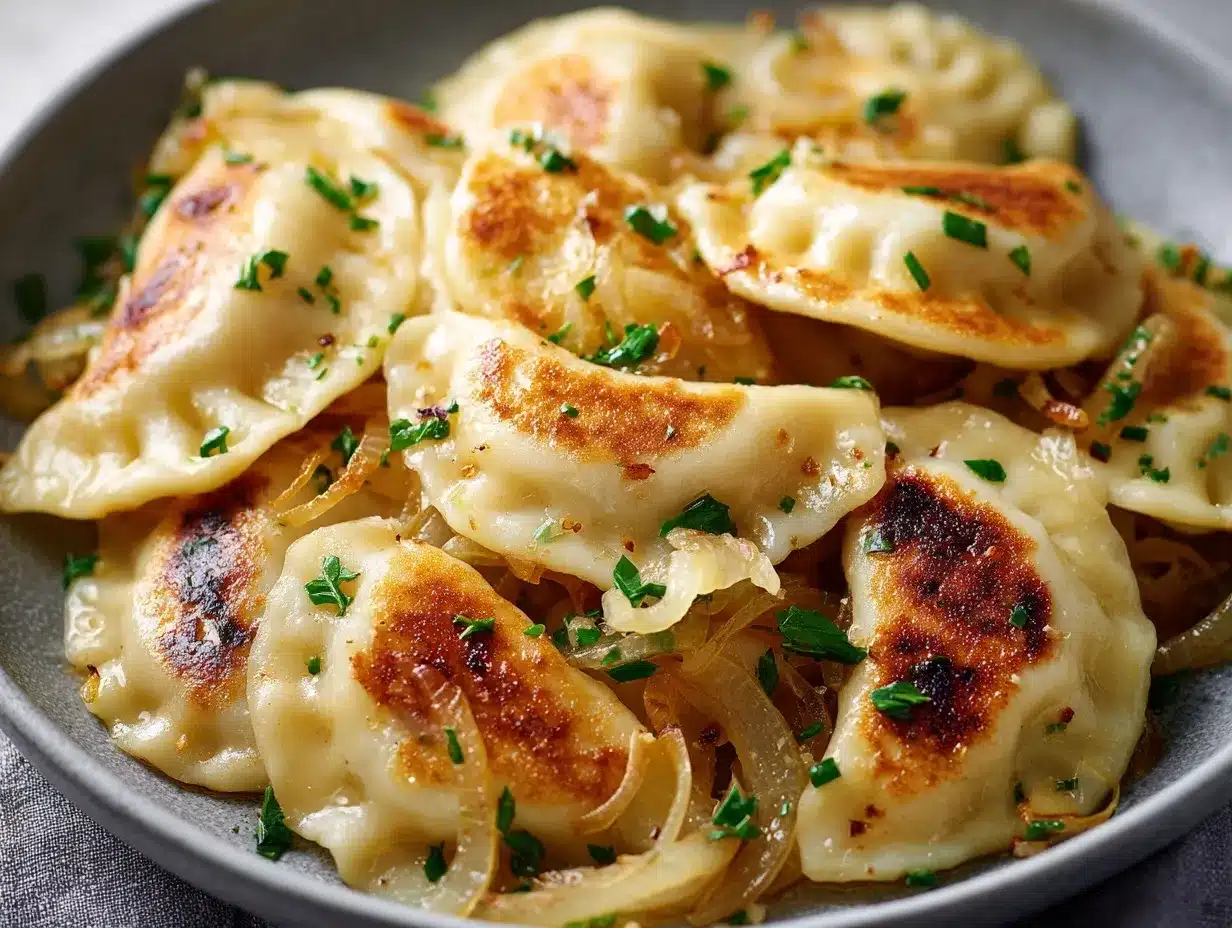
- Pan-Fry for Extra Flavor: Heat a skillet over medium heat and add a tablespoon of butter. Fry the boiled perogies until golden brown on both sides, about 2-3 minutes per side.
Serve your perogies warm with your favorite toppings like sour cream, chives, or caramelized onions. Watch as everyone devours them with delight!
Cooking Tips & Techniques
- Don’t skip resting the dough: Resting allows the gluten to relax, making the dough easier to roll out.
- Seal properly: Be sure to pinch the edges tightly or use a fork to avoid the filling spilling out during cooking.
- Don’t overcrowd the pot: Boil the perogies in batches to ensure even cooking.
- Save time: Prepare the filling a day ahead and store it in the fridge—it makes the process feel less overwhelming!
- Fry for extra flavor: Sure, boiled perogies are delicious, but frying them in butter adds a crispy, golden layer that’s simply irresistible.
Remember, practice makes perfect! The more you make perogies, the more confident you’ll get with shaping and sealing them.
Variations & Adaptations
- Vegan Option: Use dairy-free butter, plant-based sour cream, and vegan cheese. For the filling, try mashed sweet potatoes or sautéed mushrooms.
- Gluten-Free Version: Swap all-purpose flour for a gluten-free flour blend. Add a pinch of xanthan gum to help with elasticity.
- Seasonal Twist: Customize your filling with seasonal veggies—think roasted pumpkin in autumn or fresh spinach and feta in spring.
- Protein Boost: Mix in cooked, crumbled bacon or shredded chicken into the filling for a heartier option.
- Sweet Treat: Swap the savory filling for a sweet one like mashed blueberries mixed with a touch of sugar and cinnamon.
One of my favorite variations is adding caramelized onions and crispy bacon to the filling—it’s the perfect combination of smoky and sweet.
Serving & Storage Suggestions
Perogies are best served warm, fresh off the skillet, with a dollop of sour cream and a sprinkle of chives. You can also serve them with a side of sauerkraut or a fresh green salad for a complete meal. If you’re feeling indulgent, pair them with a cold beer or a glass of chilled white wine.
To store leftovers, place the perogies in an airtight container and refrigerate for up to 3 days. For longer storage, freeze the uncooked perogies on a baking sheet, then transfer them to a freezer-safe bag or container. They’ll keep for up to 3 months in the freezer.
When you’re ready to enjoy them, boil the frozen perogies straight from the freezer—no need to thaw! You can also pan-fry them directly from frozen, but cook them on a lower heat to ensure they heat through evenly.
Nutritional Information & Benefits
This easy homemade perogies recipe is comforting and satisfying, but it can also fit into a balanced diet with a little mindfulness. Each serving (about 4 perogies) is approximately 200-250 calories, depending on the filling and toppings.
Potatoes are a great source of potassium and vitamin C, while cheddar cheese provides calcium and protein. You can lighten things up by using low-fat dairy in the dough and filling, or add extra veggies for fiber and nutrients.
For those with dietary restrictions, you can easily adapt the recipe to be gluten-free, vegan, or low-carb, making it a versatile option for different lifestyles and preferences.
Conclusion
There’s nothing quite like the satisfaction of making a batch of homemade perogies. From the simple ingredients to the hands-on preparation, this recipe is a true joy to create—and even better to eat! Whether you’re a seasoned cook or a beginner, these easy homemade perogies are a must-try.
Feel free to get creative with the fillings and toppings to make this recipe your own. Whether you’re enjoying them on a snowy evening or serving them at a family gathering, these perogies are sure to be a hit.
So, what are you waiting for? Grab your rolling pin, whip up a batch, and let me know how it goes! Leave a comment below or share your version of this recipe—I’d love to hear from you.
FAQs
1. Can I make perogies ahead of time?
Absolutely! You can freeze uncooked perogies on a baking sheet, then transfer them to a freezer-safe container. When ready to cook, boil them straight from the freezer.
2. Can I use store-bought dough instead of homemade?
Yes, you can use pre-made dumpling wrappers or even pie crust for a shortcut, but homemade dough has the best texture and flavor.
3. How do I prevent perogies from sticking together after boiling?
Place them on a clean, dry tea towel after boiling and avoid stacking them. You can also toss them gently with a little melted butter.
4. Can I make this recipe gluten-free?
Yes! Use a gluten-free flour blend and add a pinch of xanthan gum to help with elasticity in the dough.
5. What’s the best way to reheat leftover perogies?
For the best flavor and texture, reheat them in a skillet with a little butter until warmed and crispy. Alternatively, you can microwave them, but they won’t have that golden crunch.
Pin This Recipe!