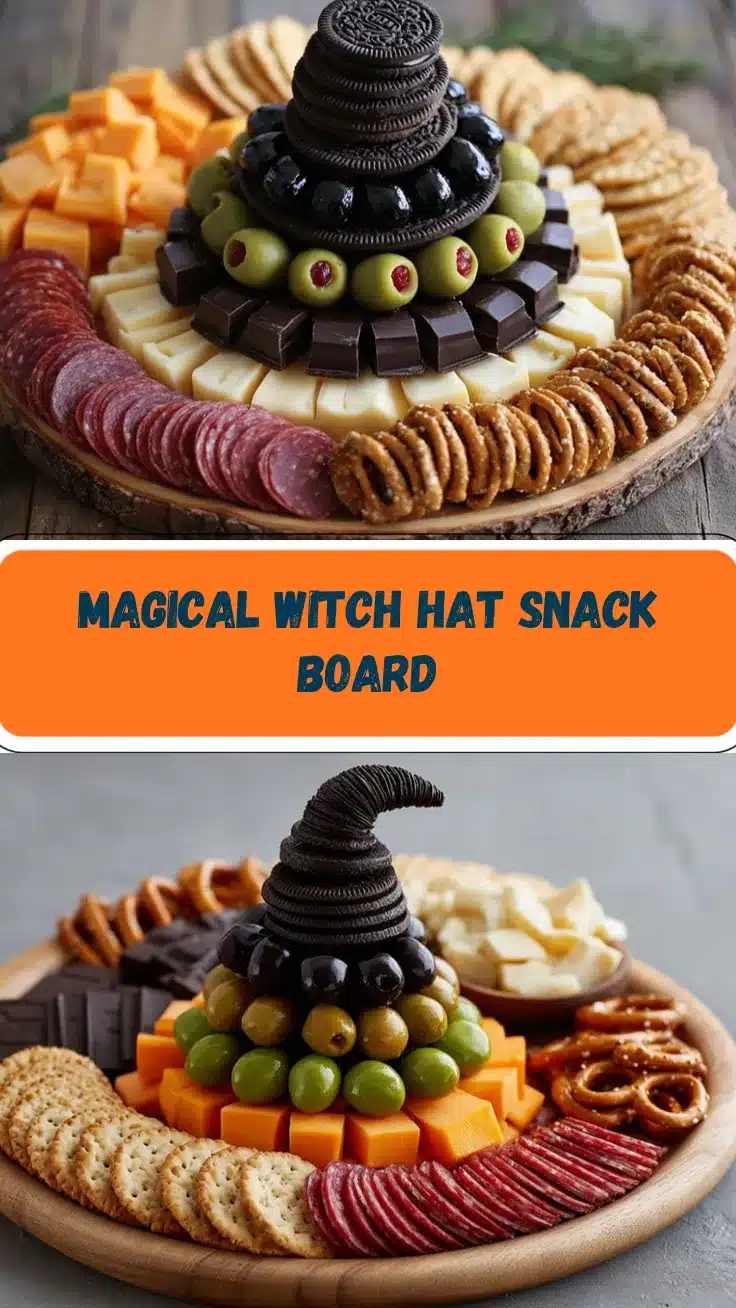
Spooky season is here, and it’s time to bring those hauntingly delicious vibes to your next Halloween party! Imagine a whimsical spread of treats shaped like witch hats, creepy snacks, and colorful goodies that will bewitch your guests. This enchanting witch hat snack board is not only a feast for the eyes but also incredibly easy to put together. Whether you’re hosting a party for kids or adults, this snack board will steal the show and make everyone say “wow!” Let’s dive into how you can create this magical masterpiece for your Halloween festivities.
Why You’ll Love This Recipe
- Festive and Fun: This snack board is the ultimate Halloween centerpiece. It’s creative, colorful, and guaranteed to impress your guests.
- No Cooking Required: Forget hours spent in the kitchen. This is all about assembling store-bought treats into something spellbinding.
- Perfect for All Ages: Whether you’re hosting little witches and wizards or spooky-loving adults, this snack board is a crowd-pleaser.
- Customizable: You can switch out treats and decorations to suit your taste and dietary needs.
- Quick to Make: You can put this board together in under 30 minutes, leaving you more time to focus on enjoying the party.
What makes this snack board really stand out is its unique theme. It’s not just another Halloween spread—it’s a magical, witch-inspired creation that feels like stepping into a spooky fairy tale. The combination of textures, flavors, and colors creates an unforgettable experience. Whether you’re making this for your kids or as an Instagram-worthy decor piece for your party, this snack board is the definition of festive fun!
What Ingredients You Will Need
This enchanting witch hat snack board comes to life with a mix of sweet and savory goodies. Don’t worry—you can find most of these ingredients at your local grocery store or online!
- Mini Chocolate Cones: The star of the board, these cones will be transformed into adorable witch hats. You can use dark chocolate cones for the perfect spooky look.
- Assorted Candies: Think candy corn, gummy worms, licorice strings, chocolate eyeballs, and Halloween-colored M&Ms. These add color and fun to the board.
- Pretzel Sticks: Great for broom handles to match the witch theme.
- Cheese Cubes: Add a savory element with orange cheddar or gouda cubes for a pop of color.
- Crackers: Opt for round crackers to create a base for the witch hats. You can also include some spooky-shaped ones, like bats or pumpkins.
- Fresh Fruit: Mandarin orange slices, blackberries, and green grapes for a healthier touch and Halloween colors.
- Dips: Serve guacamole, chocolate hummus, or pumpkin-flavored dips in small bowls.
- Decorative Halloween Picks: These can be skeletons, witches, or spider-themed and add an extra spooky touch.
Feel free to get creative with your ingredients! The beauty of a snack board is that you can mix and match based on your preferences.
Equipment Needed
- Large Serving Board: A big wooden or slate board works best for displaying your snacks.
- Small Bowls: Perfect for dips or keeping candies separated.
- Decorative Halloween Accessories: Spiderweb cloth, mini pumpkins, or battery-powered string lights to set the scene.
- Piping Bags: For decorating the witch hats with frosting or melted chocolate.
- Small Knife: Useful for cutting fruit or cheese into smaller pieces.
If you don’t have a fancy serving board, don’t worry—use a large tray or even a cutting board covered with parchment paper. The decorations will steal the show anyway!
Preparation Method
- Prep Your Ingredients: Wash and dry your fresh fruit, cut cheese into cubes, and slice any larger fruits like apples or pears.
- Set Up the Board: Place your large serving board on a sturdy table. If you’re using a decorative cloth or tablecloth, lay it down first.
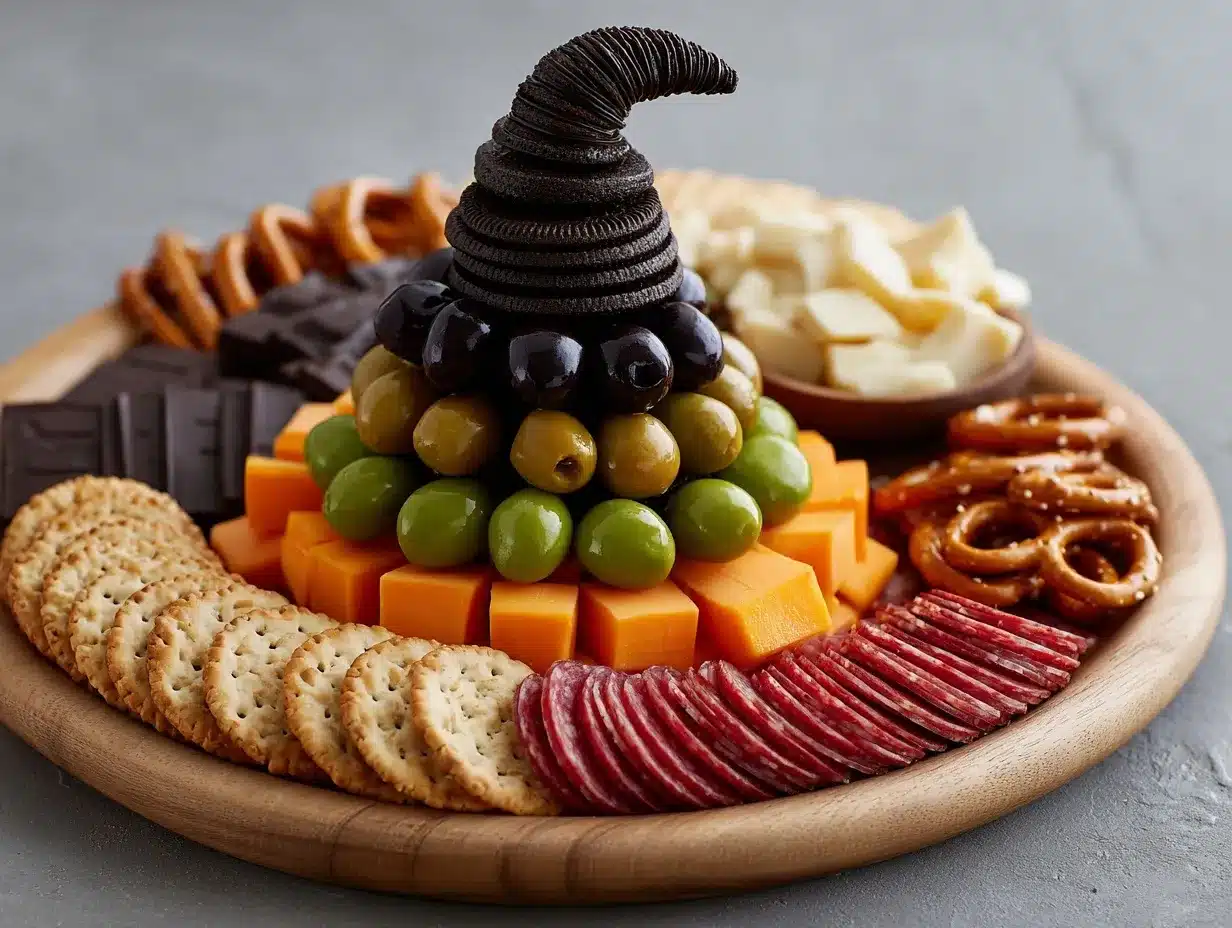
- Create the Witch Hats: Take your mini chocolate cones and attach them to round crackers using melted chocolate. Use a piping bag to add a decorative rim on the base of each cone to mimic the look of a witch hat.
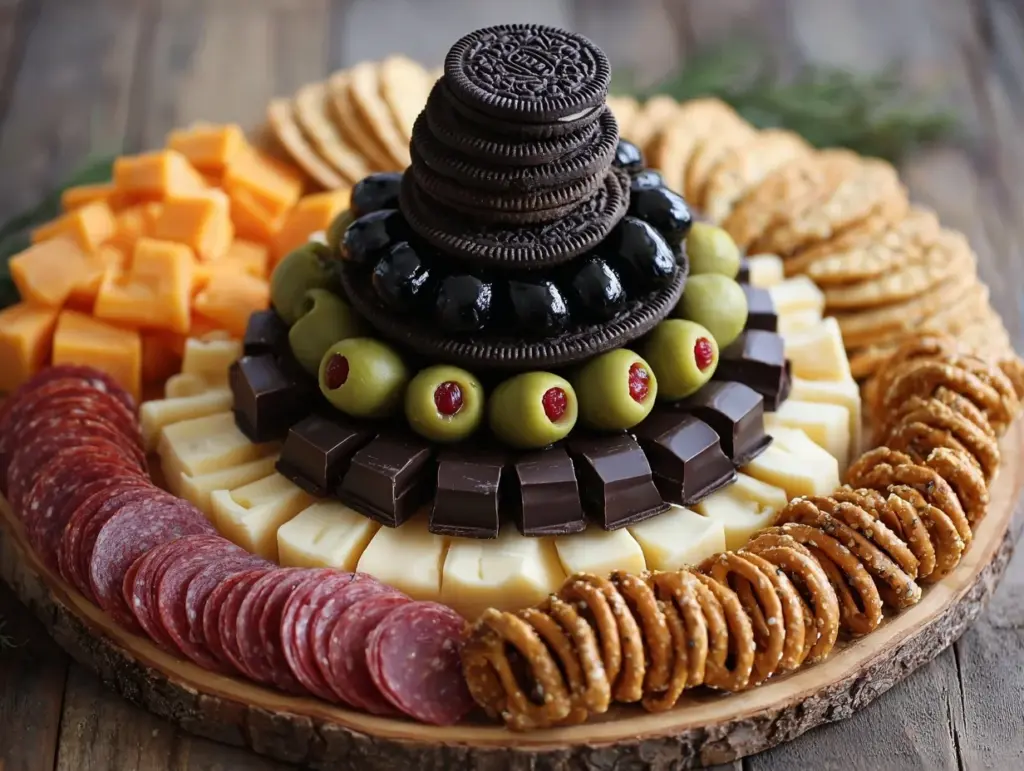
- Arrange the Items: Start by placing the witch hats in the center of the board. Spread your candy, fruits, and cheese cubes around them in clusters for a visually appealing layout.
- Add Dips: Place small bowls of dips in the corners of the board. Guacamole can resemble a bubbling cauldron, and chocolate hummus fits the theme perfectly.
- Add Decorative Touches: Use Halloween-themed picks, mini pumpkins, and string lights to enhance the spooky vibe. Sprinkle candy corn and gummy worms around for a finishing touch.
- Final Adjustments: Step back and assess the board. Adjust the placement of items to ensure everything looks balanced and aesthetically pleasing.
Cooking Tips & Techniques
Creating a snack board is more about presentation than cooking, but here are some tips to make it truly enchanting:
- Balance Sweet and Savory: Include a mix of candy, fruit, and salty snacks to cater to different preferences.
- Color Coordination: Stick to Halloween colors like orange, black, purple, and green for a cohesive look.
- Keep the Board Full: No one likes a sparse snack board! Fill every nook and cranny with treats.
- Play with Heights: Use small bowls and props to create layers and dimensions on your board.
- Frosting Designs: Practice your piping skills ahead of time to make those witch hats look extra magical.
- Keep It Fresh: Don’t assemble the fresh fruit until right before serving to keep everything looking vibrant.
Variations & Adaptations
If you want to switch things up, here are some ideas:
- Gluten-Free Option: Use gluten-free crackers and pretzels for guests with dietary restrictions.
- Vegan Version: Replace cheese cubes with plant-based cheese alternatives and opt for vegan-friendly candies.
- Seasonal Twist: Add themed items like pumpkin spice cookies, caramel apples, or roasted pumpkin seeds.
- Personalized Witch Hats: Instead of chocolate cones, use sugar cones and dip them in vibrant colored frosting or melted candy melts.
- Spicy Variation: Include spicy snacks like chili-lime peanuts and spicy popcorn for an adult twist.
Serving & Storage Suggestions
When it comes to serving and storing your enchanting witch hat snack board, here are some tips:
- Serving Temperature: Serve the snack board at room temperature, but keep any dips chilled until ready to serve.
- Presentation Ideas: Add spooky-themed decorations like fake cobwebs, tiny figurines, or place the board on a dark, mysterious tablecloth.
- Storage: Store leftover candies and snacks in airtight containers to keep them fresh.
- Reheating Fruit: If you include baked items, you can gently reheat them in the oven to bring them back to life.
- Plan for Leftovers: Use leftover fruits in smoothies or add candies to baked goods for post-party treats.
Nutritional Information & Benefits
While this snack board is all about indulging in Halloween fun, it can include healthier options too:
- Fresh Fruit: Packed with vitamins, fiber, and natural sweetness.
- Cheese Cubes: A good source of calcium and protein, perfect for balancing out the sugary treats.
- Dark Chocolate Cones: Choose high-quality dark chocolate for a dose of antioxidants.
Keep in mind that this snack board can be tailored to fit various dietary needs, whether you’re looking for gluten-free, vegan, or low-sugar options.
Conclusion
This enchanting witch hat snack board is more than just a collection of treats—it’s a celebration of Halloween magic. I love it because it’s so simple to create, yet it makes such a huge impact. Plus, seeing the joy on your guests’ faces when they dive into this spooky spread is priceless. Don’t be afraid to get creative and add your personal touch to this recipe. Whether you’re going all out for a big party or keeping it cozy with family, this snack board will make your Halloween unforgettable.
So, what are you waiting for? Grab your favorite Halloween treats and start assembling your own enchanting witch hat snack board. Don’t forget to share your spooky creations in the comments below—I’d love to see how you’ve put your spin on it!
FAQs
Can I make the snack board ahead of time?
Yes, you can assemble most of the board a few hours ahead, but wait to add fresh fruit and dips until right before serving to keep everything fresh.
What if I can’t find mini chocolate cones?
No worries! Regular ice cream cones can be trimmed down to size or dipped in melted chocolate for the same effect.
Are there healthier options for this snack board?
Absolutely! Add more fresh fruits, nuts, and veggies for a healthier twist. You can also swap candies for dried fruit or dark chocolate.
How do I keep the snack board looking fresh during the party?
Keep dips chilled until serving, and avoid placing fresh fruit directly on the board until it’s time to eat. A cool room temperature also helps!
Can I make this snack board for other holidays?
Definitely! You can adapt the theme for Christmas, Easter, or even birthdays by switching up the colors and decorations.
Pin This Recipe!