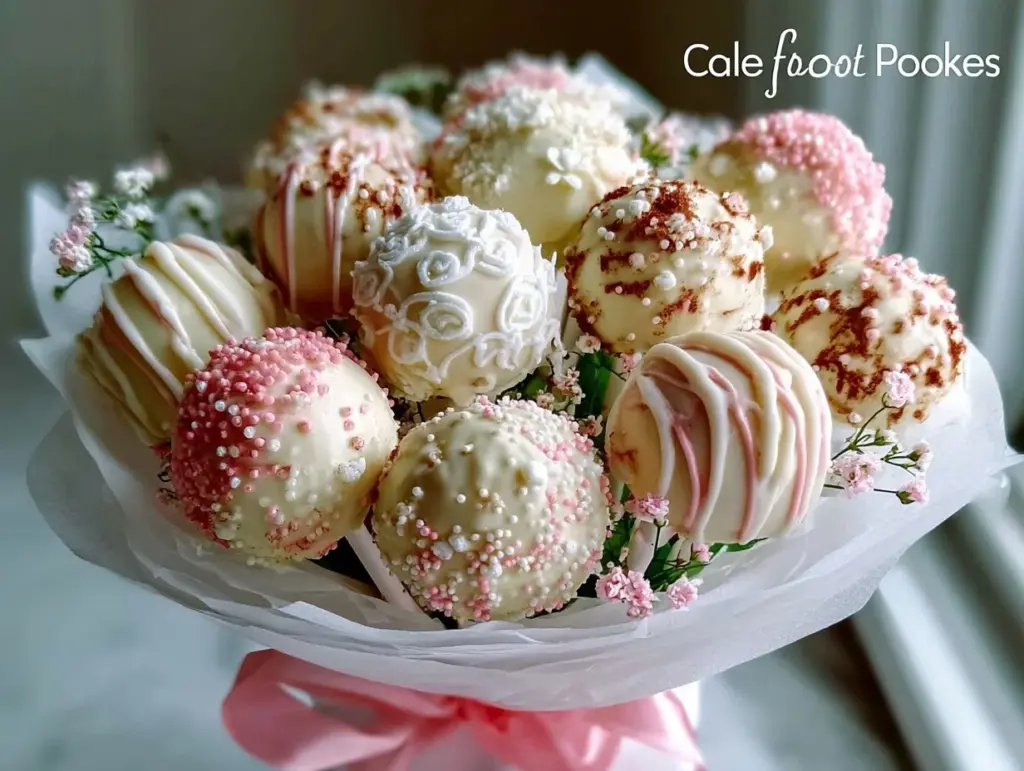
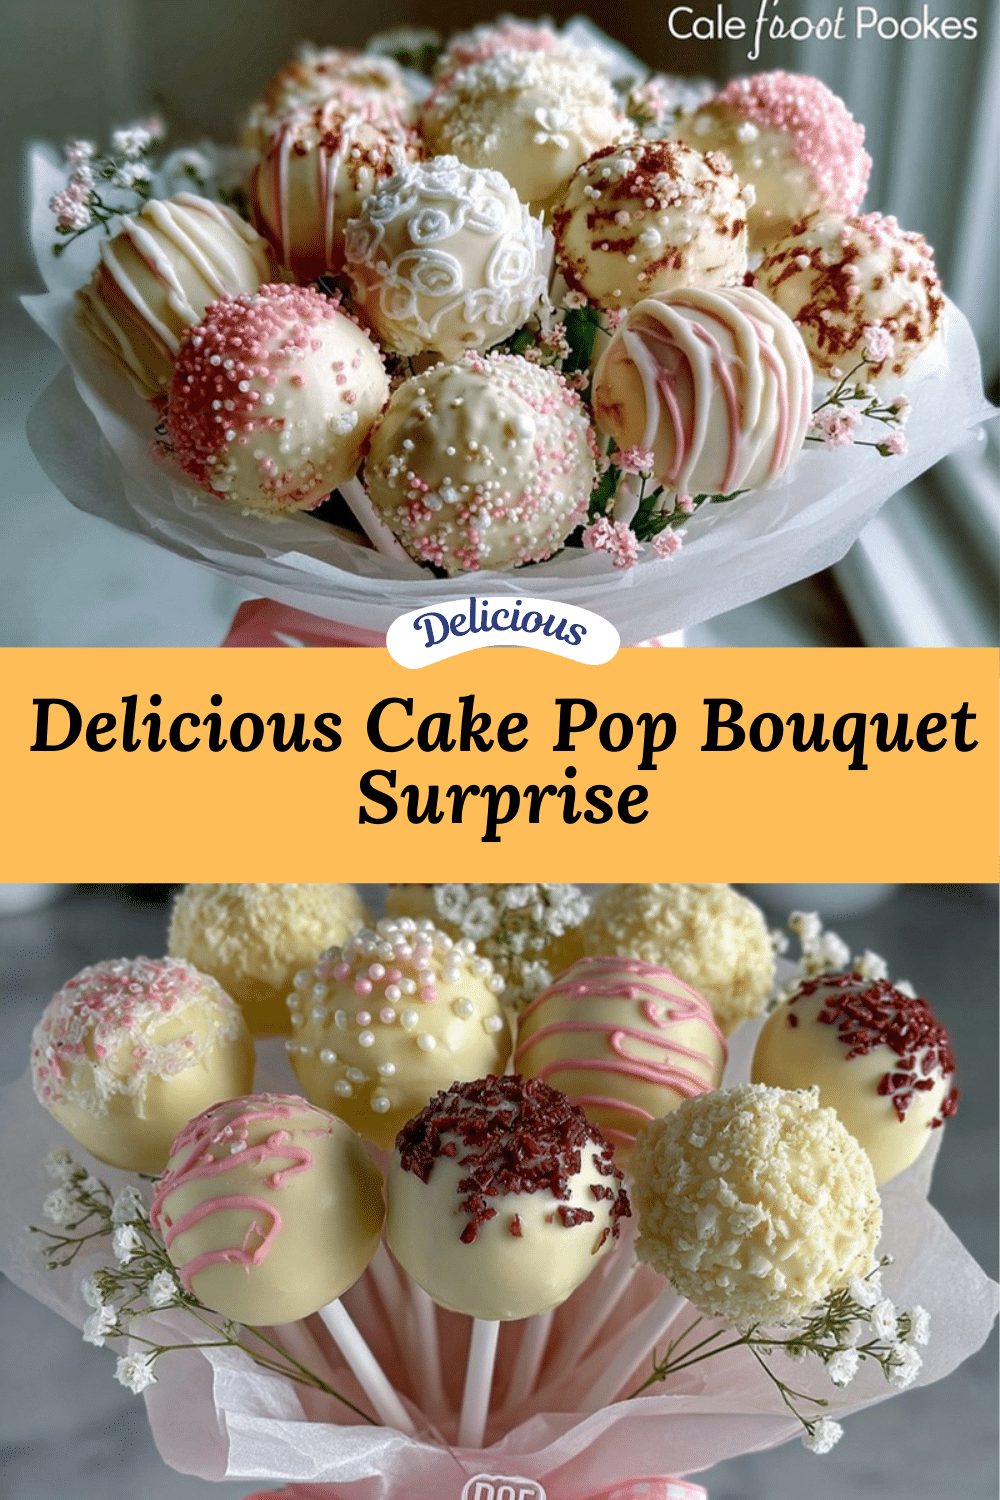
The sight of a delicious cake pop bouquet instantly brings a smile to my face—there’s just something about those little bites of cake on a stick, dressed up like a floral arrangement, that feels both fancy and fun. Honestly, the first time I made this cake pop bouquet, I was aiming to wow my friends at a birthday party, and it totally did the trick. It’s like the perfect mix of elegance and whimsy, and it tastes just as good as it looks.
Making a cake pop bouquet isn’t just about the presentation; it’s about creating a treat that’s easy to eat, share, and enjoy without the mess of a traditional cake slice. Plus, it’s a fantastic idea for busy bakers who want to impress without spending hours fussing over complicated decorations. Over the years, I’ve tested this recipe multiple times, tweaking the cake texture and dipping chocolate until it was just right. If you’ve never tried making cake pops or you’ve only done the basic versions, this recipe will show you how to turn them into an elegant centerpiece that’s perfect for celebrations or simply treating yourself.
This delicious cake pop bouquet recipe is truly a standout—it combines simplicity, charm, and irresistible flavor all in one. Whether you’re gifting it, serving it at a party, or just craving something sweet and sophisticated, these cake pops will quickly become a favorite in your baking repertoire. So grab your apron, and let’s get started on this delightful project that’s as enjoyable to make as it is to eat.
Why You’ll Love This Recipe
After making this delicious cake pop bouquet more times than I can count, I’ve come to appreciate what makes it so special—and why you’ll love it too:
- Quick & Easy: The whole process takes under two hours, including chilling time, making it perfect for last-minute celebrations or weekend baking fun.
- Simple Ingredients: No need for fancy or hard-to-find items; most of the ingredients are pantry staples you likely already have on hand.
- Perfect for Gifting: Whether it’s Mother’s Day, a birthday, or an anniversary, this bouquet makes a thoughtful, edible gift that’s sure to impress.
- Crowd-Pleaser: Kids and adults alike can’t get enough of these bite-sized delights—the combination of moist cake, creamy frosting, and chocolate coating is just irresistible.
- Unbelievably Delicious: The texture is soft and moist inside with a smooth, glossy chocolate shell on the outside—every bite melts in your mouth.
What sets this cake pop bouquet apart? Well, I’ve learned that blending the cake crumbs just right and using high-quality chocolate for dipping makes a world of difference. Plus, arranging the cake pops like a bouquet with colorful ribbons and tissue paper adds that wow factor without a lot of extra effort. This isn’t just another cake pop recipe—it’s a little masterpiece that brings joy and a touch of elegance wherever it goes.
What Ingredients You Will Need
This delicious cake pop bouquet recipe uses simple, wholesome ingredients that come together to create both fantastic flavor and a satisfying texture. You won’t need to hunt for anything exotic—just gather these essentials, and you’re good to go!
- For the Cake:
- All-purpose flour (1 ½ cups / 190g) – for a tender crumb
- Granulated sugar (1 cup / 200g) – adds just the right sweetness
- Baking powder (1 ½ tsp) – helps the cake rise nicely
- Salt (¼ tsp) – balances flavors
- Unsalted butter (½ cup / 115g), softened – adds richness
- Eggs (2 large, room temperature) – binds the batter
- Whole milk (½ cup / 120ml) – keeps the cake moist
- Vanilla extract (1 tsp) – for that classic flavor
- For the Frosting & Binding:
- Cream cheese (4 oz / 115g), softened – adds tang and moisture
- Powdered sugar (1 cup / 120g) – sweetens and thickens
- Vanilla extract (½ tsp) – enhances frosting flavor
- For the Coating & Decoration:
- White chocolate or candy melts (12 oz / 340g) – for dipping and coating
- Food coloring (optional) – to tint chocolate for a pop of color
- Sprinkles, edible glitter, or finely chopped nuts – for decorating
- Lollipop sticks (about 20) – sturdy and food-safe
- Floral foam or a sturdy vase – to hold your bouquet upright
- Colored tissue paper and ribbons – to wrap and embellish your bouquet
When picking your ingredients, I recommend using a trusted brand of white chocolate like Ghirardelli or Wilton candy melts for the best texture and shine. For the cake, fresh eggs and quality butter really make a difference in flavor, so try to avoid substitutes if possible. If you want a gluten-free option, swapping the all-purpose flour for a gluten-free blend works well, just make sure it’s a 1:1 substitute. Also, if you’re dairy-free, coconut cream cheese and non-dairy milk can be great alternatives without sacrificing taste.
Equipment Needed
- Mixing Bowls: At least two, medium and large sizes, for batter and frosting.
- Electric Mixer: A hand mixer or stand mixer makes beating the cake batter and frosting much easier and smoother.
- Baking Pan: A 9×9 inch square pan works perfectly for baking the cake evenly.
- Cooling Rack: Essential for letting the cake cool completely before crumbling.
- Food Processor or Fork: For crumbling the cake finely—using a processor speeds things up, but a fork works in a pinch.
- Microwave-Safe Bowl: For melting chocolate safely and evenly.
- Lollipop Sticks: These are a must-have to create that classic cake pop shape.
- Floral Foam or Vase: To arrange and display the bouquet elegantly.
- Wax Paper or Parchment: For placing dipped cake pops to set.
If you don’t have a stand mixer, no worries—I often use a hand mixer, and it works just fine. For melting chocolate, a double boiler is a nice touch but a microwave on short bursts with stirring in between works just as well. Floral foam can be found cheaply at craft stores, but if you’re on a budget, a sturdy mug filled with rice or beans can hold the sticks in place temporarily. Trust me, the right tools make the process smoother but don’t stress if you’re working with basics—you can still get great results.
Preparation Method

- Preheat your oven to 350°F (175°C). Grease and flour your 9×9-inch baking pan to prevent sticking. This usually takes about 5 minutes.
- Mix the dry ingredients. In a medium bowl, whisk together 1 ½ cups (190g) all-purpose flour, 1 cup (200g) granulated sugar, 1 ½ teaspoons baking powder, and ¼ teaspoon salt. Set aside.
- Cream the butter and eggs. Using your electric mixer, beat ½ cup (115g) softened unsalted butter until fluffy, about 2-3 minutes. Add 2 large eggs one at a time, beating well after each addition. Then stir in 1 teaspoon vanilla extract.
- Combine wet and dry ingredients. Alternate adding the flour mixture and ½ cup (120ml) whole milk to the butter mixture, beginning and ending with flour. Mix on low speed just until combined to avoid overmixing, about 1-2 minutes.
- Bake the cake. Pour batter into the prepared pan and smooth the top. Bake for 30-35 minutes or until a toothpick inserted in the center comes out clean. Cooling time is about 15 minutes in the pan, then transfer cake to a wire rack to cool completely, approximately 45 minutes.
- Make the frosting. While the cake cools, beat 4 oz (115g) softened cream cheese with 1 cup (120g) powdered sugar and ½ teaspoon vanilla extract until smooth and creamy. This should take about 3-5 minutes.
- Crumble the cake. Once cooled, crumble the cake into fine crumbs using a food processor or by hand with a fork. Fine crumbs help the cake pops hold together better.
- Mix cake crumbs with frosting. Add frosting gradually to the cake crumbs, mixing by hand until the mixture is moist enough to form into balls without falling apart. You want a consistency similar to playdough—about ¾ cup (180g) frosting total, but adjust as needed.
- Shape the cake pops. Roll the mixture into 1 ½-inch (4 cm) balls and place them on a wax paper-lined tray. Chill in the refrigerator for at least 1 hour to firm up; this helps them stay on the sticks later.
- Melt the chocolate coating. In a microwave-safe bowl, melt 12 oz (340g) white chocolate or candy melts in 30-second intervals, stirring between each until smooth. If desired, add a few drops of food coloring to tint your chocolate for a festive look.
- Insert sticks and dip. Dip the tip of each lollipop stick into the melted chocolate, then insert it halfway into each chilled cake ball. This “glue” step helps the cake pop stay on the stick. Return to the fridge for 10 minutes.
- Coat the cake pops. Dip each cake pop into the melted chocolate, allowing excess to drip off. Before the coating sets, decorate with sprinkles or edible glitter. Place them back on wax paper to dry completely, about 30 minutes.
- Assemble the bouquet. Once set, arrange your cake pops in floral foam inside a vase or container. Add colored tissue paper and ribbons to create that stunning bouquet effect.
Tip: If the chocolate thickens during dipping, warm it gently again in short bursts. Also, keeping your cake pops cold during the dipping process helps prevent cracking. I learned that the hard way on my first try—warm cake pops plus hot chocolate equals a messy meltdown!
Cooking Tips & Techniques
Making a delicious cake pop bouquet is all about small details that add up to a flawless final product. Here are some tips I’ve picked up along the way:
- Don’t overmix the batter. Overworking the cake batter can lead to dense cake pops. Mix just until the ingredients blend.
- Use room temperature ingredients. Eggs and butter come together better when they’re not straight from the fridge, making the cake lighter.
- Chill the cake pops well. Patience here pays off—if the cake balls aren’t firm before dipping, they’ll crumble or fall off the sticks.
- Dip with care. Use a gentle swirling motion when dipping cake pops into chocolate to get even coverage without too much excess.
- Prevent cracking. Adding a little vegetable shortening to the melted chocolate can help it stay smooth and less brittle.
- Work in batches. Trying to dip too many cake pops at once can warm the coating too much or cause sticking.
- Decorate quickly. Sprinkles or toppings should be added immediately after dipping before the chocolate sets.
One time, I rushed the chilling step and ended up with a few sad cake pops that just didn’t hold together. Since then, I always set a timer and keep everything cold—it’s a game changer. Also, multitasking helps! While the cake is baking, prep your frosting and decorations so you’re ready to roll as soon as the cake cools.
Variations & Adaptations
One of the best things about this delicious cake pop bouquet recipe is how easy it is to customize. Here are some of my favorite variations you can try:
- Flavor swaps: Replace vanilla cake with chocolate, red velvet, or lemon for a different taste twist. Just use your favorite boxed cake mix or homemade recipe.
- Dietary tweaks: Use gluten-free flour blends to make this bouquet friendly for gluten-sensitive guests. For dairy-free, swap cream cheese for coconut cream cheese and use dairy-free chocolate melts.
- Seasonal themes: Add festive colors with food coloring—reds and greens for Christmas, pastels for Easter, or orange and black for Halloween. You can also mix in finely chopped nuts or dried fruit into the batter for added texture.
- Alternative coatings: Try dark chocolate or milk chocolate for the coating instead of white chocolate. You can drizzle contrasting chocolate over the dipped pops for a pretty marbled effect.
- Personal touch: I once made a coffee-flavored cake pop bouquet by adding espresso powder to the batter and frosting—it was a hit with my caffeine-loving friends!
Feel free to experiment with your favorite flavors and decorations. The cake pop bouquet is forgiving and fun to personalize, so don’t hesitate to make it your own.
Serving & Storage Suggestions
Serving your delicious cake pop bouquet is as enjoyable as making it. These cake pops are best served at room temperature so the chocolate coating is firm but not hard. If you’re presenting it as a gift, wrap the bouquet in clear cellophane and tie with a ribbon for an elegant touch.
Pair your cake pop bouquet with light beverages like tea, coffee, or sparkling lemonade to complement the sweet flavors without overpowering them. For parties, setting the bouquet as a centerpiece invites guests to grab a treat easily.
Storing cake pops properly keeps them fresh and tasty. Keep them in an airtight container in the refrigerator for up to 5 days. Before serving, bring them to room temperature for about 30 minutes to soften the frosting center gently. For longer storage, you can freeze cake pops in a single layer on a baking sheet, then transfer to a freezer-safe container for up to 2 months. Thaw overnight in the fridge before enjoying.
Over time, the flavors meld, and the cake pops become even more moist and flavorful—so if you can resist, they’re sometimes better the next day! Just be sure to keep them away from humid places to prevent the chocolate from sweating.
Nutritional Information & Benefits
Each delicious cake pop (about 2 oz / 57g) contains approximately 180-220 calories, depending on your choice of cake and coating. They provide a moderate amount of fat from butter and cream cheese, along with carbohydrates mostly from sugar and flour.
Key ingredients like eggs and milk offer protein and essential vitamins, while cream cheese adds calcium and a bit of healthy fat. Using white chocolate provides a smooth coating, though you can opt for dark chocolate for additional antioxidants.
This recipe can be adjusted to suit various dietary needs by selecting gluten-free or dairy-free alternatives. Just keep in mind that cake pops are definitely a treat best enjoyed in moderation, but they make a special indulgence that’s worth every bite.
Conclusion
This delicious cake pop bouquet recipe is a delightful way to impress friends and family with minimal fuss and maximum charm. From the moist cake centers to the glossy chocolate coatings, every component feels thoughtfully crafted yet totally approachable. Whether you’re celebrating a special occasion or just craving something sweet and beautiful, these cake pops hit the spot.
I love this recipe because it’s flexible and fun—you can make it your own with flavors, colors, and decorations that suit your style. Plus, it’s a fantastic project that brings a little joy to the kitchen and the table. So why not give it a try? Your next party, gift, or afternoon treat will thank you!
Don’t forget to share your own cake pop bouquet creations or any tweaks you make—I’d love to hear how yours turns out. Happy baking and enjoy every delicious bite!
FAQs
Can I use store-bought cake instead of baking from scratch?
Yes! Using store-bought cake or boxed cake mix works fine. Just crumble it well and mix with frosting as directed.
How do I prevent cake pops from falling off the sticks?
Dip the stick tip in melted chocolate before inserting it into the cake ball, then chill the pops to set before dipping in chocolate coating.
Can I make cake pops ahead of time?
Absolutely! Cake pops can be made a day or two in advance and stored in the fridge. Just bring them to room temperature before serving.
What’s the best way to melt chocolate without burning it?
Use short 20-30 second bursts in the microwave, stirring well between each interval. Alternatively, use a double boiler to melt chocolate gently.
How can I make this recipe dairy-free?
Swap cream cheese for a dairy-free alternative like coconut cream cheese, use plant-based milk, and choose dairy-free chocolate melts for coating.
Pin This Recipe!
Delicious Cake Pop Bouquet Recipe Easy Elegant Treats to Impress

This cake pop bouquet recipe combines simplicity, charm, and irresistible flavor to create an elegant and fun treat perfect for celebrations or gifting. The moist cake centers coated in glossy chocolate make a delightful bite-sized dessert.
- Prep Time: 30 minutes
- Cook Time: 35 minutes
- Total Time: 2 hours
- Yield: 20 cake pops
- Category: Dessert
- Cuisine: American
Ingredients
- All-purpose flour (1 ½ cups / 190g)
- Granulated sugar (1 cup / 200g)
- Baking powder (1 ½ tsp)
- Salt (¼ tsp)
- Unsalted butter (½ cup / 115g), softened
- Eggs (2 large, room temperature)
- Whole milk (½ cup / 120ml)
- Vanilla extract (1 tsp)
- Cream cheese (4 oz / 115g), softened
- Powdered sugar (1 cup / 120g)
- Vanilla extract (½ tsp)
- White chocolate or candy melts (12 oz / 340g)
- Food coloring (optional)
- Sprinkles, edible glitter, or finely chopped nuts
- Lollipop sticks (about 20)
- Floral foam or a sturdy vase
- Colored tissue paper and ribbons
Instructions
- Preheat your oven to 350°F (175°C). Grease and flour your 9×9-inch baking pan to prevent sticking.
- Mix the dry ingredients: whisk together flour, sugar, baking powder, and salt in a medium bowl.
- Cream the butter and eggs: beat softened butter until fluffy, add eggs one at a time, then stir in vanilla extract.
- Combine wet and dry ingredients: alternate adding flour mixture and milk to the butter mixture, beginning and ending with flour. Mix on low speed just until combined.
- Bake the cake: pour batter into prepared pan and bake for 30-35 minutes or until a toothpick comes out clean. Cool in pan for 15 minutes, then transfer to wire rack to cool completely (about 45 minutes).
- Make the frosting: beat cream cheese with powdered sugar and vanilla extract until smooth and creamy.
- Crumble the cooled cake into fine crumbs using a food processor or fork.
- Mix cake crumbs with frosting gradually until mixture is moist enough to form balls without falling apart.
- Shape the cake pops: roll mixture into 1 ½-inch balls and place on wax paper-lined tray. Chill in refrigerator for at least 1 hour.
- Melt the chocolate coating in a microwave-safe bowl in 30-second intervals, stirring until smooth. Add food coloring if desired.
- Dip the tip of each lollipop stick into melted chocolate, then insert halfway into each chilled cake ball. Chill for 10 minutes.
- Coat each cake pop by dipping into melted chocolate, allowing excess to drip off. Decorate with sprinkles or edible glitter before coating sets. Let dry on wax paper for about 30 minutes.
- Assemble the bouquet by arranging cake pops in floral foam inside a vase or container. Add colored tissue paper and ribbons for decoration.
Notes
Use room temperature ingredients for better texture. Chill cake pops well before dipping to prevent crumbling. Warm chocolate gently if it thickens during dipping. Adding vegetable shortening to melted chocolate can help prevent cracking. Work in batches when dipping to avoid warming the coating too much. Decorate immediately after dipping before chocolate sets.
Nutrition
- Serving Size: 1 cake pop (about 2
- Calories: 200
- Sugar: 18
- Sodium: 120
- Fat: 11
- Saturated Fat: 6
- Carbohydrates: 25
- Fiber: 0.5
- Protein: 3
Keywords: cake pop bouquet, cake pops, easy cake pops, party treats, edible bouquet, chocolate coated cake pops, elegant desserts


