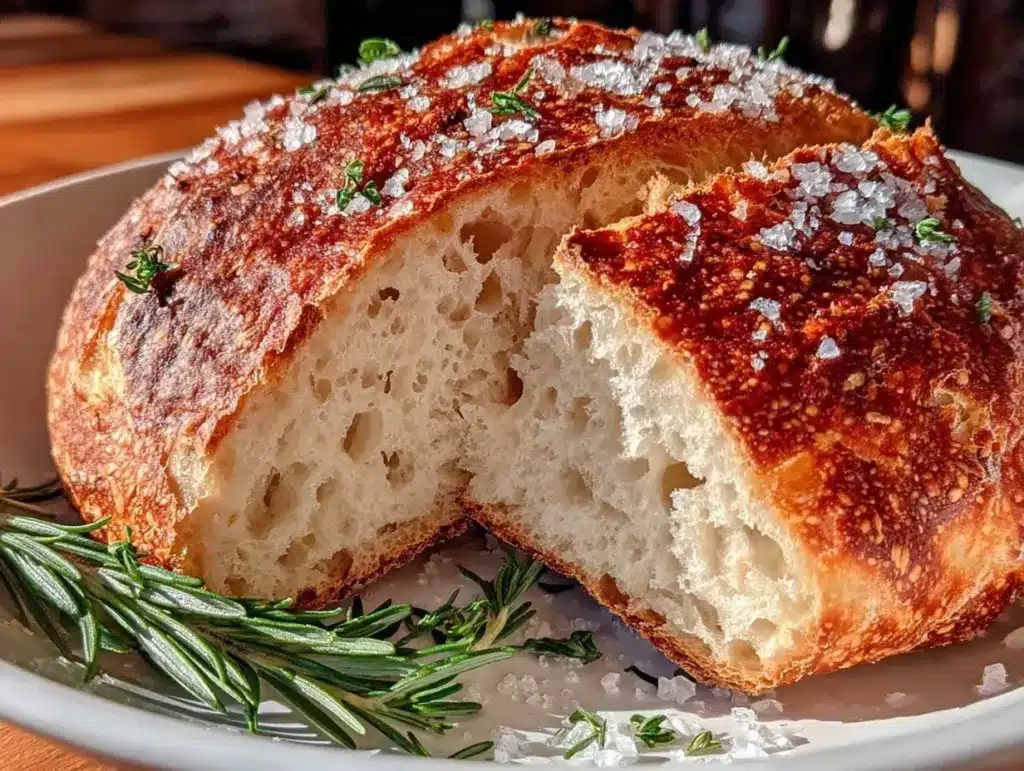
The crackle of a perfectly baked sourdough crust as you slice into a rustic homemade artisan sourdough loaf is honestly one of life’s simple pleasures. I still remember the first time I tried making this bread—it was a rainy afternoon, and I was craving something comforting but also a little challenging. I’d always admired those golden, crusty loaves in bakeries, but making one at home felt like an elusive dream. After several attempts (and a few burnt edges), I finally landed on a recipe that gives you that perfect crust with a chewy, airy crumb inside. This rustic homemade artisan sourdough loaf has since become my go-to when I want bread that feels honest and hearty, with just the right tang and texture.
What I love about this recipe is how it connects you to the art of bread-making without overwhelming you with complicated steps. As a self-taught home baker, I’ve tested this loaf countless times, tweaking fermentation times and hydration levels until it felt just right. It’s comforting, it’s rewarding, and it’s surprisingly doable even if you’re a beginner. Plus, that crust? It’s the kind you’ll want to tap (yes, tap!) to check for that crunchy sound before pulling it out of the oven. If you’re someone who enjoys the cozy ritual of baking or just wants to impress friends with homemade bread, this recipe is your new best friend.
Whether you’re pairing it with your favorite garlic butter or dunking it into a bowl of warm soup, this rustic homemade artisan sourdough loaf with perfect crust is a true crowd-pleaser. From busy weeknights to leisurely weekend mornings, it fits right into all kinds of moments. If you’re curious about making bread that’s as beautiful as it is delicious, stick around because I’m sharing everything I’ve learned to help you get it just right.
Why You’ll Love This Recipe
After baking this rustic homemade artisan sourdough loaf over and over, I can say with confidence that it hits all the right notes for both beginners and seasoned bakers alike:
- Simple Ingredients: No fancy flours or weird additives—just flour, water, salt, and your trusty sourdough starter.
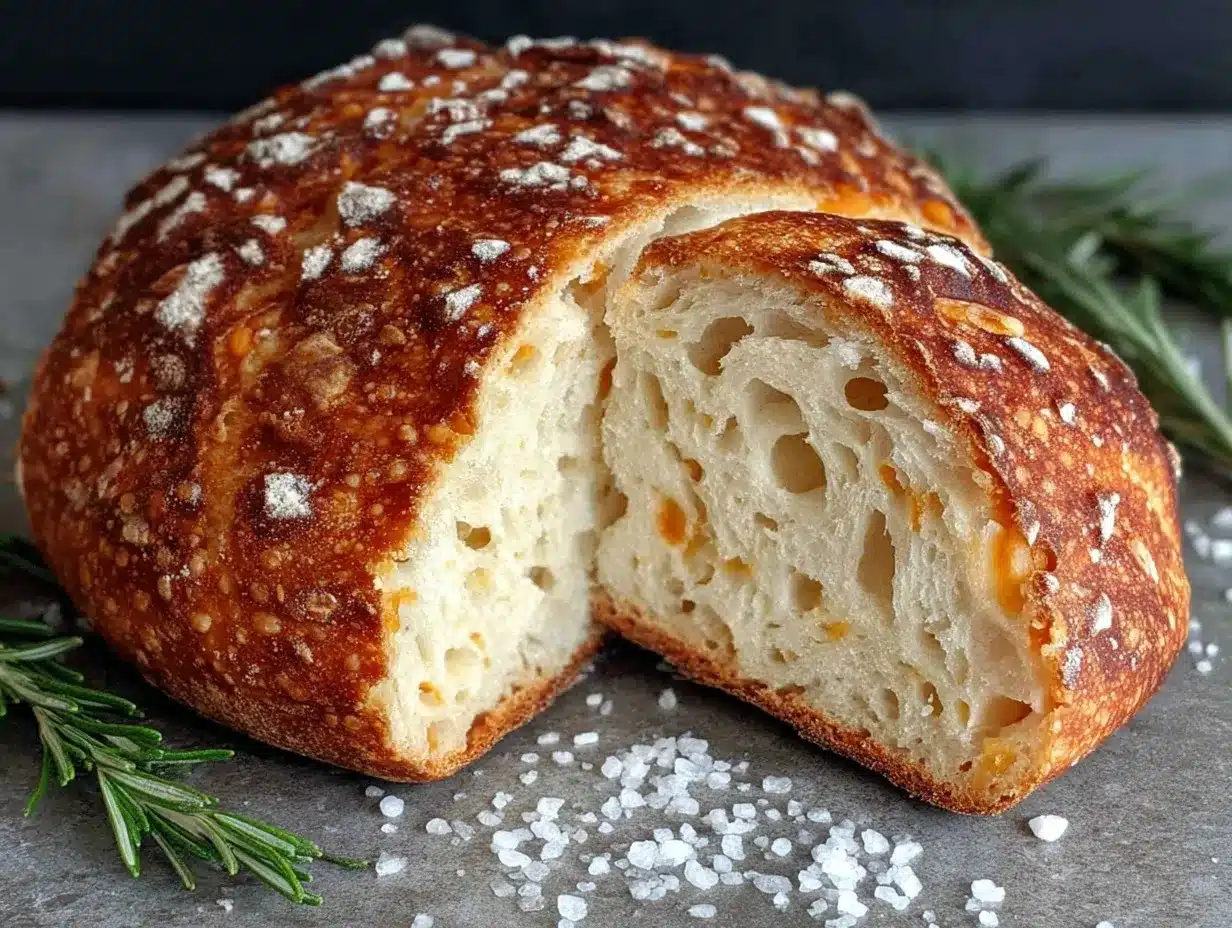
- Perfect Crust: This recipe nails that crunchy, golden crust that makes bread so irresistible, thanks to the baking technique and steam method.
- Flexible Timing: Whether you have a few hours or can plan ahead for an overnight rise, this loaf adapts to your schedule.
- Flavor Depth: The natural fermentation gives a lovely tang and complexity that store-bought bread just can’t match.
- Great for All Occasions: It’s hearty enough for sandwiches, elegant enough for a cheese board, and perfect alongside hearty soups like loaded potato soup or creamy vegetable soup.
This recipe isn’t just about making bread; it’s about capturing that rustic charm we all crave when life gets a bit hectic. The technique I use for a blistering crust involves baking the loaf inside a preheated Dutch oven—a little trick I picked up after plenty of trial and error. Plus, the dough’s hydration level is carefully balanced to give you an open crumb without sticky messiness. It’s honestly the kind of bread that makes you close your eyes after the first bite and savor the moment.
What Ingredients You Will Need
This rustic homemade artisan sourdough loaf relies on a handful of simple, wholesome ingredients that come together beautifully to create a loaf bursting with flavor and character. Here’s what you’ll need:
- Bread Flour – 500g (about 4 cups): I recommend a high-protein bread flour like King Arthur for great gluten development. You can swap 50g for whole wheat flour for a nuttier taste if you like.
- Water – 375ml (1 ½ cups), lukewarm: This hydrates the dough perfectly to yield an open crumb. Filtered water can improve fermentation if your tap water is chlorinated.
- Active Sourdough Starter – 100g (about ½ cup), bubbly and fed within last 6-8 hours: Use a mature starter that’s lively. If you’re new, don’t worry—there are plenty of starter guides out there to get you going.
- Salt – 10g (about 2 teaspoons), fine sea salt preferred: Salt controls fermentation and enhances flavor. Don’t skip it!
Optional but recommended:
- Rice Flour or Cornmeal – for dusting your proofing basket to prevent sticking.
- Olive Oil – a teaspoon to oil your hands during shaping if the dough feels sticky.
For those with dietary preferences, you can experiment with spelt or rye flour, but keep in mind that hydration and fermentation times might change. I also find that using a Dutch oven works wonders, but if you don’t have one, a heavy oven-safe pot with a lid will do the trick just fine.
Equipment Needed
Making this rustic homemade artisan sourdough loaf is surprisingly straightforward when you have the right tools on hand. Here’s what I use and recommend:
- Mixing Bowl: A large bowl for combining your ingredients. Glass, stainless steel, or plastic all work.
- Dutch Oven (or Heavy Oven-Safe Pot with Lid): This is essential for creating steam and baking the loaf with that perfect crust. I use a 5 to 6-quart size, which is just right for this recipe.
- Bench Scraper: Great for handling sticky dough and cleaning your work surface.
- Kitchen Scale: Accurate measurements are key for bread, so I highly recommend weighing your ingredients.
- Proofing Basket (Banneton) or Bowl with a Towel: For the final rise; dust with rice flour or cornmeal to prevent sticking.
- Kitchen Towel or Plastic Wrap: To cover and keep the dough moist during rises.
If you don’t have a proofing basket, no worries! A bowl lined with a floured towel works just fine. For budget-friendly options, many of these items can be found at affordable prices, and you might already have some on hand. My Dutch oven has been a workhorse in the kitchen, and honestly, it’s one of the best investments I’ve made for baking.
Preparation Method
- Mix the Dough (15 minutes): In your mixing bowl, combine 500g bread flour and 375ml lukewarm water. Stir until there are no dry spots. Cover and let it rest for 30 minutes — this autolyse step helps with gluten development.
- Add Starter and Salt (10 minutes): Add 100g active sourdough starter and 10g salt to the dough. Mix thoroughly by folding and pinching for about 5-7 minutes until it comes together in a sticky ball.
- Bulk Fermentation (4 to 6 hours): Cover the bowl with a damp towel or plastic wrap. Every 30 minutes for the first 2 hours, perform a series of stretch and folds: wet your hand, grab one side of the dough, stretch it upwards, and fold it over the dough. This builds strength. After 2 hours, let the dough rise undisturbed for another 2-4 hours until it has roughly doubled in size and looks bubbly.
- Shape the Loaf (10 minutes): Lightly flour your work surface and carefully turn the dough out. Shape it into a tight round loaf by folding edges into the center and rotating. Use a bench scraper to tighten the surface tension by pulling the dough towards you on the counter.
- Final Proof (2 to 4 hours or overnight): Place the shaped dough seam-side up into a floured proofing basket or bowl lined with a floured towel. Cover and let it rest at room temperature for 2-4 hours, or refrigerate overnight for more flavor complexity.
- Preheat the Oven (45 minutes before baking): About 45 minutes before baking, place your Dutch oven with the lid inside your oven and preheat to 475°F (245°C). This ensures the pot is scorching hot for a great crust.
- Score and Bake (45 minutes): Carefully remove the hot Dutch oven. Turn the dough out seam-side down onto parchment paper, score the top with a sharp knife or lame, and transfer it into the pot. Cover with the lid and bake for 20 minutes. Then remove the lid and bake for an additional 25 minutes, until the crust is deep golden brown and crackly.
- Cool Completely (at least 1 hour): Let the loaf cool on a wire rack before slicing. This step is crucial for the crumb to set properly.
Pro tip: If your dough feels sticky during shaping, wet your hands lightly with water or oil to avoid sticking. Also, don’t rush the bulk fermentation—it’s where the magic happens. The dough should feel airy and slightly jiggly when it’s ready.
Cooking Tips & Techniques
Getting a perfect crust and crumb on your rustic homemade artisan sourdough loaf can be tricky, but here are some tips I’ve picked up along the way:
- Hydration Matters: The 75% hydration level (water to flour ratio) in this recipe gives a moist, open crumb without being too sticky. If your dough feels unmanageably sticky, reduce water by 10-15ml next time.
- Use a Hot Dutch Oven: This traps steam, which is critical for crust development. I never skip preheating mine for at least 30-45 minutes.
- Scoring Technique: Use a very sharp blade and make confident, swift cuts. This allows the loaf to expand properly without tearing.
- Don’t Skip the Autolyse: Letting flour rest with water before adding starter and salt improves gluten and flavor.
- Patience is Key: The best sourdoughs take time. Don’t rush fermentation, and you’ll be rewarded with deeper flavor and texture.
- Learning from Flops: I once baked a loaf too soon and ended up with gummy bread inside. Waiting for the dough to double and feel airy will save you from this.
- Timing Tips: I usually start the bulk fermentation in the morning and shape in the evening, then bake the next day for a fresh loaf at breakfast.
Variations & Adaptations
Once you’ve mastered this rustic homemade artisan sourdough loaf, don’t hesitate to experiment with these variations:
- Whole Wheat Sourdough: Replace 150g of bread flour with whole wheat flour for a heartier loaf. You might need a touch more water.
- Seeded Loaf: Add 50g mixed seeds (sunflower, sesame, flax) during the last stretch and fold for extra crunch and nutrition.
- Herb-Infused: Toss in fresh rosemary or thyme to the dough to give a fragrant twist perfect for pairing with soups or cheeses.
- Gluten-Free Version: While traditional sourdough relies on gluten, you can try a gluten-free sourdough starter and substitute with gluten-free flours, but expect a different texture.
- Overnight Cold Fermentation: After shaping, proof the dough in the fridge overnight to develop more complex flavors and fit baking into a busy schedule.
Personally, I love the seeded version for weekend brunches—it adds an irresistible nutty crunch. Also, for a cozy night in, pairing this loaf with a warm bowl of creamy tomato soup is unbeatable.
Serving & Storage Suggestions
This rustic homemade artisan sourdough loaf is best enjoyed fresh, but it also stores well if you handle it right. Here’s how I recommend serving and storing it:
- Serving: Slice the bread with a serrated knife when completely cool. Serve it with olive oil and balsamic vinegar, softened butter, or alongside hearty soups like the loaded potato soup for a comforting meal.
- Storage: Keep the loaf in a paper bag or wrapped in a clean kitchen towel at room temperature for up to 3 days. Avoid plastic bags, which trap moisture and soften the crust.
- Freezing: Slice the loaf and freeze in airtight bags to enjoy later. Toast slices directly from the freezer for that fresh-baked taste.
- Reheating: For a revived crust, sprinkle some water on the loaf and warm it in a 350°F (175°C) oven for 5-10 minutes.
- Flavor Development: The bread’s flavor deepens if you let it rest wrapped overnight. The tang mellows and the crumb firms up beautifully.
Nutritional Information & Benefits
This rustic homemade artisan sourdough loaf is more than just delicious—it brings some nice nutritional perks too. A typical slice (about 60g) contains roughly 150 calories, 30g of carbohydrates, 5g of protein, and 1g of fat.
The natural fermentation process breaks down gluten and phytic acid, making the bread easier to digest and nutrients more bioavailable. Compared to commercial bread, sourdough’s slow fermentation often results in a lower glycemic index, which can be easier on blood sugar.
Using bread flour ensures good protein content for muscle support, and you can boost fiber by swapping some flour for whole wheat or adding seeds. Just be mindful of salt content if you’re watching sodium intake.
From my experience as a home baker passionate about wholesome food, this loaf fits nicely into balanced diets and offers a tasty way to enjoy carbs without the guilt.
Conclusion
There’s something magical about pulling a rustic homemade artisan sourdough loaf from your oven—the smell, the crackling crust, and the soft crumb inside. This recipe is worth trying because it brings the bakery experience right into your kitchen without complicated steps or exotic ingredients. It’s flexible, forgiving, and yields a loaf that tastes like love and patience went into every bite.
Feel free to adjust hydration levels, try different flours, or add your favorite mix-ins to make this sourdough loaf truly your own. I hope this recipe inspires you to get your hands a little floury and enjoy the simple joy of bread-making.
If you give it a shot, I’d love to hear how your loaf turned out — drop a comment below or share your photos! Baking bread is a journey, and every loaf is a little victory. Happy baking!
FAQs
How do I know if my sourdough starter is ready to use?
Your starter should be bubbly and double in size within 4-8 hours of feeding. It should pass the “float test” by gently dropping a spoonful in water; if it floats, it’s active and ready.
Can I use all-purpose flour instead of bread flour?
Yes, but bread flour’s higher protein content helps develop gluten for better structure and chew. Using all-purpose flour might result in a slightly denser loaf.
Why did my sourdough loaf come out dense?
Common reasons include under-proofing, inactive starter, or low hydration. Make sure your dough doubles in size during bulk fermentation and that your starter is lively.
How do I get a crunchy crust every time?
Baking in a preheated Dutch oven traps steam, creating that perfect crust. Also, baking uncovered for the last 20-25 minutes helps the crust brown and crisp up.
Can I freeze the sourdough loaf?
Absolutely! Slice before freezing and store in airtight bags. Toast or warm slices directly from the freezer for best results.
Pin This Recipe!

Rustic Homemade Artisan Sourdough Loaf Perfect Crust Recipe for Beginners

A simple and rewarding sourdough bread recipe that yields a rustic artisan loaf with a perfect crunchy crust and chewy, airy crumb. Ideal for beginners and seasoned bakers alike.
- Prep Time: 25 minutes
- Cook Time: 45 minutes
- Total Time: 5 to 7 hours (including fermentation and proofing; overnight proof optional)
- Yield: 1 loaf (about 1.5 lbs) 1x
- Category: Bread
- Cuisine: Artisan / American
Ingredients
- 500g bread flour (about 4 cups)
- 375ml lukewarm water (1 ½ cups)
- 100g active sourdough starter (about ½ cup), bubbly and fed within last 6-8 hours
- 10g fine sea salt (about 2 teaspoons)
- Optional: rice flour or cornmeal for dusting proofing basket
- Optional: 1 teaspoon olive oil for shaping if dough is sticky
Instructions
- Mix the Dough (15 minutes): In a mixing bowl, combine 500g bread flour and 375ml lukewarm water. Stir until no dry spots remain. Cover and rest for 30 minutes (autolyse).
- Add Starter and Salt (10 minutes): Add 100g active sourdough starter and 10g salt. Mix by folding and pinching for 5-7 minutes until sticky ball forms.
- Bulk Fermentation (4 to 6 hours): Cover bowl. Every 30 minutes for first 2 hours, perform stretch and folds. Then let dough rise undisturbed for 2-4 hours until doubled and bubbly.
- Shape the Loaf (10 minutes): Lightly flour surface, turn dough out, shape into tight round loaf by folding edges into center and rotating. Use bench scraper to tighten surface tension.
- Final Proof (2 to 4 hours or overnight): Place shaped dough seam-side up in floured proofing basket or bowl lined with floured towel. Cover and rest at room temp for 2-4 hours or refrigerate overnight.
- Preheat Oven (45 minutes before baking): Place Dutch oven with lid inside oven and preheat to 475°F (245°C).
- Score and Bake (45 minutes): Remove hot Dutch oven. Turn dough seam-side down onto parchment, score top, transfer to pot. Cover and bake 20 minutes. Remove lid and bake 25 more minutes until deep golden and crackly.
- Cool Completely (at least 1 hour): Cool loaf on wire rack before slicing.
Notes
Use a hot Dutch oven preheated for at least 30-45 minutes to trap steam and develop a perfect crust. Wet or oil hands when shaping sticky dough. Don’t rush bulk fermentation; dough should double and feel airy. Adjust hydration if dough is too sticky by reducing water by 10-15ml. Scoring with a sharp blade allows proper expansion. For more flavor, proof dough overnight in fridge. Store bread in paper bag or kitchen towel to keep crust crisp. Reheat with water sprinkle in 350°F oven for 5-10 minutes to revive crust.
Nutrition
- Serving Size: 1 slice (about 60g)
- Calories: 150
- Sodium: 200
- Fat: 1
- Carbohydrates: 30
- Fiber: 1
- Protein: 5
Keywords: sourdough, artisan bread, homemade bread, rustic loaf, perfect crust, beginner bread recipe, sourdough starter, baking bread


