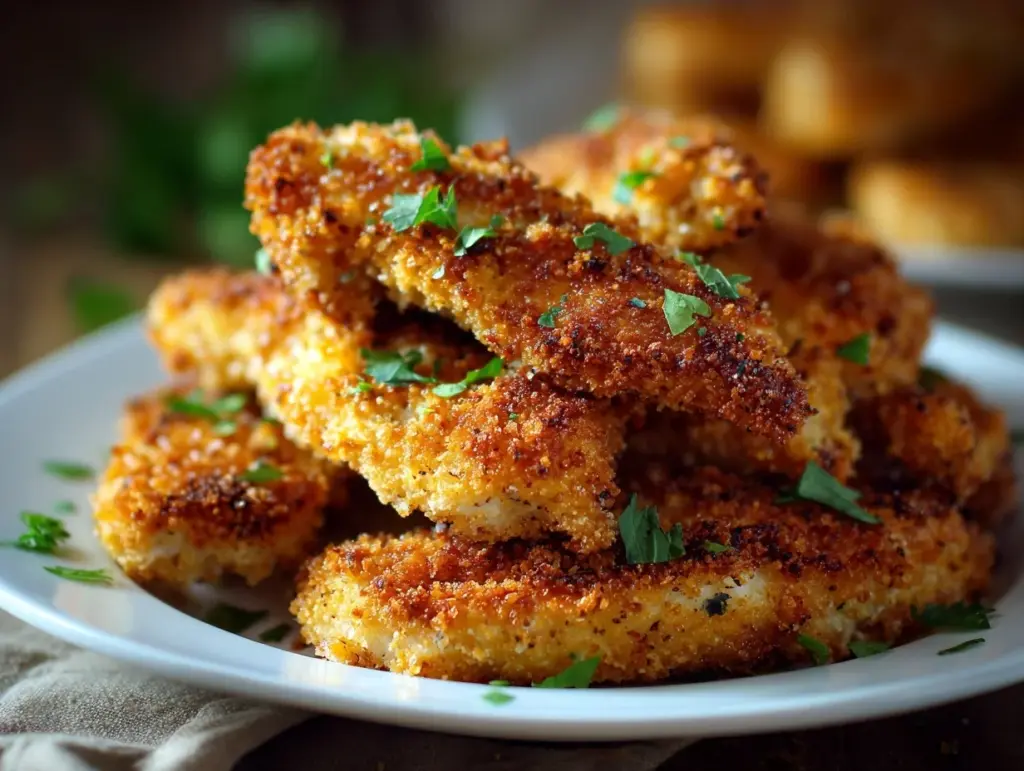
There’s something magical about biting into a perfectly crispy chicken tender, isn’t there? The crunch, the juicy center, and the irresistible flavor—it’s comfort food at its finest. These baked chicken tenders are my go-to recipe for busy weeknights or casual gatherings. They’re easy to make, healthier than fried, and so delicious that you’ll find yourself making them over and over again. Trust me, these tenders will steal the show whether you’re serving kids, adults, or just yourself!
I first started making these during a phase of experimenting with healthier versions of favorite foods, and honestly, they’ve become a staple in my kitchen. The secret lies in the perfect coating and baking method that delivers all the crunch without the need for deep frying. Let me walk you through why these are a game-changer!
Why You’ll Love This Recipe
- Quick & Easy: These baked chicken tenders come together in under 30 minutes, making them perfect for weeknight dinners or last-minute cravings.
- Healthier Alternative: Skip the frying and still enjoy that golden, crispy texture with fewer calories and less oil.
- Family-Friendly: Kids love them, adults love them—these tenders are always a crowd-pleaser.
- Customizable: Adjust the seasonings and coatings to suit your taste. Whether you like them spicy, savory, or mild, this recipe adapts beautifully.
- No Fancy Ingredients: Everything you need is likely already in your kitchen or easy to grab from your local store.
- Perfect Texture: The tenders are juicy on the inside and perfectly crispy on the outside—exactly how chicken tenders should be!
Unlike store-bought frozen tenders, these have a homemade touch that makes them extra special. Plus, they’re baked, which means no lingering frying odor in your kitchen! What’s not to love?
What Ingredients You Will Need
This recipe uses simple, everyday ingredients to create irresistibly crispy chicken tenders. Here’s what you’ll need:
- Chicken: 1 pound of chicken tenders or boneless, skinless chicken breasts sliced into strips.
- Buttermilk: 1 cup for marinating (adds tenderness and flavor).
- Egg: 1 large egg, beaten (helps the coating stick).
- Breadcrumbs: 1 cup of panko breadcrumbs (for ultimate crunch).
- Flour: ½ cup of all-purpose flour (helps create a base layer for the coating).
- Seasonings: 1 teaspoon of paprika, ½ teaspoon of garlic powder, ½ teaspoon of onion powder, ½ teaspoon of black pepper, and ½ teaspoon of salt.
- Parmesan Cheese: ¼ cup, finely grated (optional, but adds a wonderful savory kick).
- Cooking Spray: For greasing the baking sheet and ensuring the coating gets crispy.
If you don’t have buttermilk, you can easily make a substitute by combining 1 cup of milk with 1 tablespoon of lemon juice or vinegar and letting it sit for about 5 minutes. For gluten-free tenders, swap out the flour and breadcrumbs for gluten-free versions.
Equipment Needed
Here’s a list of basic kitchen tools to make your chicken tenders:
- Baking Sheet: A large baking sheet for evenly cooking the tenders.
- Wire Rack: Optional but highly recommended; placing the tenders on a rack ensures even crispiness.
- Mixing Bowls: For marinating the chicken and preparing the coating.
- Tongs: Useful for dipping the chicken into the different layers without getting your hands messy.
- Measuring Cups and Spoons: For accurate ingredient prep.
If you don’t have a wire rack, you can bake the tenders directly on parchment paper-lined baking sheets, but you may need to flip them halfway through to crisp both sides.
Preparation Method

- Marinate the Chicken: Place the chicken strips in a bowl and cover them with buttermilk. Let them marinate for at least 30 minutes or up to 4 hours in the fridge. This step makes the chicken extra tender and flavorful.
- Prepare the Coating: In one bowl, mix flour with paprika, garlic powder, onion powder, black pepper, and salt. In another bowl, beat the egg. In a third bowl, combine panko breadcrumbs with parmesan cheese.
- Preheat the Oven: Preheat your oven to 400°F (200°C) and lightly grease a baking sheet or wire rack with cooking spray.
- Coat the Chicken: Remove the chicken from the buttermilk and shake off excess liquid. Dip each strip into the flour mixture, then the egg, and finally coat it in the breadcrumb mixture. Press the breadcrumbs onto the chicken to ensure they stick well.
- Arrange on Baking Sheet: Place the coated chicken strips on the prepared baking sheet or wire rack, ensuring they’re not touching each other.
- Bake: Bake for 20-25 minutes, flipping halfway through, until the tenders are golden brown and the internal temperature reaches 165°F (74°C).
- Serve: Let the tenders cool for a couple of minutes before serving. Pair them with your favorite dipping sauce!
These tenders are best enjoyed fresh out of the oven, but they’re still delicious when reheated.
Cooking Tips & Techniques
- Don’t Skip the Marinating: Marinating in buttermilk is key for tender, juicy chicken. If you’re short on time, even 30 minutes makes a difference.
- Use Panko Breadcrumbs: Regular breadcrumbs work, but panko gives that extra crunch that makes these tenders shine.
- Don’t Overcrowd the Pan: Leave space between each chicken strip so they bake evenly and get crispy all around.
- Flip for Even Browning: If you’re not using a wire rack, make sure to flip the tenders halfway through baking.
- Serve Immediately: These are at their crispiest straight out of the oven, so don’t wait too long to dig in!
My personal trick? Adding parmesan to the breadcrumbs—it’s a game-changer for flavor!
Variations & Adaptations
- Spicy Kick: Add ½ teaspoon of cayenne pepper or chili powder to the flour mixture for spicy tenders.
- Gluten-Free Option: Use gluten-free breadcrumbs and flour for a celiac-friendly version.
- Air Fryer Method: Cook the tenders in an air fryer at 400°F (200°C) for 10-12 minutes, flipping halfway through.
- Seasonal Twist: Swap out the seasonings for fresh herbs like rosemary or thyme for a unique flavor profile.
- Kid-Friendly Coating: Mix the breadcrumbs with crushed cornflakes for extra crunch that kids will love.
Don’t be afraid to experiment! One of my favorite variations is adding lemon zest to the breadcrumb mixture for a fresh, zingy flavor.
Serving & Storage Suggestions
Serve these tenders hot and crispy with your favorite dipping sauces like ranch, honey mustard, or barbecue sauce. They pair beautifully with a side of roasted vegetables, sweet potato fries, or a crisp green salad.
To store leftovers, place the tenders in an airtight container in the refrigerator for up to 3 days. For longer storage, freeze them in a single layer and transfer to a freezer-safe bag. Reheat in the oven at 375°F (190°C) or in an air fryer to regain their crispiness.
Pro tip: The flavors deepen slightly after a day, so they’re still incredibly tasty when reheated!
Nutritional Information & Benefits
Estimated per serving (4 tenders):
- Calories: 280
- Protein: 25g
- Carbohydrates: 18g
- Fat: 10g
- Fiber: 1g
These baked chicken tenders are packed with protein, making them a great option for a balanced meal. Using panko breadcrumbs and baking instead of frying keeps the fat content lower, making this a lighter alternative to traditional fried chicken strips.
Conclusion
If you’re looking for a recipe that’s easy, healthy, and downright delicious, these crispy homemade baked chicken tenders are the answer. They’re versatile, family-friendly, and guaranteed to satisfy even the pickiest eaters. Plus, you can customize them to suit your taste or dietary needs without compromising on flavor.
Give them a try and let me know how they turn out! I’d love to hear your favorite variations or dipping sauce pairings. Leave a comment below or share your creations on social media. Let’s make dinner fun, easy, and irresistibly crispy!
Happy cooking!
FAQs
Can I use chicken thighs instead of chicken breasts?
Yes, you can use boneless, skinless chicken thighs for this recipe. They’ll be just as delicious, but note that thighs may take a few extra minutes to cook.
What’s the best dipping sauce for these tenders?
Classic choices like ranch, honey mustard, or barbecue sauce work beautifully. For a spicy kick, try sriracha mayo or buffalo sauce.
Can I freeze these chicken tenders?
Absolutely! Freeze them in a single layer after baking and store in a freezer-safe bag. Reheat in the oven or air fryer for best results.
Do I need a wire rack for baking?
A wire rack helps achieve even crispiness, but you can bake directly on parchment paper if needed. Just flip the tenders halfway through.
How do I make these tenders extra crispy?
Press the breadcrumbs firmly onto the chicken during coating and use panko breadcrumbs for maximum crunch. Baking on a wire rack also helps!
Pin This Recipe!

Crispy Baked Chicken Tenders Recipe Easy and Irresistible

These baked chicken tenders are crispy, juicy, and healthier than fried. Perfect for busy weeknights or casual gatherings, they’re easy to make and always a crowd-pleaser.
- Prep Time: 30 minutes
- Cook Time: 25 minutes
- Total Time: 55 minutes
- Yield: 4 servings 1x
- Category: Main Course
- Cuisine: American
Ingredients
- 1 pound chicken tenders or boneless, skinless chicken breasts sliced into strips
- 1 cup buttermilk
- 1 large egg, beaten
- 1 cup panko breadcrumbs
- 1/2 cup all-purpose flour
- 1 teaspoon paprika
- 1/2 teaspoon garlic powder
- 1/2 teaspoon onion powder
- 1/2 teaspoon black pepper
- 1/2 teaspoon salt
- 1/4 cup parmesan cheese, finely grated (optional)
- Cooking spray
Instructions
- Place the chicken strips in a bowl and cover them with buttermilk. Let them marinate for at least 30 minutes or up to 4 hours in the fridge.
- In one bowl, mix flour with paprika, garlic powder, onion powder, black pepper, and salt. In another bowl, beat the egg. In a third bowl, combine panko breadcrumbs with parmesan cheese.
- Preheat your oven to 400°F (200°C) and lightly grease a baking sheet or wire rack with cooking spray.
- Remove the chicken from the buttermilk and shake off excess liquid. Dip each strip into the flour mixture, then the egg, and finally coat it in the breadcrumb mixture. Press the breadcrumbs onto the chicken to ensure they stick well.
- Place the coated chicken strips on the prepared baking sheet or wire rack, ensuring they’re not touching each other.
- Bake for 20-25 minutes, flipping halfway through, until the tenders are golden brown and the internal temperature reaches 165°F (74°C).
- Let the tenders cool for a couple of minutes before serving. Pair them with your favorite dipping sauce!
Notes
Marinating in buttermilk is key for tender chicken. Use panko breadcrumbs for extra crunch, and bake on a wire rack for even crispiness.
Nutrition
- Serving Size: 4 tenders per serving
- Calories: 280
- Fat: 10
- Carbohydrates: 18
- Fiber: 1
- Protein: 25
Keywords: chicken tenders, baked chicken, crispy chicken, healthy chicken recipe, easy dinner recipe