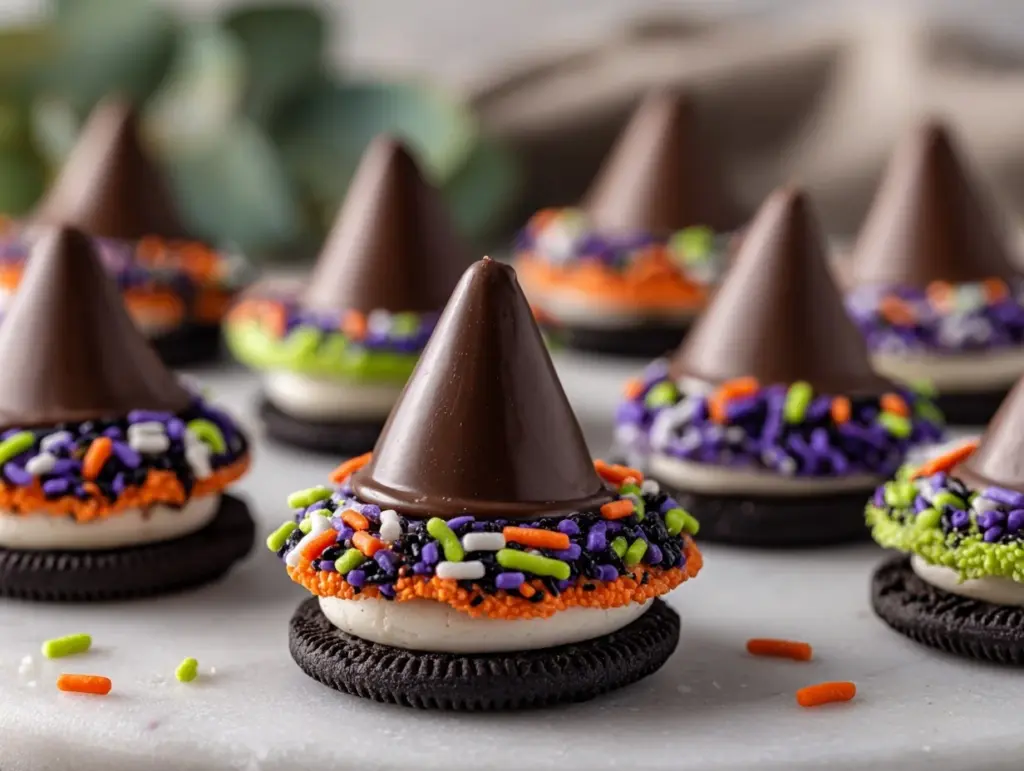
The crunch of a sweet Oreo cookie, topped with rich chocolate frosting and a candy kiss, is the perfect treat that screams Halloween fun! These magical Oreo Witch Hat Cookies are ridiculously easy to make, yet they look like you put in hours of work. They’re whimsical, festive, and ideal for kids, parties, or anyone who loves a little Halloween magic. And the best part? You only need four ingredients!
I came up with this recipe last Halloween while scrambling to whip up something impressive for a last-minute party. Let me tell you, these adorable witch hats were such a hit that I now make them every October without fail. They’re quick, fun, and always get a “wow” when people see them. Plus, they’re so foolproof, even the kids can jump in to help!
Whether you’re hosting a spooky bash or just want a fun activity with your family, these Oreo Witch Hat Cookies are the treat you didn’t know you needed. No baking required, no fancy tools – just pure Halloween magic.
Why You’ll Love This Recipe
- Super Easy: Only four ingredients and zero baking required – you can make these in under 20 minutes!
- Festive and Fun: Perfect for Halloween parties, classroom treats, or a spooky movie night.
- Kid-Friendly: Let the little ones join in on the decorating – they’ll love making these witch hats come to life!
- Customizable: Want to mix things up? You can easily swap out colors or candy for your own creative twist.
- Perfect for Sharing: These cookies are bite-sized and ideal for serving a crowd.
- No Baking Skills Required: If you can spread frosting and unwrap a candy kiss, you’re good to go!
What sets these apart from other Halloween treats? It’s the combination of textures – the crunch of the Oreo, the creamy frosting, and the velvety richness of the chocolate kiss. Plus, the colorful decorative icing adds that extra spooky flair, making them a showstopper on any dessert table. If you’re looking for a simple, magical Halloween treat that’s guaranteed to be a crowd-pleaser, this is it!
What Ingredients You Will Need
This recipe uses just four simple ingredients, making it the ultimate easy Halloween treat. Here’s what you’ll need:
- Oreo Cookies: Any variety works, but classic Oreos are my favorite. You’ll need at least one package.
- Chocolate Frosting: Store-bought or homemade, this acts as the “glue” for your witch hats. I prefer a rich, creamy frosting for easy spreading.
- Hershey’s Kisses: Unwrap these little chocolate kisses beforehand to save time during assembly.
- Colored Decorative Icing: Go for bright Halloween colors like orange, purple, or green. You can find icing tubes at most grocery stores or craft stores.
And that’s it! These ingredients are likely already sitting in your pantry or are super easy to grab on your next grocery trip. If you’re feeling adventurous, you can swap out the Oreo cookies for another type of chocolate sandwich cookie or use white chocolate kisses for a different look.
Equipment Needed
Here’s all you need to make these magical Oreo Witch Hat Cookies:
- Butter Knife or Small Spatula: For spreading the frosting onto the cookies.
- Piping Bag or Icing Tubes: If you want to get fancy with your decorative icing, a piping bag can give you more control.
- Small Plate or Tray: Perfect for assembling the cookies and keeping them organized.
- Wax Paper: Optional, but great for easy cleanup and preventing the cookies from sticking to your tray.
Don’t worry if you don’t have a piping bag – the icing tubes work just as well. And if you’re in a pinch, a zip-top bag with a tiny corner snipped off can work wonders for decorating!
Preparation Method
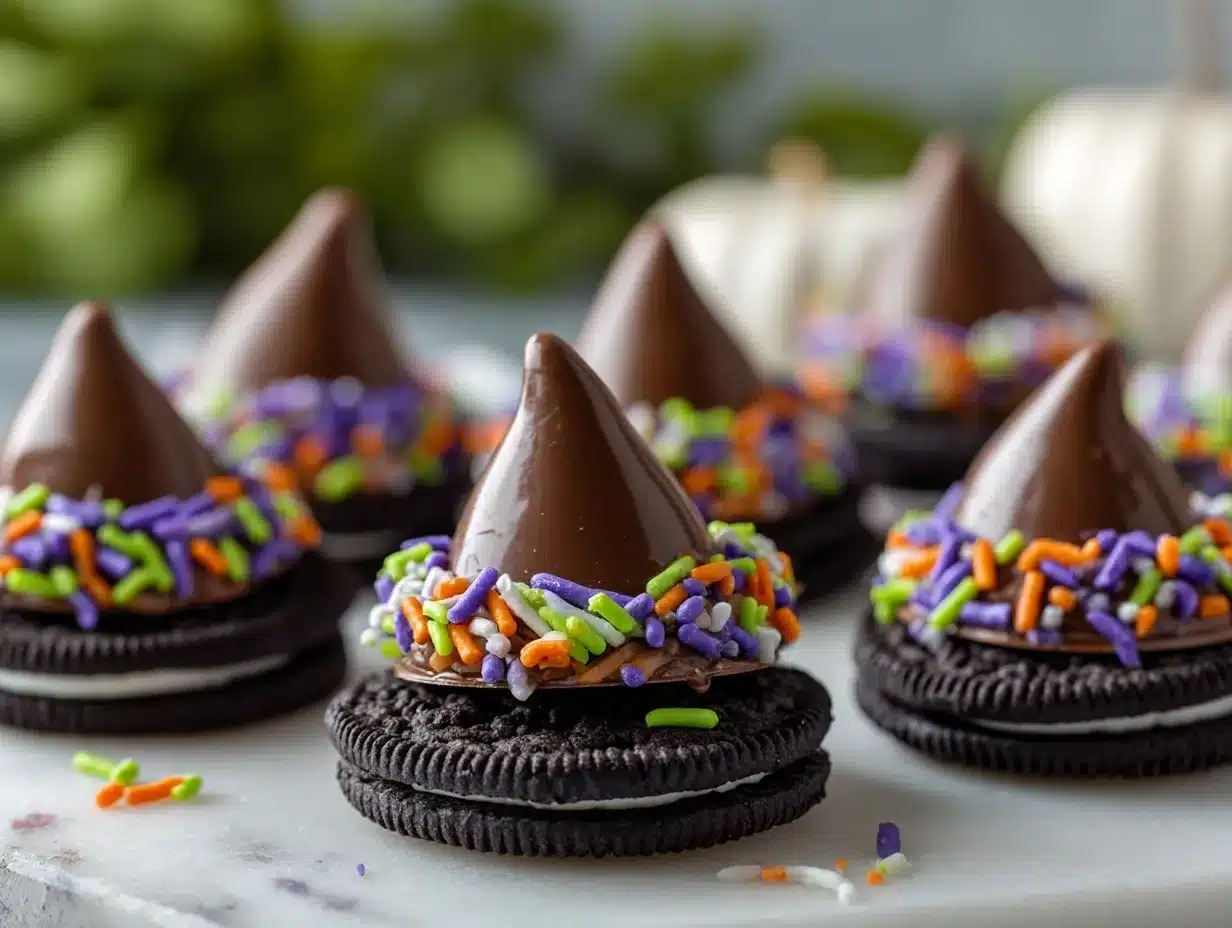
- Prepare Your Ingredients: Unwrap your Hershey’s Kisses and set them aside. Lay out your Oreos on a wax paper-lined tray for easy cleanup.
- Spread the Frosting: Using a butter knife or small spatula, spread a dollop of chocolate frosting on the flat side of an Oreo cookie. You don’t need a thick layer – just enough to act as glue for the candy kiss.
- Attach the Candy Kiss: Press a Hershey’s Kiss gently into the frosting, flat side down. Make sure it sticks firmly and let it sit for a few minutes to set.
- Decorate the Hat Brim: Use your colored decorative icing to pipe a thin line around the base of the Hershey’s Kiss where it meets the Oreo. This creates the illusion of a festive hat brim.
- Repeat: Assemble the rest of your cookies using the same steps. You can switch up the icing colors for variety!
- Let Them Set: Allow the cookies to sit at room temperature for at least 10 minutes to let the frosting and icing firm up. If you’re in a hurry, pop them in the fridge for a few minutes.
And there you have it – six simple steps to magical Oreo Witch Hat Cookies that will wow your guests and delight your kids!
Cooking Tips & Techniques
- Use the Right Frosting: Avoid frosting that’s too thin or runny, as it won’t hold the Hershey’s Kiss in place. A thicker, creamier frosting works best.
- Work in Batches: If you’re making a large quantity, prep the Oreos and Hershey’s Kisses in batches to keep things organized.
- Get Creative: Try experimenting with different icing patterns on the hat brim – zigzags, polka dots, or even tiny stars.
- Chill to Set: If your frosting isn’t firming up, refrigerate the cookies for a few minutes. This will help everything stay put.
- Use a Steady Hand: When applying the decorative icing, use a light grip and steady motion for clean lines.
If you’re making these with kids, it’s worth setting up a little “decorating station” so they can have fun and get creative with the icing colors and designs.
Variations & Adaptations
- Gluten-Free Option: Use gluten-free sandwich cookies instead of Oreos.
- Colorful Kisses: Swap traditional Hershey’s Kisses for the white chocolate or caramel-filled ones for a fun twist.
- DIY Frosting: If you prefer homemade, whip up a batch of chocolate buttercream for a richer taste.
- Seasonal Flair: Add edible glitter or sprinkle some crushed candy canes around the cookie for a winter-themed look.
- Sugar-Free Version: Use sugar-free cookies and reduced sugar frosting for a lighter option.
Last year, I swapped out the decorative icing for melted white chocolate dyed orange, and it was a hit! Don’t be afraid to play around with colors and ingredients to make this recipe uniquely yours.
Serving & Storage Suggestions
These Oreo Witch Hat Cookies are best served at room temperature. Arrange them on a festive tray for your Halloween party or wrap them individually in clear cellophane bags for a cute treat bag idea.
If you have leftovers (unlikely, but hey, it happens), store them in an airtight container in the fridge for up to 5 days. Just make sure they’re completely set before stacking them to avoid smudging the decorative icing.
When ready to eat, let them come to room temperature for about 10 minutes to soften the frosting and cookies slightly.
Nutritional Information & Benefits
Each Oreo Witch Hat Cookie contains approximately:
- Calories: 150
- Fat: 7g
- Sugar: 12g
- Carbohydrates: 20g
While these cookies are definitely a treat, they’re great for special occasions when you want to indulge a little. The portion size makes it easy to enjoy without going overboard. Plus, they’re peanut-free, so they’re a safer option for sharing in group settings!
Conclusion
If you’re looking for a quick and magical way to bring some Halloween spirit to your table, these Oreo Witch Hat Cookies are just the ticket. They’re fun, festive, and oh-so-delicious. Whether you’re making them with your kids or whipping them up for a party, this recipe is bound to be a crowd favorite.
I love how creative this recipe allows me to be – choosing different icing colors and patterns makes every batch feel unique. Plus, seeing the joy on people’s faces when they see these cute treats is priceless.
Give it a try and let me know how it turns out! Don’t forget to share your creations in the comments below. I’d love to see how you make these cookies your own. Happy Halloween and happy baking!
FAQs
Can I make these Oreo Witch Hat Cookies ahead of time?
Yes! You can make these cookies up to 2 days in advance. Just store them in an airtight container to keep them fresh.
Can I use homemade frosting?
Absolutely! Homemade chocolate buttercream frosting works wonderfully and adds a richer flavor.
What if I don’t have decorative icing?
No problem! You can use melted chocolate or even small candies like M&M’s to decorate the hat brim.
Can I freeze these cookies?
Yes, you can freeze them! Just make sure they’re fully set before placing them in a freezer-safe container. Thaw at room temperature before serving.
How can I make these cookies allergy-friendly?
Use gluten-free cookies and dairy-free chocolate frosting for a kid-friendly, allergy-safe option.
Pin This Recipe!