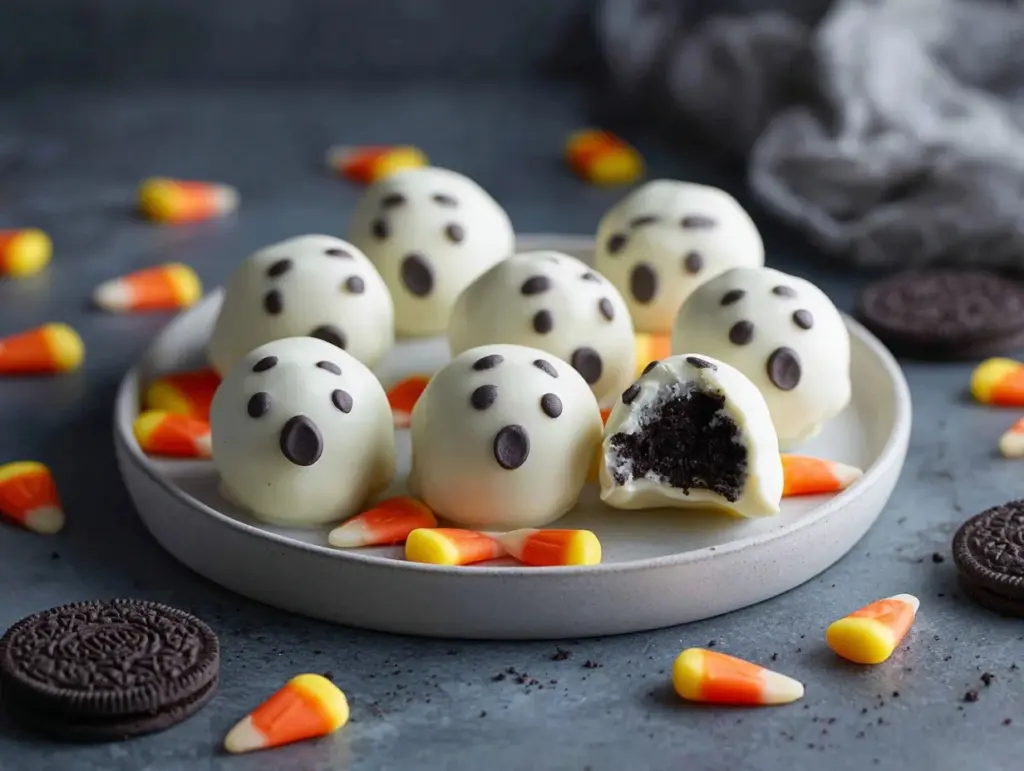
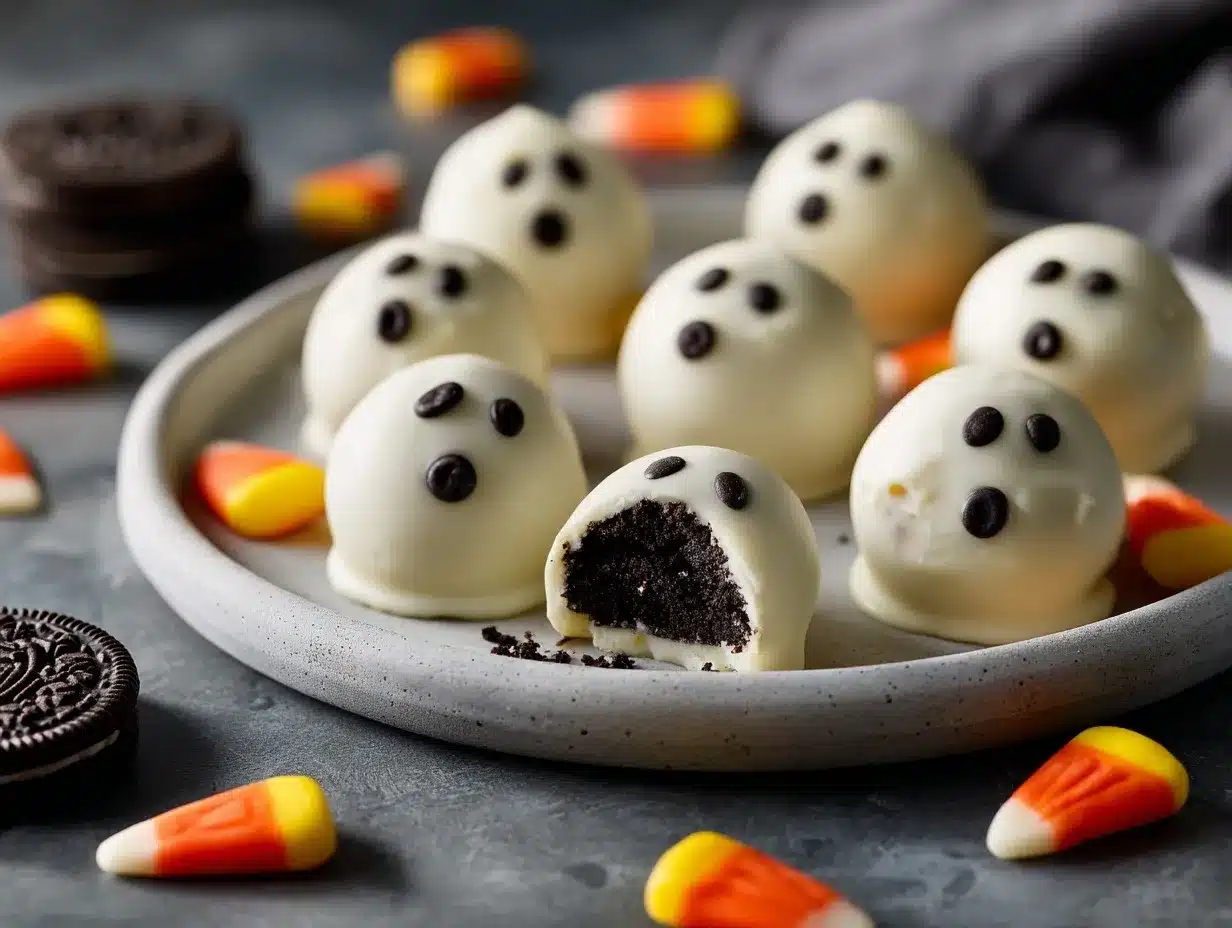
There’s something magical about Halloween treats that are both spooky and adorable. These irresistible No-Bake Oreo Ghost Truffles are the epitome of fun, festive, and easy-to-make desserts. Imagine biting into a creamy Oreo center wrapped in white chocolate, with playful ghost faces that are almost too cute to eat (almost!). Whether you’re hosting a Halloween party or simply want a fun activity with the kids, this recipe will steal the show.
I first whipped these up for a last-minute Halloween celebration, and let me tell you—they were gone in minutes. The best part? No oven required, meaning you can spend more time decorating and less time stressing about baking. They’re perfect for busy parents, party planners, or anyone who loves a sweet treat with a spooky twist. And honestly, who doesn’t love Oreos? The combination of rich chocolate and creamy filling is perfection.
If you’re looking for a festive dessert that’s easy, fun, and guaranteed to impress, these No-Bake Oreo Ghost Truffles are your answer. Let me show you how simple it is to make these little ghostly bites of joy!
Why You’ll Love This Recipe
- Quick & Easy: No need to preheat the oven or fuss with complicated steps. These Oreo Ghost Truffles come together in just 30 minutes!
- Perfect for Halloween Parties: Whether you’re hosting or attending, these spooky treats are always a crowd favorite.
- Kid-Friendly Fun: Get the little ones involved! They’ll love decorating the ghost faces and sneaking a few bites along the way.
- No-Bake Simplicity: Minimal effort, maximum deliciousness—what’s not to love?
- Customizable: You can easily tweak the recipe to fit your dietary needs or flavor preferences.
What sets these ghost truffles apart is their playful design and the creamy Oreo filling. They’re not just tasty; they’re a conversation starter. Plus, they’re surprisingly easy to make, even if you’re not a pro in the kitchen. Imagine serving these at your Halloween gathering and watching everyone’s faces light up—it’s the kind of joy that makes all the effort worth it.
What Ingredients You Will Need
This recipe uses simple ingredients, most of which you probably already have in your pantry. Here’s what you’ll need:
- Oreos: 36 cookies (regular, not double-stuffed). The base of these truffles, providing the rich chocolate flavor.
- Cream Cheese: 8 oz, softened. This is what binds the crushed Oreos together and creates a decadent, creamy center.
- White Chocolate Chips or Candy Melts: 2 cups. For the ghostly coating. You can use regular white chocolate or candy melts for easier melting.
- Dark Chocolate or Black Gel Icing: For drawing the ghost faces. You can use melted chocolate or edible markers.
If you’re looking for substitutions, you could try using gluten-free chocolate sandwich cookies and dairy-free cream cheese for a gluten-free and vegan-friendly version. Feel free to experiment with flavored Oreos for a unique twist, like mint or pumpkin spice!
Equipment Needed
Here’s a quick rundown of the tools you’ll need to bring these ghost truffles to life:
- Food Processor: To crush the Oreos into fine crumbs. If you don’t have one, a zip-top bag and rolling pin will work too.
- Mixing Bowl: For combining the Oreo crumbs with cream cheese.
- Cookie Scoop or Spoon: To portion out the truffle mixture into even-sized balls.
- Baking Sheet: To chill the truffle balls before coating them.
- Microwave-Safe Bowl: For melting the white chocolate or candy melts.
- Piping Bag or Toothpick: For decorating the ghost faces.
Don’t have a cookie scoop? No worries! Simply use a tablespoon to measure out your truffles. And if you don’t own a food processor, crushing the Oreos by hand will do the trick—just make sure they’re finely crumbled for a smooth texture.
Preparation Method
- Prepare the Oreo Mixture: Place the Oreos in a food processor and pulse until they become fine crumbs. If you’re doing this manually, place the Oreos in a zip-top bag and crush them with a rolling pin.
- Mix with Cream Cheese: Transfer the Oreo crumbs to a mixing bowl and add the softened cream cheese. Use a spatula or clean hands to combine until fully incorporated. The mixture should be sticky but firm enough to hold its shape.
- Form the Truffles: Using a cookie scoop or tablespoon, scoop out portions of the mixture and roll them into balls. Place them on a baking sheet lined with parchment paper. Chill in the refrigerator for 20 minutes to firm up.
- Melt the White Chocolate: In a microwave-safe bowl, melt the white chocolate chips or candy melts in 20-second intervals, stirring in between to prevent overheating. When smooth and glossy, it’s ready to use.
- Coat the Truffles: Remove the chilled truffles from the fridge. Using a fork or skewer, dip each ball into the melted white chocolate, ensuring it’s fully coated. Allow excess chocolate to drip off before placing them back onto the parchment-lined baking sheet.
- Decorate the Ghost Faces: Once the white chocolate is set, use melted dark chocolate or black gel icing to draw two small eyes and a spooky ghost mouth on each truffle. Let the decorations dry completely.
- Serving: Arrange the ghost truffles on a festive platter and serve at room temperature for best flavor and texture.
Cooking Tips & Techniques
- Keep the Cream Cheese Soft: Let your cream cheese sit at room temperature for about 30 minutes before starting. This makes mixing much easier.
- Don’t Skip Chilling: Chilling the truffle balls is essential to keep them from falling apart during the coating process.
- Use High-Quality Chocolate: For smooth, rich coating, opt for good-quality white chocolate or candy melts. If the chocolate is too thick, add a teaspoon of coconut oil to thin it.
- Get Creative with Decorations: Experiment with different ghost faces—happy, spooky, or silly! If you’re making these with kids, let them have fun with their own designs.
- Work Quickly with Chocolate: White chocolate can harden fast, so be prepared to dip and decorate efficiently.
Variations & Adaptations
- Gluten-Free Option: Use gluten-free sandwich cookies and ensure your white chocolate is safe for gluten-sensitive guests.
- Vegan Version: Swap cream cheese with a dairy-free alternative and use vegan chocolate for coating.
- Flavored Oreos: Experiment with seasonal Oreo flavors like pumpkin spice or red velvet for a unique twist.
- Colorful Coating: Instead of white chocolate, use orange candy melts and make Jack-o’-lantern faces instead of ghosts!
- Change the Theme: These truffles can be adapted for other holidays—red and green for Christmas or pastel shades for Easter.
Serving & Storage Suggestions
Serve these No-Bake Oreo Ghost Truffles on a spooky Halloween platter or arrange them in a decorative box for a fun party favor. Pair them with warm apple cider or a cup of hot chocolate to complete the festive vibe.
To store, place the truffles in an airtight container and refrigerate for up to a week. For longer storage, freeze them in a single layer on a baking sheet until firm, then transfer to a freezer-safe bag for up to a month. When ready to eat, allow them to thaw in the fridge for a few hours before serving.
Nutritional Information & Benefits
Each No-Bake Oreo Ghost Truffle contains approximately:
- Calories: 120
- Fat: 6 grams
- Carbohydrates: 14 grams
- Protein: 1 gram
While these truffles are undoubtedly a sweet treat, they’re great for satisfying your Halloween cravings in small, manageable portions. They’re also a fun way to enjoy a festive dessert without the need for heavy baking or preparation. Just remember to enjoy them in moderation!
Conclusion
No-Bake Oreo Ghost Truffles are the ultimate Halloween treat—spooky and sweet with minimal effort required. Whether you’re creating memories in the kitchen with your kids or impressing guests at a party, these truffles always steal the show. The Oreo filling is creamy and decadent, and the ghost faces are just too cute to resist.
Happy Halloween and happy no-baking! 🎃👻
FAQs
Can I make these truffles ahead of time?
Absolutely! These truffles can be made a day or two in advance. Just store them in an airtight container in the refrigerator until you’re ready to serve.
What can I use if I don’t have a food processor?
If you don’t have a food processor, place the Oreos in a zip-top bag and crush them with a rolling pin until they’re fine crumbs.
Can I use milk chocolate instead of white chocolate?
Yes, you can! They won’t look like ghosts, but milk chocolate truffles are just as delicious. You can still get creative with decorations.
How can I make these truffles vegan?
Use dairy-free cream cheese and vegan chocolate. Also, ensure your sandwich cookies are vegan-friendly.
Do I have to refrigerate them?
Yes, refrigerating the truffle balls before dipping them in chocolate helps them firm up. Once coated, store them in the fridge until you’re ready to serve.
Pin This Recipe!