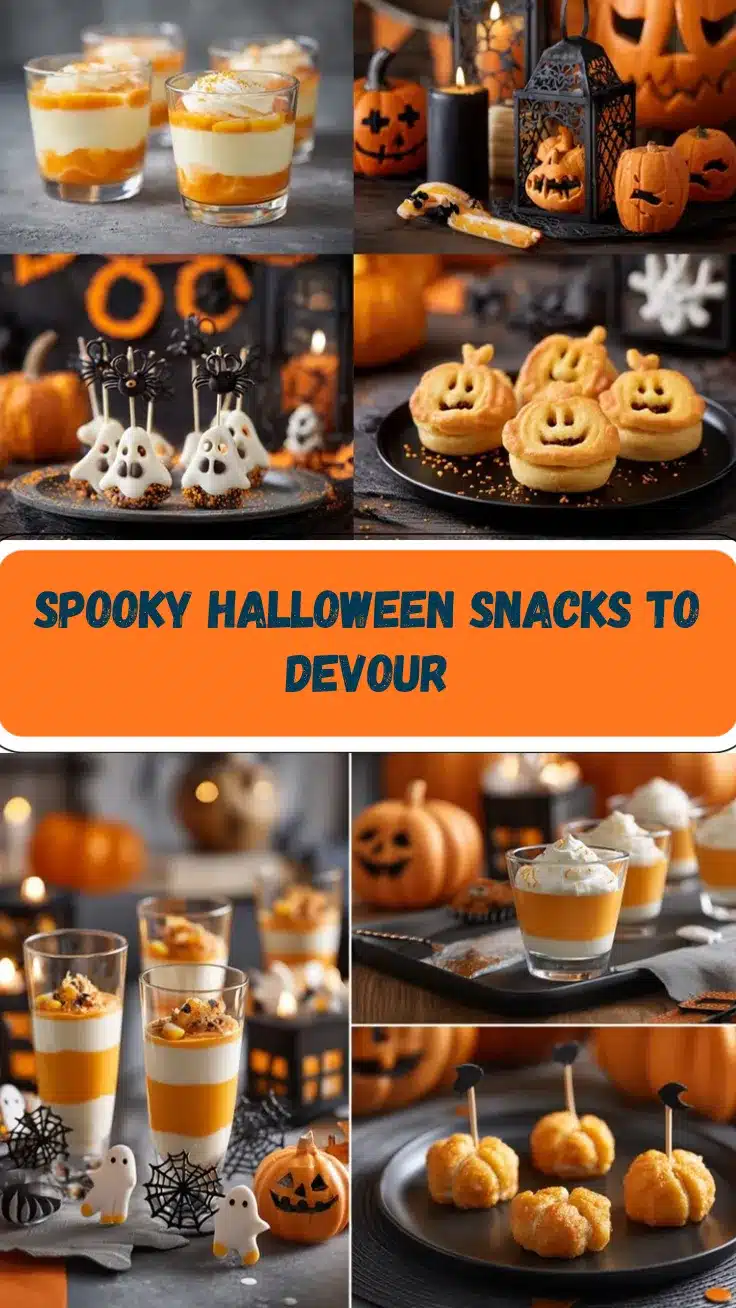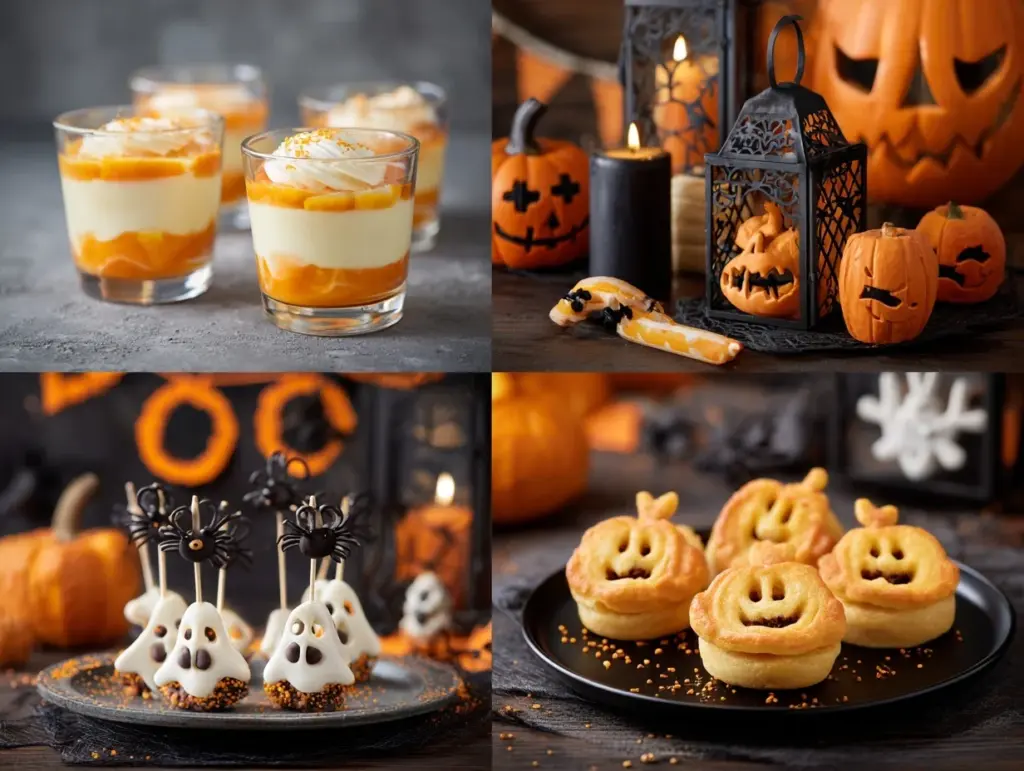
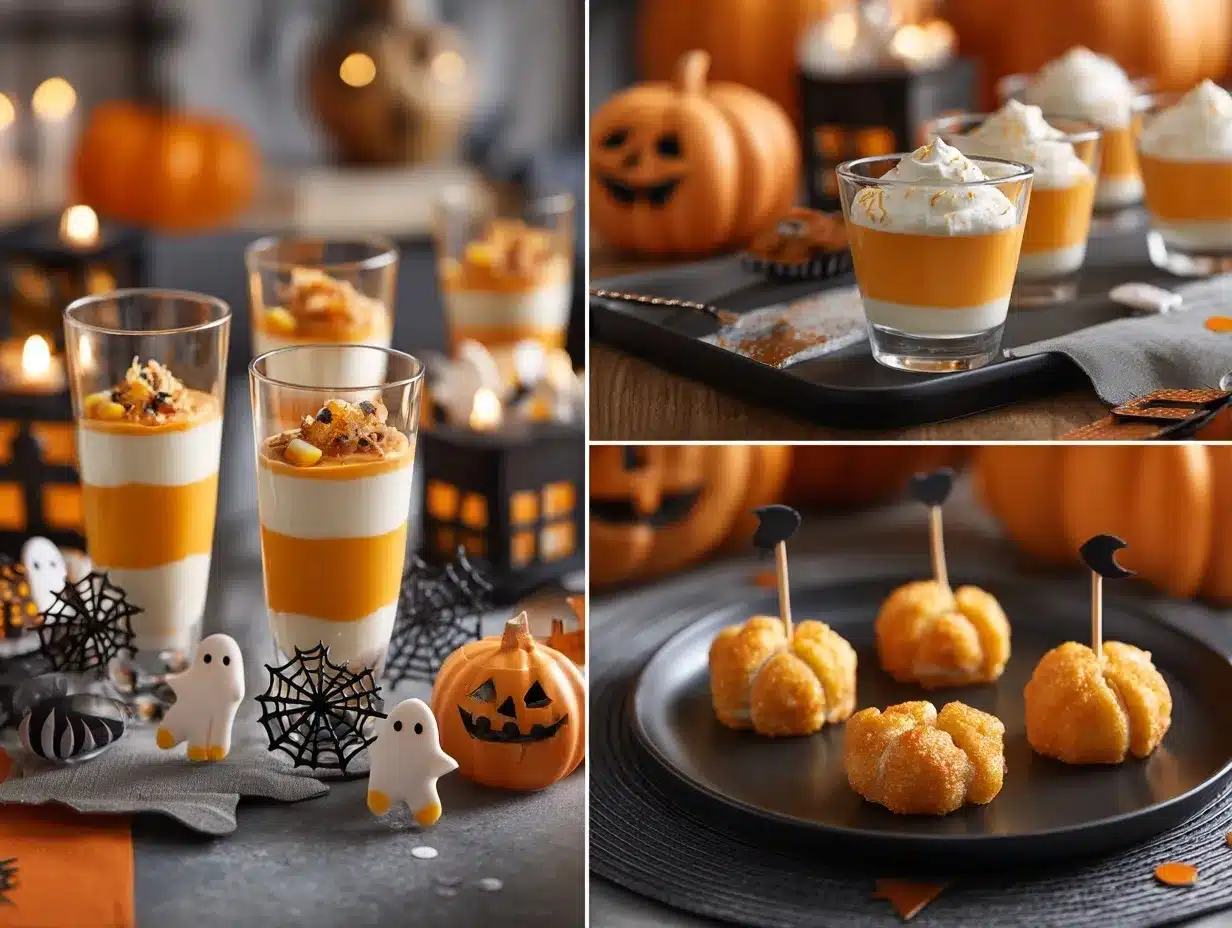
The crunch of autumn leaves underfoot, the chill in the air, and the excitement of dressing up—Halloween is easily one of my favorite times of year! And let’s be real, what’s a Halloween party without the snacks? Whether you’re hosting a spooky soirée or just want to impress your family with some festive treats, I’ve got you covered with these creative and easy Halloween snack ideas. They’re fun, delicious, and just creepy enough to match the mood of the season!
I’ve been crafting Halloween snacks for years, from gooey monster fingers to eerie eyeball cupcakes, and let me tell you—these recipes are guaranteed to be a hit. So, grab your favorite spooky apron and let’s make some magic in the kitchen!
Why You’ll Love These Halloween Snack Ideas
- Perfect for Parties: Whether it’s a kid-friendly gathering or an adults-only costume bash, these snacks bring festive flair to any celebration.
- Easy to Make: You don’t need to be a pastry chef or spend hours in the kitchen. These are simple recipes that anyone can whip up.
- Creative and Fun: These snacks bring a playful, spooky vibe to your table—think mummy hot dogs, ghostly cupcakes, and gory dips!
- Customizable: Have picky eaters or dietary restrictions? No problem! These recipes are flexible, so you can tweak them to suit your needs.
- Kid-Approved: Trust me, these snacks will have kids squealing with delight (and maybe a little fright) when they take a bite.
What makes these Halloween snack ideas extra special is the combination of creativity and simplicity. You don’t need expensive ingredients or complicated techniques to pull off a festive spread that will wow your guests. Plus, they’re visually stunning—perfect for snapping a picture to share on Instagram or Pinterest!
What Ingredients You Will Need
These spooky snacks rely on simple, affordable ingredients you can find at your local grocery store or might already have in your pantry. Here’s a breakdown:
- For Mummy Hot Dogs: Hot dogs, refrigerated crescent roll dough or puff pastry, and mustard or ketchup for eyes.
- For Spooky Spider Oreo Balls: Oreo cookies, cream cheese, white chocolate for coating, black food gel, and pretzel sticks.
- For Witch Finger Pretzels: Pretzel rods, green candy melts, almond slivers (for “nails”), and sprinkles for decoration.
- For Pumpkin Deviled Eggs: Eggs, mayonnaise, mustard, paprika, and food coloring (orange).
- For Bloody Dip: Cream cheese, salsa, shredded mozzarella, and edible food dye.
- For Ghostly Cupcakes: Chocolate cupcake mix, vanilla frosting, mini marshmallows (for ghost shapes), and black sprinkles for faces.
If you’re short on time or ingredients, feel free to swap as needed! For example, use vegan sausage for the mummy hot dogs or dairy-free cheese for the bloody dip. Halloween snacks are meant to be fun, so don’t stress about perfection!
Equipment Needed
Here’s what you’ll need to bring these spooky snacks to life:
- Mixing bowls (a few different sizes for various recipes)
- Baking sheets (for mummy hot dogs and pretzel rods)
- Microwave-safe bowls (for melting candy melts or chocolate)
- Piping bags or zip-top bags (for decorating cupcakes and deviled eggs)
- Measuring cups and spoons (for precise ingredient amounts)
- A whisk, spatula, and wooden spoons
- Knife or scissors (for cutting pastry dough or pretzels)
If you don’t have piping bags, don’t worry—you can use a zip-top bag and snip off one corner for DIY decorating. And if you’re short on baking sheets, line a large plate with parchment paper for the pretzel rods or Oreo balls.
Preparation Method
1. Mummy Hot Dogs
- Preheat your oven to 375°F (190°C).
- Wrap each hot dog with thin strips of crescent roll dough or puff pastry, leaving gaps to resemble mummy bandages.
- Place the wrapped hot dogs on a baking sheet lined with parchment paper.
- Bake for 12-15 minutes, or until the dough is golden brown.
- Once cooled slightly, use mustard or ketchup to add tiny dots for “eyes.”
2. Spooky Spider Oreo Balls
- Crush the Oreo cookies into fine crumbs and mix with softened cream cheese until well combined.
- Roll the mixture into small balls and chill in the freezer for 15 minutes.
- Melt white chocolate and add black food gel to create a dark coating.
- Dip the Oreo balls into the chocolate and add pretzel pieces for spider legs.
- Use a toothpick and white chocolate to draw eyes on the spiders.
3. Witch Finger Pretzels
- Melt green candy melts in a microwave-safe bowl.
- Dip each pretzel rod into the melted candy, covering about three-fourths of the rod.
- Attach almond slivers to the tips to resemble fingernails.
- Sprinkle with decorative sugar or sprinkles for added effect.
- Let them set for 30 minutes before serving.
4. Pumpkin Deviled Eggs
- Hard boil the eggs and peel them. Slice each egg in half and scoop out the yolk.
- Mix the yolks with mayonnaise, mustard, paprika, and orange food coloring.
- Spoon the mixture back into the egg whites.
- Use a toothpick to create lines on the yolk mixture, making it look like a pumpkin.
5. Bloody Dip
- Spread softened cream cheese onto a serving plate.
- Pour salsa over the cream cheese to create a “bloody” appearance.
- Sprinkle with shredded mozzarella and add a few drops of edible red food dye for extra gore.
6. Ghostly Cupcakes
- Prepare a chocolate cupcake mix according to package instructions and let them cool completely.
- Pipe vanilla frosting onto each cupcake, using a circular motion to create a ghost shape.
- Place mini marshmallows on top for the ghost’s head.
- Add black sprinkles or food gel to create faces.
Cooking Tips & Techniques
Want flawless Halloween snacks? Here are my tried-and-true tips:
- Chill Before Dipping: For recipes like Oreo balls, chilling helps the mixture hold its shape during dipping.
- Work Quickly with Candy Melts: Candy melts harden fast, so have all your decorations ready before you start dipping.
- Use Parchment Paper: Always line your baking sheets or plates with parchment paper to prevent sticking.
- Precision Matters: For detailed decorations like ghost faces or mummy eyes, toothpicks work wonders for small designs.
- Dye Smart: A little food coloring goes a long way—start with a tiny amount and build up to your desired shade.
Remember, Halloween snacks don’t have to be perfect—they’re supposed to be playful and fun, so embrace the imperfections!
Variations & Adaptations
Here are some fun ways to adapt these recipes:
- Gluten-Free: Use gluten-free pastry dough or almond flour alternatives for the mummy hot dogs.
- Vegan-Friendly: Swap regular hot dogs for vegan sausages and use dairy-free cream cheese and chocolate for the Oreo balls.
- Flavor Twists: Add cinnamon to the Oreo balls for a fall-inspired flavor or sprinkle chili powder onto the bloody dip for a spicy kick.
- Seasonal Switch: Try pumpkin-shaped pretzels instead of witch fingers for a more classic Halloween theme.
- Personalized Cupcakes: Let guests decorate their ghost cupcakes with sprinkles or candies of their choice.
Serving & Storage Suggestions
Here’s how to serve and store your creations:
- Serving Temperature: Most snacks are best served at room temperature, except for the dip, which can be slightly chilled.
- Presentation Tips: Arrange snacks on a spooky platter with Halloween-themed decorations (think cobwebs or plastic spiders).
- Refrigerator Storage: Store leftover Oreo balls and cupcakes in an airtight container in the fridge for up to 5 days.
- Freezer Storage: Freeze Halloween snacks like Oreo balls for up to a month—just thaw them in the fridge before serving.
- Reheating: Mummy hot dogs can be reheated in an oven at 350°F (175°C) for 5-7 minutes.
Nutritional Information & Benefits
While Halloween snacks are meant to be indulgent, here’s a quick breakdown of what you’re enjoying:
- Eggs: Packed with protein and essential vitamins.
- Cheese: A good source of calcium and protein.
- Dark Chocolate (optional): Contains antioxidants and can satisfy your sweet tooth.
- Moderation: These treats are meant to be enjoyed—so savor them in reasonable portions!
Note: If you’re catering to dietary restrictions, make sure to check ingredient labels for allergens like nuts, dairy, or gluten.
Conclusion
Halloween is a time for creativity, fun, and a little spookiness—and these snack ideas bring all of that to the table. Whether you’re crafting mummy hot dogs or piping ghostly cupcakes, these recipes are designed to be simple, festive, and absolutely delicious. Plus, they’re super customizable, so you can tailor them to suit anyone’s tastes or dietary needs.
I’ve loved making these treats for my own Halloween parties over the years, and they never fail to impress. So, gather your ingredients, grab your apron, and whip up some spooky magic! I’d love to hear which snack was your favorite—leave a comment below and share your thoughts. And don’t forget to pin this post for later so you’ll always have these ideas at hand.
Let’s make this Halloween the most delicious one yet. Happy haunting and happy snacking!
FAQs
Can I make these snacks ahead of time?
Yes! Many of these snacks, like Oreo balls and cupcakes, can be prepared a day or two ahead and stored in the fridge.
Are these snacks kid-friendly?
Absolutely! All of these recipes are designed with kids in mind—they’re fun, festive, and easy to eat.
Can I make these snacks healthier?
Sure! Use vegan or gluten-free alternatives for certain ingredients, and try reducing sugar in recipes like cupcakes.
Do I need any special tools for decorating?
Nope! A toothpick or a zip-top bag can work wonders for detailed decorations if you don’t have piping bags.
How can I make these snacks look extra spooky?
Use edible glitter, black food gel, or Halloween-themed sprinkles for an extra eerie touch!
Pin This Recipe!