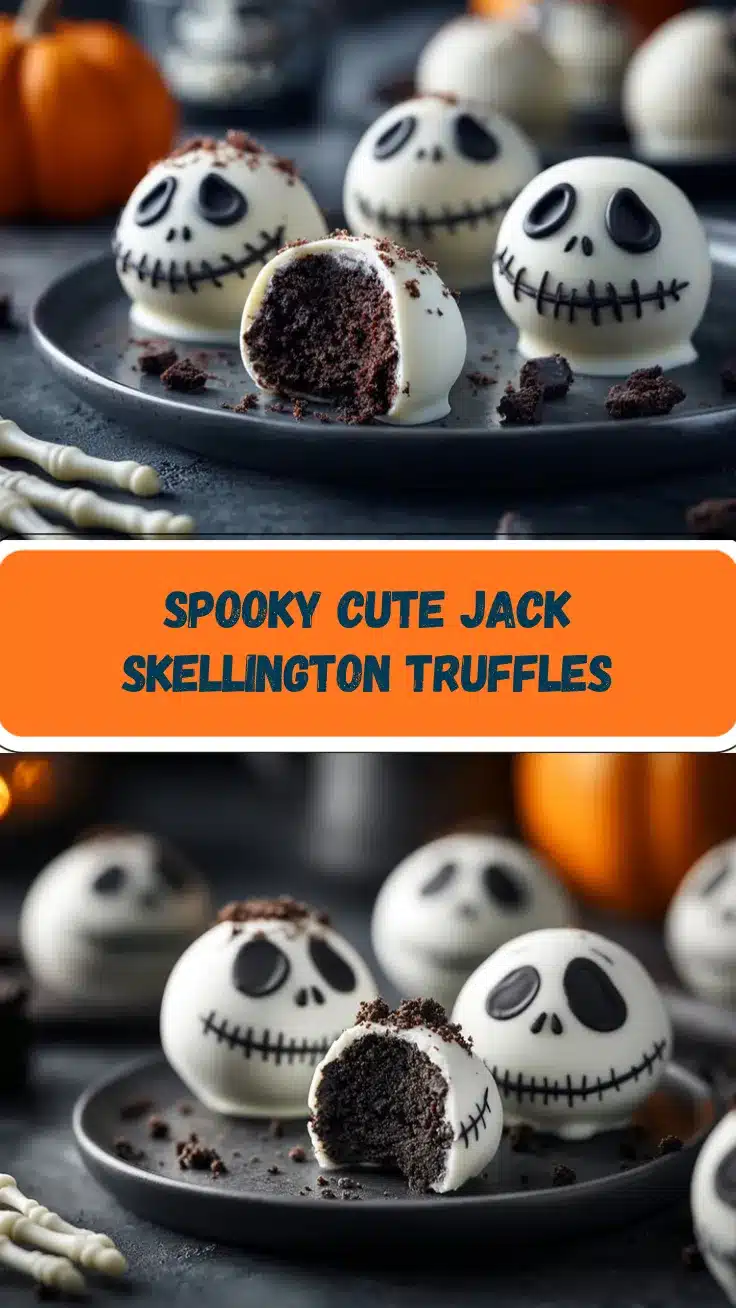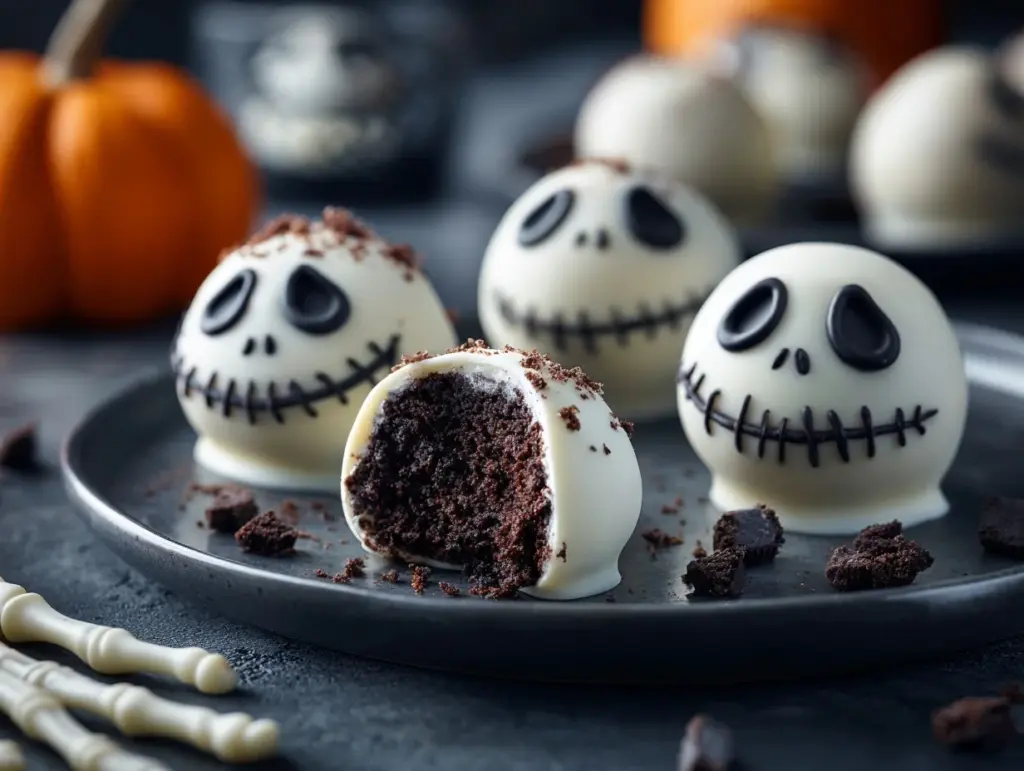
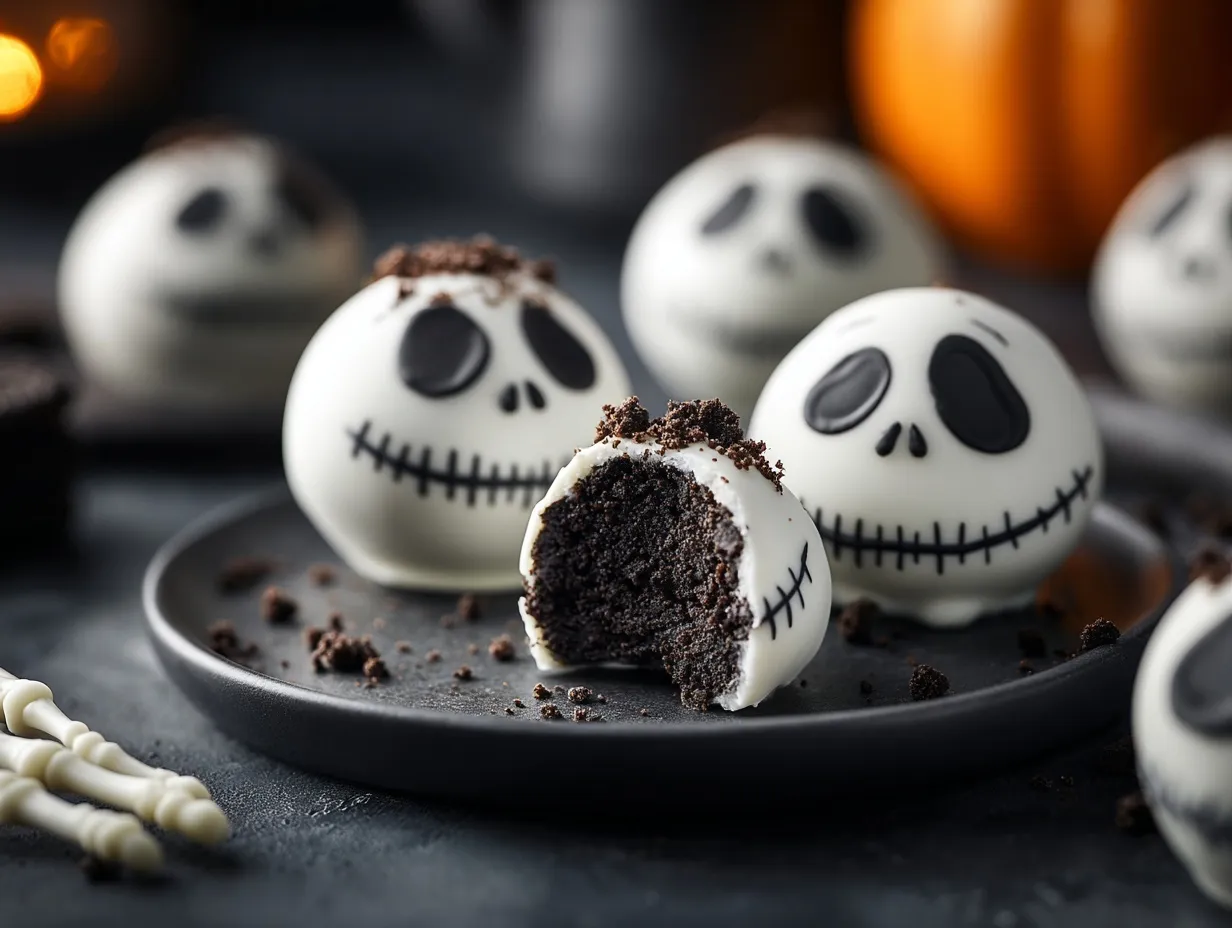
Have you ever seen a treat so cute and spooky that you couldn’t wait to make it? That’s exactly how I felt the first time I whipped up these Jack Skellington Oreo Truffles! Inspired by the Pumpkin King himself, these bite-sized delights are perfect for Halloween parties or even a cozy night watching The Nightmare Before Christmas. They’re rich, decadent, and surprisingly easy to make—plus, they’re almost too adorable to eat. (I said almost!)
It’s no secret that Halloween is one of my favorite holidays. The costumes, the spooky vibes, the candy—it’s all so much fun. And when I can combine my love for crafting cute treats with the holiday spirit, I’m all in. These Oreo truffles are the perfect way to celebrate. Whether you’re a baking beginner or a seasoned pro, making these little guys is a breeze. Let’s get started!
Why You’ll Love This Recipe
If you’re looking for a Halloween treat that’s as fun to make as it is to eat, you’re in the right place. Here’s what makes these Spooky Jack Skellington Oreo Truffles an absolute must for your Halloween lineup:
- Simple and Quick: With just a handful of ingredients and no baking required, you’ll have these spooky treats ready in no time.
- Perfect for Halloween: Whether you’re throwing a Halloween bash or want to surprise your coworkers, these are guaranteed to be a hit.
- Cute and Creepy: Inspired by Jack Skellington from The Nightmare Before Christmas, these treats are equal parts adorable and spooky.
- Kid-Friendly: Get the little ones involved in decorating these truffles—they’ll love it! Plus, it’s a great opportunity for some family bonding.
- Customizable: You can tweak the design, flavors, and colors to fit your Halloween theme, so they’re one-of-a-kind.
- Deliciously Decadent: Creamy, chocolatey, and filled with Oreo goodness—these treats are impossible to resist.
Trust me, once you’ve tried them, these Oreo truffles will become a Halloween tradition in your house. They’re not just a dessert; they’re a fun experience that everyone will love.
What Ingredients You Will Need
This recipe uses simple, easy-to-find ingredients that come together to create a show-stopping Halloween treat. Here’s what you’ll need:
- Oreos: You’ll need about 36 regular Oreos (classic flavor works best) for the base.
- Cream Cheese: 8 oz, softened. This helps bind the crushed Oreos into a smooth, creamy filling.
- White Chocolate Chips or Candy Melts: About 12 oz for the outer coating. Candy melts are great for their smooth finish, but white chocolate chips work too!
- Black Gel Food Coloring: This is key for creating Jack Skellington’s iconic face. Liquid food coloring can work, but gel is easier to control.
- Optional Decorations: You can use edible markers, candy eyes, or sprinkles to add extra spooky flair.
These ingredients are staples for holiday baking, so you might already have most of them in your pantry. Plus, they’re easy to adapt—if you want to try a different cookie base or coating, go for it!
Equipment Needed
You don’t need a fancy kitchen setup to make these Jack Skellington Oreo Truffles. Here’s what you’ll need:
- Food Processor: To finely crush the Oreos into a smooth crumb texture. A blender works too!
- Mixing Bowls: For combining the Oreo crumbs with cream cheese.
- Cookie Scoop or Spoon: To make evenly-sized truffle balls.
- Baking Sheet: Line it with parchment paper for easy cleanup.
- Microwave-Safe Bowl: For melting the white chocolate or candy melts.
- Small Piping Bag or Toothpick: For drawing Jack Skellington’s face.
No food processor? No worries! You can crush the Oreos in a zip-top bag using a rolling pin. It takes a little extra effort, but it works like a charm.
Preparation Method
- Crush the Oreos: Place the Oreos in a food processor and pulse until they’re fine crumbs. If you don’t have a food processor, place them in a zip-top bag and crush them with a rolling pin.
- Mix the Filling: In a large mixing bowl, combine the crushed Oreos with the softened cream cheese. Use a spoon or your hands to mix until smooth.
- Form the Truffles: Use a cookie scoop or spoon to scoop out small portions of the mixture. Roll them into balls and place them on a parchment-lined baking sheet. Chill in the refrigerator for at least 30 minutes or until firm.
- Melt the Coating: In a microwave-safe bowl, melt the white chocolate or candy melts in 30-second intervals, stirring in between until smooth. Be careful not to overheat—it can scorch easily!
- Dip the Truffles: Use a fork to dip each chilled truffle into the melted white chocolate. Let the excess chocolate drip off, then place the truffle back on the parchment-lined baking sheet.
- Decorate the Faces: Once the chocolate has hardened, use black gel food coloring and a small piping bag or toothpick to draw Jack Skellington’s iconic face. Create two oval eyes, small nostrils, and a stitched grin. Let the decorations set.
- Chill and Serve: Refrigerate the decorated truffles for at least 15 minutes to let everything set completely. Serve chilled and enjoy the spooky goodness!
Cooking Tips & Techniques
Making these adorable Jack Skellington Oreo Truffles is straightforward, but here are some tips to ensure success:
- Don’t Skip Chilling: The Oreo mixture needs time to firm up before you can roll it into balls. If it’s too soft, it’ll be a sticky mess.
- Work Quickly with White Chocolate: White chocolate can seize if overheated, so melt it gently and keep stirring to maintain a smooth consistency.
- Keep Decorations Simple: If piping Jack’s face feels intimidating, use edible markers or stick-on candy eyes for an easier option.
- Use Quality Chocolate: High-quality white chocolate or candy melts will make a huge difference in taste and appearance.
Don’t worry if your Jack faces aren’t perfect—mine rarely are, and they still look adorably spooky!
Variations & Adaptations
One of the best things about these Oreo truffles is how easy they are to customize. Here are a few fun ideas:
- Flavor Twists: Swap the original Oreos for mint, peanut butter, or even the seasonal Halloween Oreo flavors for a fun twist.
- Colorful Coatings: Instead of white chocolate, try orange candy melts for a pumpkin-inspired look. You can still add Jack’s face using black food coloring!
- Gluten-Free Version: Use gluten-free chocolate sandwich cookies and check that your other ingredients are certified gluten-free.
- Vegan Adaptation: Use a dairy-free cream cheese alternative and vegan white chocolate for a plant-based version.
Personally, I love using mint Oreos for a refreshing twist on the classic flavor—it’s like Halloween meets a peppermint patty!
Serving & Storage Suggestions
Once your Jack Skellington Oreo Truffles are ready, here’s how to serve and store them:
- Serving Suggestions: Arrange the truffles on a festive Halloween platter or use them as edible decorations for your party table. Pair them with hot cocoa or a spooky Halloween punch!
- Storage Tips: Keep the truffles in an airtight container in the refrigerator for up to 5 days. If you’re making them ahead, store them in the freezer for up to 3 months.
- Reheating: These are best enjoyed cold, but if frozen, let them thaw in the fridge for a few hours before serving.
- Flavor Development: The truffles often taste even better the next day as the flavors meld together!
Nutritional Information & Benefits
Here’s a quick breakdown of the nutritional info for these spooky treats:
- Calories: Approximately 120 calories per truffle.
- Fat: Around 7g per serving due to the cream cheese and white chocolate.
- Sugar: About 10g per truffle—these are definitely sweet treats!
- Dietary Considerations: Can be adjusted for gluten-free or vegan diets with substitutions for Oreos and cream cheese.
While these truffles are indulgent, they’re perfect for enjoying as a special treat. Plus, they’re bite-sized, so you can enjoy one (or a few) without overdoing it!
Conclusion
There’s no better way to celebrate Halloween than with these Spooky Jack Skellington Oreo Truffles. They’re easy to make, fun to decorate, and super delicious—what more could you ask for? Whether you’re hosting a party or just want a festive treat, these truffles are sure to impress. And don’t forget to put your own spin on them—this recipe is all about creativity!
So grab your Oreos, cream cheese, and candy melts, and let’s get spooky in the kitchen. Once you make these, I’d love to hear how they turned out! Leave me a comment below and don’t forget to share your creations on social media. Happy Halloween!
FAQs
Can I make these Oreo truffles ahead of time?
Absolutely! They can be stored in the refrigerator for up to 5 days or frozen for up to 3 months.
What if I don’t have black gel food coloring?
You can use melted dark chocolate or an edible marker as an alternative for decorating Jack Skellington’s face.
Can I use flavored Oreos?
Yes! Mint, peanut butter, and even seasonal Halloween Oreos work great for a fun twist.
Do I need a food processor?
Nope! You can crush the Oreos in a zip-top bag with a rolling pin for a similar result.
Can I make these vegan or gluten-free?
Certainly! Use gluten-free Oreos and dairy-free cream cheese and chocolate to adapt the recipe.
Pin This Recipe!