The crunch of fresh veggies, the eerie charm of a skeleton, and a festive vibe—this Spooky Skeleton Veggie Platter is the perfect centerpiece for your Halloween party! Whether you’re hosting a spooky soiree or just want to surprise your kids with a creative snack, this recipe is a guaranteed crowd-pleaser. It’s not only fun and festive but also a healthier alternative to candy-filled treats. So grab your cutting board and let’s assemble this edible skeleton masterpiece together!
I first created this platter for my annual Halloween gathering, and let me tell you, it was an instant hit. The kids were squealing with delight, and even the adults couldn’t resist snapping photos before diving in. The best part? It’s totally customizable, so you can use your favorite vegetables and dip to make it your own. The spooky factor is truly off the charts, and it’s surprisingly easy to make!
Why You’ll Love This Recipe
- Fun and festive: This skeleton veggie platter is like edible art—it’s spooky, colorful, and perfect for Halloween.
- Healthy and delicious: Packed with fresh vegetables, it’s a guilt-free snack amidst all the Halloween candy.
- Kid-approved: Even picky eaters will love this creative way of serving vegetables. It’s almost too fun to eat!
- Customizable: Use whatever veggies you have on hand. It’s easy to adapt for dietary preferences and allergies.
- Perfect party centerpiece: This platter isn’t just food—it’s decoration. Your guests will be wowed by the creativity!
What makes this recipe stand out is the playful skeleton design. Instead of a boring veggie tray, you’re creating a masterpiece that doubles as a conversation starter. And the best part? It’s quick to put together—no cooking required. Trust me, you’ll love this as much as your guests do.
What Ingredients You Will Need
This recipe uses fresh, colorful veggies to create a spooky yet delicious skeleton. You can mix and match based on your preferences or what’s in season. Here’s what you’ll need:
- Bell peppers: Choose red, yellow, and orange for vibrant color (sliced into strips).
- Carrots: Baby carrots work perfectly for arms and legs.
- Cucumber: Sliced into rounds for the spine or ribs.
- Celery: Cut into sticks for the arms or ribs.
- Cherry tomatoes: Great for knees, elbows, or simply to add pops of color.
- Cauliflower florets: Perfect for creating the skeleton’s skull.
- Broccoli florets: Use these as filler for areas around the skeleton.
- Black olives: Slice them for eyes, or use whole for decoration.
- Ranch dressing or hummus: For dipping, and it can double as “brain goo” if you want to get extra spooky.
If you’re missing a vegetable, don’t worry—this recipe is all about creativity. You can swap out veggies for others you prefer, like snap peas, radishes, or even jicama sticks.
Equipment Needed
- Large serving platter: A big, flat surface is ideal for arranging your skeleton. A cutting board or tray works too!
- Sharp knife: Essential for slicing and dicing your veggies into skeleton-worthy shapes.
- Small bowls: For holding your dip or creating “eyes.”
- Optional: Cookie cutters for precise shapes (like hearts or circles).
If you don’t have a large platter, try piecing together multiple smaller ones to form the skeleton. And honestly, any sharp knife will do—I’ve even used my trusty paring knife for this in a pinch!
Preparation Method
- Prepare the veggies: Wash and dry all vegetables thoroughly. Slice bell peppers into thin strips, cut carrots and celery into sticks, and slice cucumbers into rounds. Separate cauliflower and broccoli into bite-sized florets.
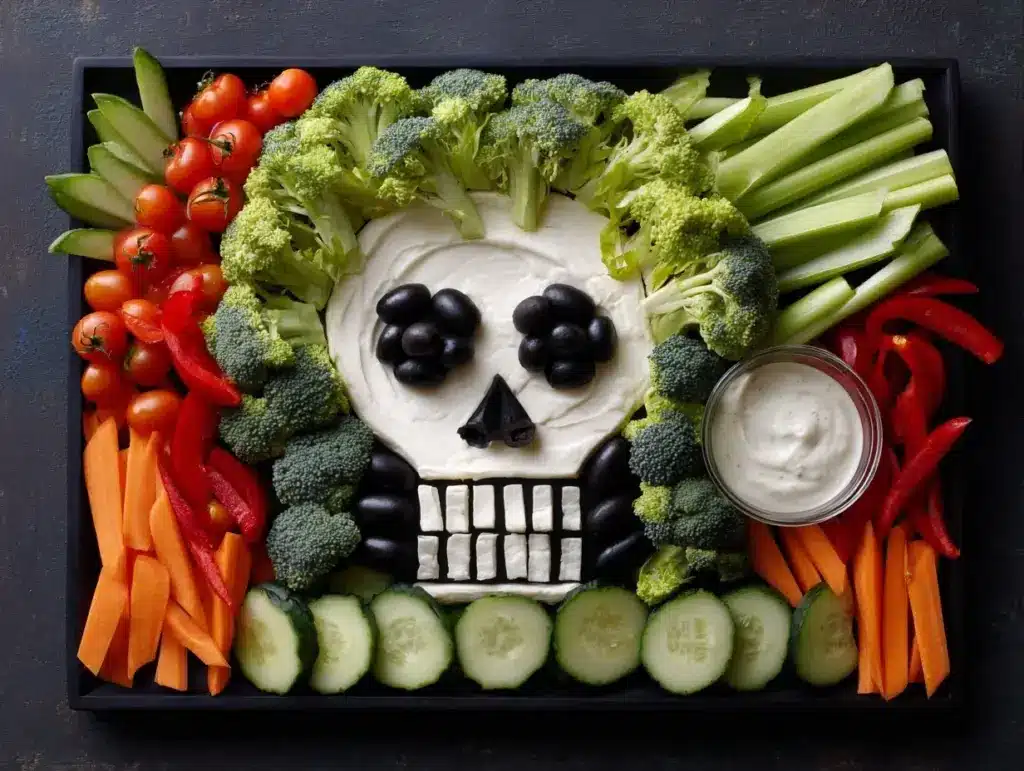
- Build the skeleton: Start by placing the cauliflower florets at the top of the platter to form the skull. Use black olive slices to create the eyes and nose.
- Add the spine: Arrange cucumber slices in a straight line below the skull to form the spine.
- Create the ribs: Lay celery sticks on either side of the spine like ribs, alternating directions for a realistic touch.
- Make the arms and legs: Use baby carrots for the limbs, and add cherry tomatoes as joints—knees, elbows, and shoulders.
- Fill in the gaps: Use broccoli florets to fill in spaces around the skeleton, creating a “background” of greenery.
- Add the dip: Place a small bowl of ranch dressing or hummus near the skeleton’s head to mimic a spooky touch like “brain goo.”
- Adjust details: If needed, tweak the placement of veggies to make the skeleton pop. You can add extra olives or small veggie pieces for added flair.
- Chill until serving: Cover the platter with plastic wrap and refrigerate until ready to serve.
Cooking Tips & Techniques
Creating the perfect Spooky Skeleton Veggie Platter is all about attention to detail. Here are some tips to make sure your platter looks amazing and tastes great:
- Use fresh, crisp veggies: The fresher your veggies, the better the platter will look and taste.
- Dry the vegetables well: Moisture can make your platter messy, so pat the veggies dry with a paper towel after washing.
- Keep it colorful: Choose a variety of colors for visual appeal—bright orange carrots, red cherry tomatoes, and green broccoli will make the skeleton pop.
- Chill the platter: Assembling the platter in advance? Cover it tightly and refrigerate to keep everything fresh and crunchy.
- Get creative: If you mess up while arranging the skeleton, just adjust it! There’s no wrong way to do this.
If your ranch dressing is too thick for dipping, add a splash of milk or water to thin it out. Also, don’t be afraid to mix and match—sometimes a little imperfection adds to the spooky vibe!
Variations & Adaptations
This recipe is highly adaptable, so you can customize it based on dietary needs, seasonal availability, or just your personal taste. Here are some fun variations:
- Vegetarian and vegan options: Swap the ranch dip for hummus or guacamole to make it vegan-friendly. You can also use dairy-free yogurt as the base for your dip.
- Spicy skeleton: Add sliced jalapeños, radishes, or spicy pickles for a kick. You can also use a spicy dip like chipotle ranch or sriracha mayo.
- Seasonal swaps: Use roasted sweet potatoes or pumpkin chunks for a fall-inspired twist. In summer, try zucchini sticks or fresh corn kernels.
- Cheesy addition: Sprinkle shredded cheese over the skeleton for an extra layer of flavor—because who doesn’t love cheese?
I once made a version with purple cauliflower for a super spooky look, and it was a major hit! Don’t be afraid to experiment with different shapes and colors to make your platter uniquely yours.
Serving & Storage Suggestions
This Spooky Skeleton Veggie Platter is best served fresh and cold. Here’s how to make the most of it:
- Serving: Place the platter in the center of your party table for maximum effect. It pairs perfectly with Halloween-themed cocktails or a glass of apple cider.
- Temperature: Serve chilled to keep the veggies crisp and refreshing.
- Storage: If you have leftovers, store the veggies in an airtight container in the refrigerator for up to 3 days.
- Reheating: Of course, you won’t reheat the veggies, but if you have leftover dip, it can be warmed slightly to loosen it up.
Pro tip: If you want to save time on party day, prep the veggies the night before and store them in separate containers. Assemble the skeleton just before serving.
Nutritional Information & Benefits
This spooky veggie platter is not only a feast for the eyes but also a healthy addition to your Halloween party. Here’s why:
- Low-calorie snack: Veggies are naturally low in calories, making this a guilt-free option.
- Rich in nutrients: You’ll get a variety of vitamins and minerals from the colorful assortment of vegetables.
- High in fiber: Great for digestion and keeping you full amid all the sugary treats.
- Diet-friendly: This recipe is gluten-free, dairy-free (if you use hummus or a vegan dip), and keto-friendly.
- Potential allergens: Be mindful of the dip you choose—it might contain dairy or nuts depending on the recipe.
Eating healthy doesn’t have to be boring, and this platter proves it! You’re serving up smiles and good-for-you snacks all in one creepy, creative dish.
Conclusion
If you’re looking for a fun, festive, and healthy centerpiece for your Halloween party, this Spooky Skeleton Veggie Platter is the recipe for you. It’s easy to make, totally customizable, and a guaranteed hit with guests of all ages. Personally, I love how it combines creativity with wholesome ingredients—it’s food and decoration rolled into one!
Now it’s your turn to bring this spooky skeleton to life! Don’t forget to share your version with friends and family. I’d love to hear how you adapted it—leave a comment below and let me know which veggies or dips you chose. Happy Halloween and happy snacking!
So, what are you waiting for? Grab your favorite veggies, start slicing, and let the Halloween fun begin!
FAQs
Can I make this skeleton platter in advance?
Yes! You can prep the veggies and store them in separate containers in the fridge a day before. Assemble the skeleton right before serving for the best presentation.
What dip works best for this platter?
Ranch dressing is a classic option, but hummus, guacamole, or even a spicy chipotle dip would work great too.
What are some kid-friendly vegetable options?
Kids usually love carrots, cherry tomatoes, and cucumber slices. You can also try sugar snap peas or sweet bell peppers for a mild crunch.
Can I make this platter vegan?
Absolutely! Just swap out the ranch dressing for a dairy-free dip like hummus or avocado dip. All the veggies are already vegan-friendly.
What’s the best way to store leftovers?
Store leftover veggies in an airtight container in the refrigerator for up to 3 days. Keep the dip separate to maintain freshness.
Pin This Recipe!
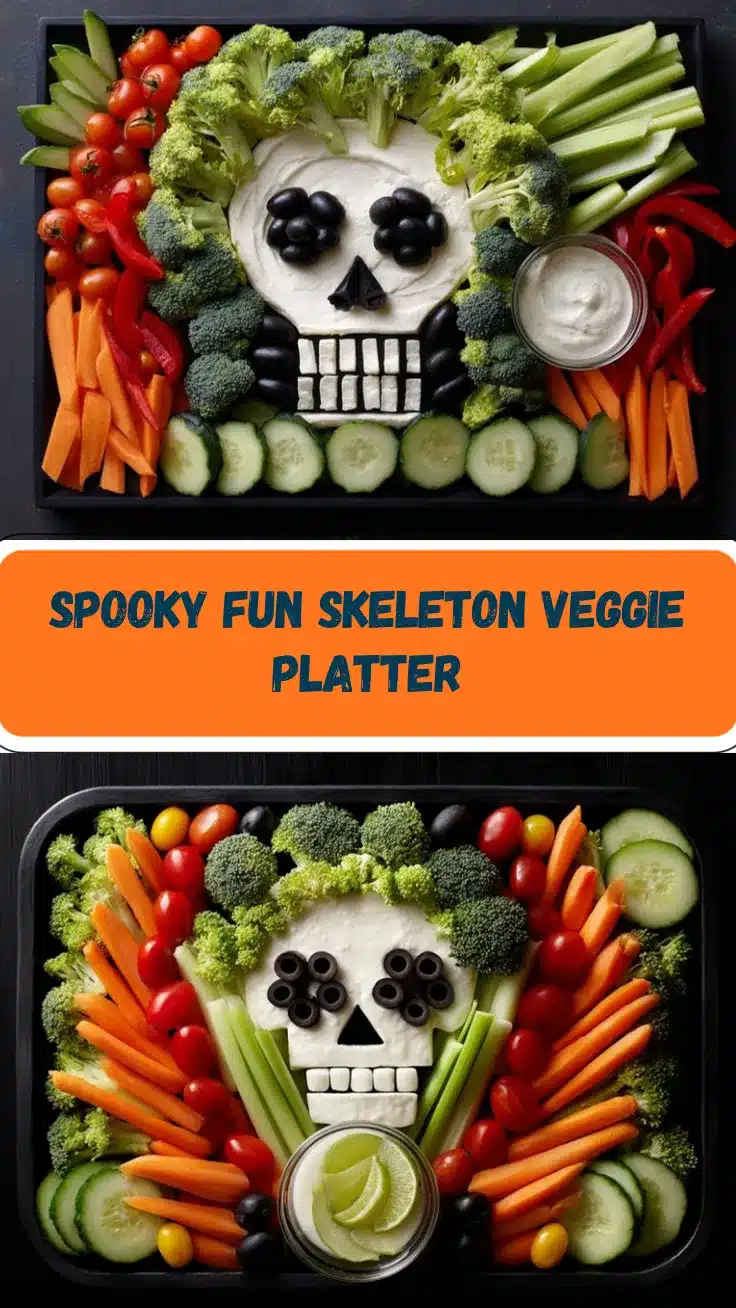
Spooky Skeleton Veggie Platter Recipe for Perfect Halloween Party
A fun and festive centerpiece for your Halloween party, this Spooky Skeleton Veggie Platter is packed with fresh vegetables and is a healthier alternative to candy-filled treats.
- Prep Time: 20 minutes
- Cook Time: 0 minutes
- Total Time: 20 minutes
- Yield: 6 servings
- Category: Appetizer
- Cuisine: American
Ingredients
- Red, yellow, and orange bell peppers (sliced into strips)
- Baby carrots
- Cucumber (sliced into rounds)
- Celery (cut into sticks)
- Cherry tomatoes
- Cauliflower florets
- Broccoli florets
- Black olives (sliced or whole)
- Ranch dressing or hummus
Instructions
- Wash and dry all vegetables thoroughly.
- Slice bell peppers into thin strips, cut carrots and celery into sticks, and slice cucumbers into rounds. Separate cauliflower and broccoli into bite-sized florets.
- Place the cauliflower florets at the top of the platter to form the skull. Use black olive slices to create the eyes and nose.
- Arrange cucumber slices in a straight line below the skull to form the spine.
- Lay celery sticks on either side of the spine like ribs, alternating directions for a realistic touch.
- Use baby carrots for the limbs, and add cherry tomatoes as joints—knees, elbows, and shoulders.
- Use broccoli florets to fill in spaces around the skeleton, creating a “background” of greenery.
- Place a small bowl of ranch dressing or hummus near the skeleton’s head to mimic a spooky touch like “brain goo.”
- Adjust the placement of veggies to make the skeleton pop. Add extra olives or small veggie pieces for added flair.
- Cover the platter with plastic wrap and refrigerate until ready to serve.
Notes
Use fresh, crisp veggies for the best taste and appearance. Dry vegetables thoroughly to avoid mess. Assemble the platter just before serving for maximum freshness.
Nutrition
- Serving Size: 1 platter per 6 people
- Calories: 50
- Sugar: 3
- Sodium: 150
- Fat: 2
- Saturated Fat: 0.5
- Carbohydrates: 6
- Fiber: 2
- Protein: 1
Keywords: Halloween, Veggie Platter, Healthy Snack, Party Food, Kid-Friendly, Vegetarian, Gluten-Free