Introduction
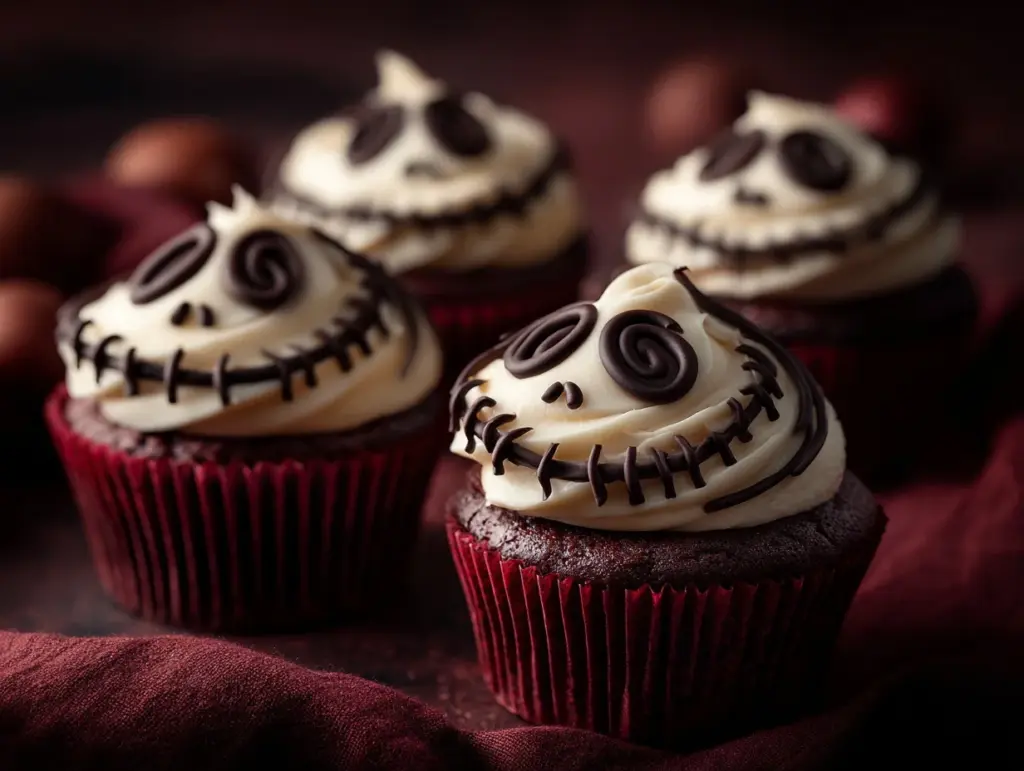
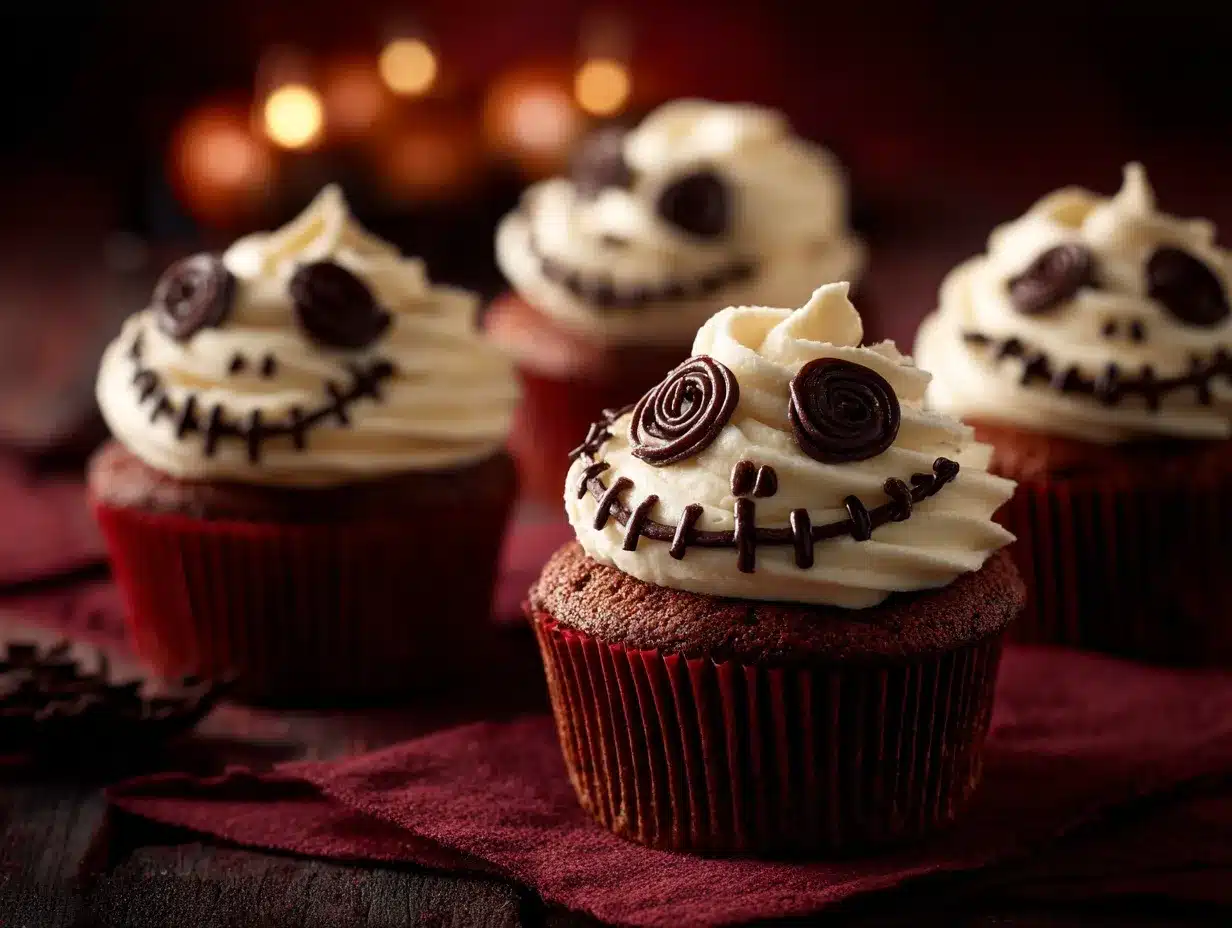
The eerie glow of jack-o’-lanterns, the rustle of autumn leaves, and the thrill of dressing up in spooky costumes—Halloween is undeniably one of the most magical times of the year. But what’s a Halloween celebration without some spine-chilling treats to match the mood? Enter my Spooky Skull Cupcakes recipe. These cupcakes aren’t just a feast for the taste buds; they’re a visual delight that will steal the show at any Halloween party.
When I first made these spooky skull cupcakes, it was for a neighborhood Halloween gathering. Watching friends and family marvel at the creepy-cute decorations and then swoon over the moist, chocolatey goodness hidden beneath was priceless. Whether you’re hosting a party, attending a festive potluck, or just looking for a fun baking activity with the kids, these cupcakes are a must-have Halloween treat. And trust me—they’re easier to make than they look!
With a rich chocolate base and buttercream frosting that’s easy to pipe into spooky skull designs, this recipe is perfect for bakers of all skill levels. Grab your apron, turn up the Halloween tunes, and let’s bake some magic. These skull cupcakes are about to become your new holiday tradition!
Why You’ll Love This Recipe
- Perfect for Halloween: These spooky skull cupcakes will be the centerpiece of your Halloween party. They’re festive, fun, and guaranteed to get compliments.
- Easy to Make: Don’t let the intricate designs fool you—this recipe is beginner-friendly, with simple steps and minimal fuss.
- Rich and Delicious: The chocolate base is moist, decadent, and full of flavor, while the buttercream frosting adds a creamy sweetness.
- Customizable Decorations: Whether you want scary skulls or cute ones, you can get creative with the details and colors.
- Great for Kids: Little ones will love helping you decorate these spooky treats—and eating them, too!
- Impress Your Guests: These cupcakes are not only delicious but also Instagram-worthy. They’re bound to be a hit at any Halloween event.
What makes this recipe unique is the combination of rich flavor and playful design. The chocolate cupcakes are the perfect canvas for your Halloween creativity, and the buttercream frosting is smooth and easy to pipe. Plus, you don’t need fancy tools to get spooky results—just a little imagination and some basic kitchen supplies. Let’s make these skull cupcakes the star of your Halloween spread!
What Ingredients You Will Need
This recipe uses simple, pantry-friendly ingredients to create cupcakes that are as delicious as they are fun to decorate. Here’s what you’ll need:
- For the Cupcakes:
- 1 cup (130g) all-purpose flour
- 1/4 cup (25g) unsweetened cocoa powder
- 1 tsp baking powder
- 1/2 tsp baking soda
- 1/4 tsp salt
- 1/2 cup (100g) granulated sugar
- 1/2 cup (100g) packed brown sugar
- 1/3 cup (80ml) vegetable oil
- 2 large eggs, room temperature
- 1/2 cup (120ml) buttermilk, room temperature
- 1 tsp vanilla extract
- For the Buttercream Frosting:
- 1 cup (230g) unsalted butter, softened
- 4 cups (500g) powdered sugar
- 2-3 tbsp heavy cream
- 1 tsp vanilla extract
- Black food coloring
- White food coloring
- For Decoration:
- Gel food coloring (optional)
- Small piping bags with round tips
- Sprinkles or edible glitter (optional)
Feel free to swap out the all-purpose flour for a gluten-free alternative if needed, or use coconut sugar instead of granulated sugar for a slightly healthier option. The buttercream can be made dairy-free by substituting with vegan butter and coconut milk.
Equipment Needed
- Muffin tin
- Paper cupcake liners
- Mixing bowls
- Whisk or electric mixer
- Spatula
- Piping bags with round tips
- Cooling rack
If you don’t have piping bags, you can use a zip-top bag with a small corner snipped off—it works in a pinch! A hand whisk is fine for mixing if you don’t have an electric mixer, though it’ll take a bit more elbow grease for the frosting.
Preparation Method
- Preheat your oven to 350°F (175°C). Line a muffin tin with cupcake liners.
- In a large mixing bowl, whisk together the flour, cocoa powder, baking powder, baking soda, and salt.
- In a separate bowl, combine the granulated sugar, brown sugar, vegetable oil, eggs, buttermilk, and vanilla extract. Whisk until smooth.
- Gradually add the dry ingredients to the wet ingredients, mixing gently until just combined. Do not overmix!
- Divide the batter evenly among the cupcake liners, filling each about 2/3 full.
- Bake for 18-22 minutes, or until a toothpick inserted into the center comes out clean. Let the cupcakes cool completely on a wire rack.
- While the cupcakes cool, make the buttercream frosting. Beat the softened butter until creamy and smooth. Gradually add powdered sugar, one cup at a time, mixing well after each addition.
- Add heavy cream and vanilla extract, beating until the frosting is fluffy. Divide the frosting into two bowls—add black food coloring to one and white to the other. Mix until the colors are evenly blended.
- Fill piping bags with the colored frosting. Use the white frosting to create skull shapes on top of each cupcake. Then use the black frosting to add details like eyes, nose, and teeth.
- Optional: Add sprinkles or edible glitter to give your spooky skull cupcakes a magical finish!
Cooking Tips & Techniques
- Don’t overmix the batter—this can make the cupcakes dense. Mix until the ingredients are just combined.
- If you don’t have buttermilk, you can make a quick substitute by mixing 1/2 cup of milk with 1/2 tablespoon of white vinegar or lemon juice. Let it sit for 5 minutes before using.
- Let the cupcakes cool completely before frosting; otherwise, the warm cupcakes will melt the buttercream.
- For easier piping, chill the buttercream frosting for 15-20 minutes before decorating.
- Use a toothpick to gently outline the skull design on the cupcakes before piping—it’ll help guide your designs.
Variations & Adaptations
- Dietary Adaptations: Make these cupcakes gluten-free by using a 1:1 gluten-free flour blend. For a dairy-free version, substitute buttermilk with almond milk mixed with a teaspoon of lemon juice, and use vegan butter for the frosting.
- Seasonal Twists: Add pumpkin spice to the cupcake batter for a fall twist, or use orange food coloring in the buttercream for a Halloween-inspired look.
- Flavor Variations: Swap the cocoa powder for pumpkin puree to create pumpkin skull cupcakes. You can also try adding a pinch of cinnamon to the frosting for a warm, spicy note.
- Different Decorating Ideas: Experiment with adding candy eyes, mini marshmallows for teeth, or even edible paint for intricate designs on the skulls.
Serving & Storage Suggestions
These spooky skull cupcakes are best served at room temperature to enjoy the soft texture of the frosting and the moist cake. Arrange them on a Halloween-themed platter for a festive presentation, and pair them with a warm apple cider or hot chocolate for cozy autumn vibes.
Store any leftovers in an airtight container in the refrigerator for up to 5 days. Before serving, let them come to room temperature so the frosting softens up again. You can also freeze unfrosted cupcakes for up to 3 months—just wrap them tightly in plastic wrap and place them in a freezer-safe bag.
Nutritional Information & Benefits
Each cupcake contains approximately 250 calories, 10g of fat, 36g of carbohydrates, and 2g of protein. The cocoa powder adds a dose of antioxidants, while the buttercream frosting gives a satisfying sweetness that’s perfect for special occasions.
The recipe is vegetarian-friendly and can be adapted for gluten-free or dairy-free needs with simple substitutions. If you’re watching your sugar intake, you could try a lower-sugar alternative for the frosting.
Conclusion
If you’re planning a Halloween party or just want to add a little spooky flair to your baking, these spooky skull cupcakes are the perfect choice. They’re fun to decorate, delicious to eat, and bound to impress anyone who sees them.
I love how this recipe allows for creativity—you can make each skull unique and add your personal touch with decorations. Plus, the rich chocolate base and creamy buttercream frosting are a match made in heaven.
Give these spooky skull cupcakes a try, and don’t forget to share your creations with me! I’d love to hear how you customized them. Tag me on social media or drop a comment below. Let’s make this Halloween the most fun (and delicious) one yet!
FAQs
Can I make these cupcakes ahead of time?
Yes! You can bake the cupcakes a day or two in advance and store them in an airtight container at room temperature. Decorate them the day of your event for the freshest look.
What if I don’t have piping bags?
No worries! You can use a zip-top bag with a small corner cut off as a DIY piping bag. It works just as well for simple designs.
Can I use store-bought frosting?
Absolutely! While homemade buttercream gives the best flavor and texture, store-bought frosting can save time. Just divide and add food coloring as needed.
How can I make these cupcakes healthier?
You can use whole wheat pastry flour instead of all-purpose flour and swap out half of the sugar for a natural sweetener like honey or coconut sugar. Keep in mind, this could slightly alter the texture.
How do I transport decorated cupcakes?
Use a cupcake carrier or place them in a sturdy box with dividers to keep them from shifting. If you don’t have a carrier, you can use a flat baking tray and cover it with foil or plastic wrap.
Pin This Recipe!