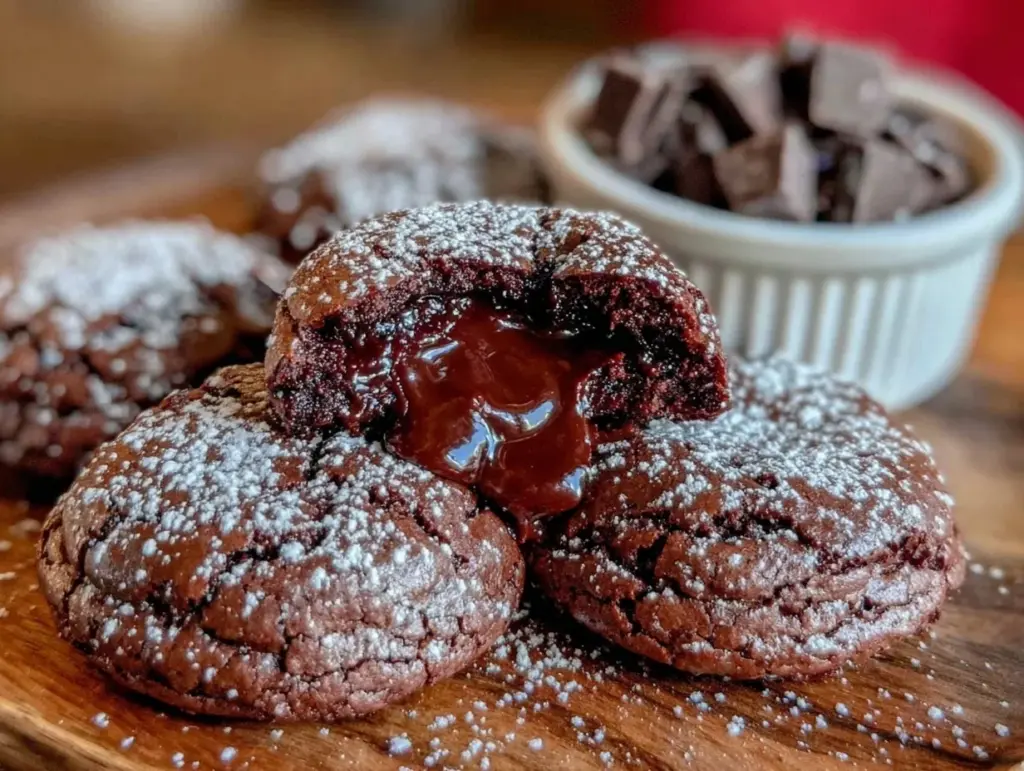
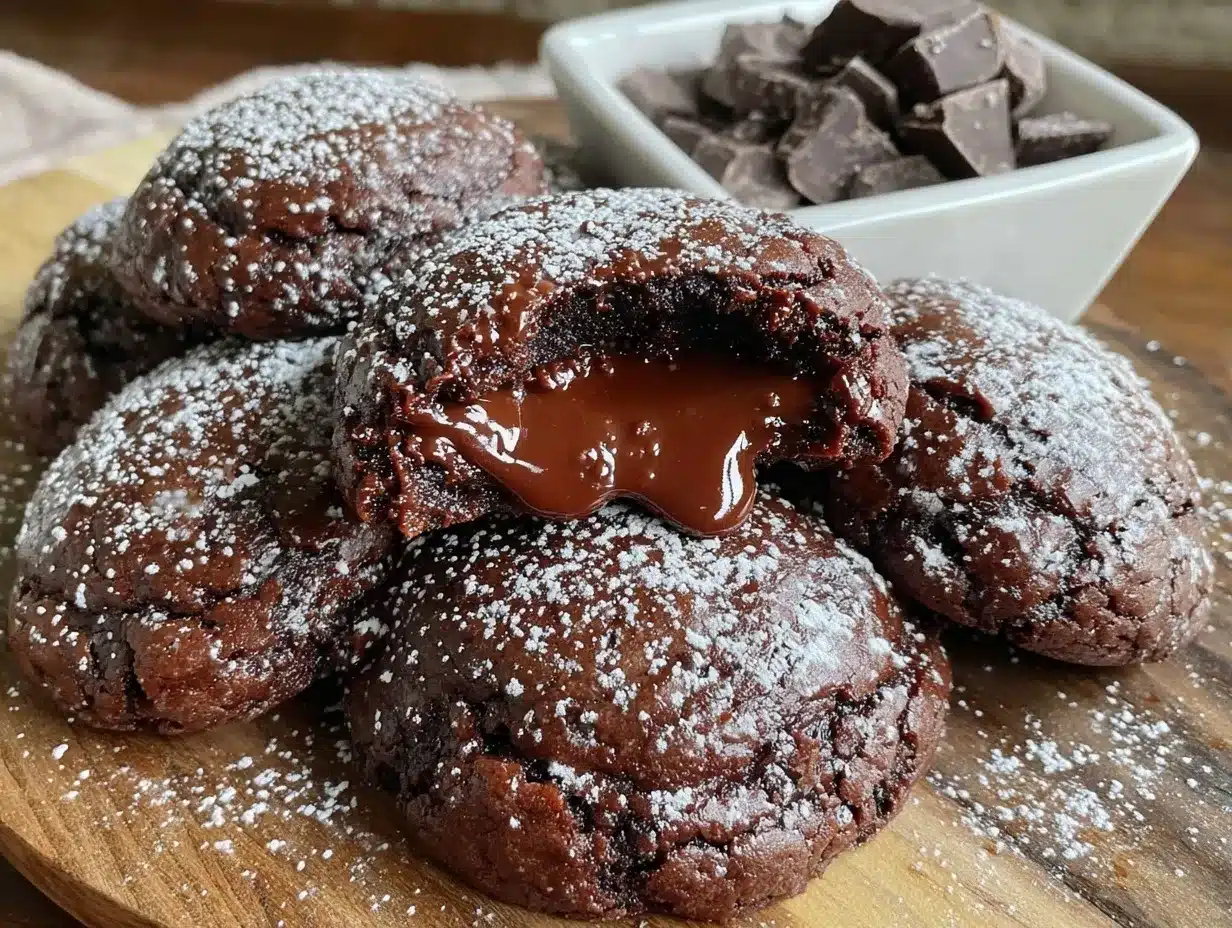
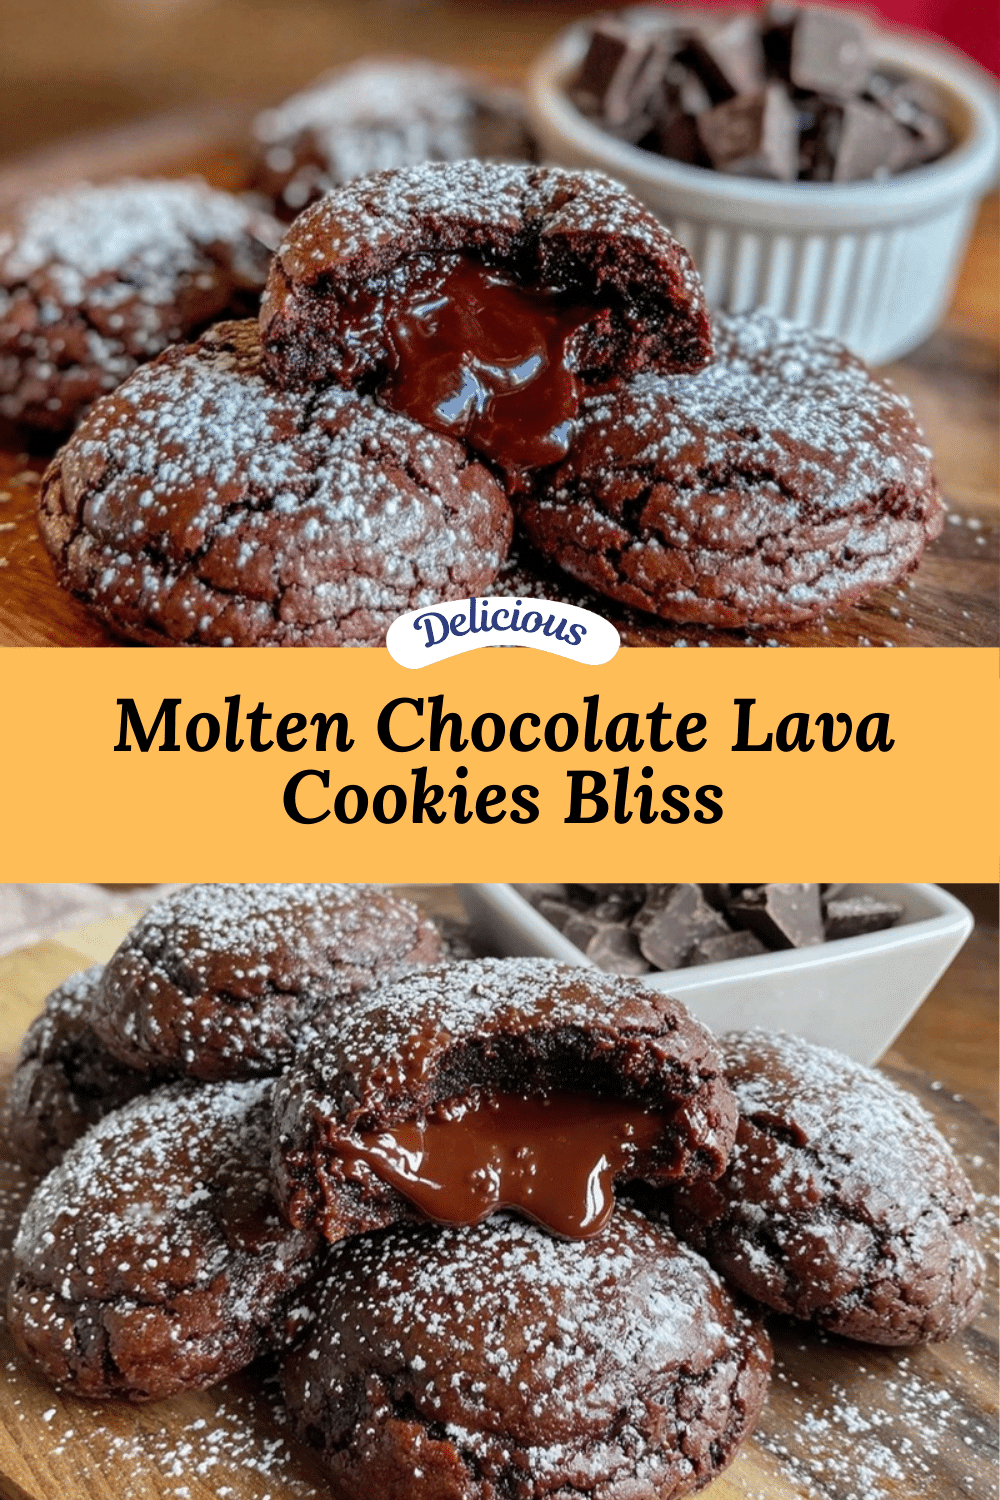
The moment you break into a warm chocolate cookie and the gooey molten center oozes out—it’s pure magic. Honestly, there’s something about these ultimate chocolate lava cookies that just hits the spot every time. I first stumbled upon this recipe on a chilly evening when I craved something rich, comforting, and a little indulgent without the fuss of baking a whole cake. After baking these molten dessert treats over and over, tweaking the chocolate ratio and baking time, I can confidently say this recipe is a keeper.
These chocolate lava cookies are like the perfect blend of a soft cookie and a molten lava cake, all rolled into one bite-sized delight. They’re ideal for anyone who loves their desserts warm and melty, and honestly, who doesn’t? Whether you’re looking to impress guests, treat yourself after a long day, or need a quick dessert fix, these cookies won’t disappoint.
What makes this recipe stand out is not only the rich, dark chocolate flavor but also the simplicity of ingredients and the quick bake time. I’ve tested this recipe multiple times, adjusting the baking time to nail that perfect molten center every single time. If you’re a molten dessert lover, I promise this ultimate chocolate lava cookies recipe will quickly become your go-to indulgence.
Why You’ll Love This Recipe
- Quick & Easy: These cookies come together in about 30 minutes, perfect for satisfying last-minute chocolate cravings.
- Simple Ingredients: No need for fancy or hard-to-find items—just common pantry staples and quality chocolate.
- Perfect for Any Occasion: Whether it’s a cozy night in, a dinner party, or a holiday treat, these cookies fit the bill.
- Crowd-Pleaser: Kids, adults, chocoholics—everyone loves the molten surprise inside.
- Unbelievably Delicious: The contrast of a slightly crisp cookie shell with the rich, gooey chocolate center hits every comfort note.
What sets this recipe apart is the little trick of chilling the dough before baking, which keeps the cookies from spreading too much and helps lock in that molten core. Plus, I use a combo of semi-sweet and bittersweet chocolate chunks for a depth of flavor that’s not too sweet but wonderfully rich. This recipe isn’t just another cookie—it’s a molten dessert experience that leaves you closing your eyes after that first bite. And hey, it’s a dessert that’s easy enough to whip up midweek without any stress.
What Ingredients You Will Need
This ultimate chocolate lava cookies recipe calls for straightforward ingredients that work together to create that perfect gooey texture and rich chocolate flavor. Most of these are probably already in your pantry, which makes it even better.
- Unsalted butter, 1/2 cup (113g), softened (adds richness and a tender crumb)
- Granulated sugar, 1/2 cup (100g) (balances the bitterness of the chocolate)
- Brown sugar, 1/4 cup (50g), packed (adds moisture and a slight caramel note)
- Large egg, 1, room temperature (binds ingredients and adds moisture)
- Pure vanilla extract, 1 teaspoon (enhances flavor depth)
- All-purpose flour, 3/4 cup (95g) (provides structure)
- Cocoa powder, 1/4 cup (25g), unsweetened (for intense chocolate flavor)
- Baking powder, 1/2 teaspoon (helps with slight rise and texture)
- Salt, 1/4 teaspoon (balances sweetness and enhances flavor)
- Chocolate chunks or chips, 1 cup (175g) (I recommend using a mix of semi-sweet and bittersweet chocolate for a complex flavor)
- Optional: Sea salt flakes for sprinkling (adds a nice contrast and crunch)
If you want to make these cookies dairy-free, you can swap the butter for a plant-based alternative and use dairy-free chocolate chunks. For gluten-free options, almond or oat flour can work, but the texture will be a bit different—still delicious though! One tip: Using good quality chocolate really makes a difference, so I often go for brands like Ghirardelli or Valrhona for that smooth melt and rich flavor.
Equipment Needed
- Mixing bowls – one large for the dough and a smaller one for dry ingredients
- Electric mixer or sturdy whisk – for creaming the butter and sugars
- Measuring cups and spoons – for accurate ingredient amounts
- Rubber spatula – handy for folding in dry ingredients and chocolate chunks
- Baking sheet – lined with parchment paper or a silicone mat to prevent sticking
- Cooling rack – to let cookies cool evenly and avoid sogginess
- Optional: Cookie scoop – helps portion dough evenly and makes the process quicker
I usually use a silicone baking mat because it’s reusable and helps the cookies bake evenly without sticking. If you don’t have one, parchment paper works just fine. And while some folks swear by wooden spoons, an electric mixer definitely speeds things up and gives a better texture when creaming the butter and sugars. Don’t forget a good cooling rack – letting cookies cool properly is key to keeping that perfect molten center intact.
Preparation Method
- Preheat your oven to 350°F (175°C). Line a baking sheet with parchment paper or a silicone baking mat. This will keep the cookies from sticking and help them bake evenly.
- Cream the butter and sugars: In a large bowl, beat 1/2 cup softened unsalted butter, 1/2 cup granulated sugar, and 1/4 cup packed brown sugar together using an electric mixer or whisk. This should take about 2-3 minutes until it’s light and fluffy.
- Add the egg and vanilla: Crack in one large room temperature egg and pour in 1 teaspoon pure vanilla extract. Beat again until fully combined, about 1 minute.
- Combine dry ingredients: In a separate bowl, sift together 3/4 cup all-purpose flour, 1/4 cup unsweetened cocoa powder, 1/2 teaspoon baking powder, and 1/4 teaspoon salt. This helps avoid lumps and evenly distributes the rising agent.
- Fold dry ingredients into wet: Gradually add the flour mixture to the butter mixture, folding gently with a rubber spatula. Be careful not to overmix—stop once just combined to keep the cookies tender.
- Stir in chocolate chunks: Fold in 1 cup of your chosen chocolate chunks or chips. The chunks create those molten pockets that make these cookies special.
- Chill the dough: Cover the bowl with plastic wrap and refrigerate the dough for at least 30 minutes. This step is crucial; chilling firms up the dough and prevents it from spreading too much during baking, keeping the molten center intact.
- Shape the cookies: Using a cookie scoop or spoon, portion out dough balls about 2 tablespoons (30g) each. Place them 2 inches apart on your prepared baking sheet.
- Bake: Place the baking sheet in the preheated oven and bake for 10-12 minutes. The edges should be set but the centers will still look soft and slightly underbaked. This is key for that molten center.
- Cool briefly: Let the cookies rest on the baking sheet for 5 minutes before transferring to a cooling rack. This helps them firm up just enough without losing the gooey middle.
- Optional finishing touch: Sprinkle a pinch of sea salt flakes on top while the cookies are still warm to add a delightful contrast.
One tip I learned the hard way is not to overbake these cookies! It’s tempting to leave them in longer when they look underdone, but that’s exactly how you keep the molten center. Also, chilling the dough is a game changer—it’s worth the wait. If you don’t chill, the cookies tend to spread too thin and lose that lava effect.
Cooking Tips & Techniques
Timing is everything when it comes to these ultimate chocolate lava cookies. The goal is to have a cookie with a slightly crisp edge but a molten, gooey center. I usually set a timer for 10 minutes and start checking at that point. If the centers jiggle a little when you shake the pan gently, you’re on the right track.
One common mistake is using cold eggs or butter straight from the fridge, which can make the dough harder to mix and affect the texture. I always bring my eggs and butter to room temperature before starting.
When mixing, don’t overwork the dough once you add the flour—that can lead to tough cookies. Folding gently preserves that soft crumb. And remember, the type of chocolate matters! High-quality chocolate chunks melt better and taste richer, giving you that dreamy molten center.
If you’re in a hurry, you can skip the chilling step, but expect the cookies to spread more and the centers to be less gooey. I’ve tried baking them on both parchment paper and silicone mats; both work well, but silicone prevents sticking without extra grease.
Multitasking tip: While the dough chills, you can prep your coffee or whip up a quick fruit salad to serve alongside. It’s all about timing so you’re ready to enjoy these cookies fresh out of the oven!
Variations & Adaptations
- Peanut Butter Chocolate Lava Cookies: Add 1/4 cup creamy peanut butter to the butter mixture for a nutty twist that pairs wonderfully with the molten chocolate.
- Vegan Version: Replace butter with coconut oil and the egg with a flax egg (1 tablespoon flaxseed meal + 3 tablespoons water). Use dairy-free chocolate chunks for a fully vegan treat.
- Spicy Mocha Lava Cookies: Stir in 1 teaspoon instant espresso powder and a pinch of cayenne pepper to the dry ingredients for a subtle kick and coffee undertone.
You can also experiment with baking methods. For instance, baking these cookies in a convection oven often reduces baking time by a minute or two, so keep a close eye. If you want a softer cookie, take them out right at the 10-minute mark; for a firmer edge with molten center, go up to 12 minutes.
For a gluten-free option, swapping all-purpose flour for a gluten-free blend works fine but expect a slightly different texture. I once tried adding chopped nuts on top before baking for extra crunch—totally delicious and adds a nice contrast to the soft interior.
Serving & Storage Suggestions
These ultimate chocolate lava cookies are best served warm, right out of the oven, when the center is still molten and irresistible. If you want to get fancy, a scoop of vanilla ice cream or a dollop of whipped cream on the side takes them to the next level. A drizzle of raspberry sauce or fresh berries adds a nice tart balance to the rich chocolate.
To store, keep the cookies in an airtight container at room temperature for up to 3 days. If you want to keep them longer, freezing is your friend. Freeze baked cookies in a single layer on a tray, then transfer them to a freezer-safe container. When ready to enjoy, warm them in the oven at 300°F (150°C) for about 5 minutes to revive that molten center.
Leftover dough can also be frozen. Just scoop balls onto a baking sheet, freeze until solid, then store in a freezer bag. Bake straight from frozen—add a minute or two to the baking time.
One thing I love is that the flavors actually deepen a bit after a day or two, so if you can resist, letting them rest overnight wrapped tightly can result in an even richer chocolate experience.
Nutritional Information & Benefits
Each chocolate lava cookie contains roughly 180-220 calories depending on size and ingredients, with about 10-12 grams of fat and 20-25 grams of carbohydrates. Using high-quality dark chocolate adds antioxidants, which contribute to heart health in moderation.
These cookies are not just a comfort dessert—they also provide a quick energy boost thanks to the sugars and fats. If you swap regular butter for a plant-based version or use gluten-free flour, you can tailor them to fit different dietary needs.
Keep in mind, these are treats best enjoyed in moderation, but the joy and satisfaction they bring often outweigh the indulgence. For me, baking these molten dessert treats is a rewarding ritual that feeds both body and soul.
Conclusion
If you’re after a dessert that’s easy to make, packed with rich chocolate flavor, and has that dreamy molten center, this ultimate chocolate lava cookies recipe is for you. It’s a recipe I keep coming back to when I want something that feels special but doesn’t require hours in the kitchen.
Feel free to tweak the chocolate types, add your favorite mix-ins, or try the variations I shared. It’s a versatile recipe that welcomes your personal touch. Honestly, I love how these cookies bring a little joy and warmth to any day.
Give it a try, and don’t forget to share your thoughts or any creative spins you put on the recipe. Happy baking—and enjoy every molten bite!
FAQs
How do I get the perfect molten center in chocolate lava cookies?
Chilling the dough before baking and baking just until the edges are set but the center looks slightly underbaked is key. Usually, 10-12 minutes at 350°F (175°C) works well.
Can I make these cookies ahead of time?
Yes! You can prepare the dough and refrigerate it for up to 2 days or freeze it for longer storage. Bake fresh for the best molten effect.
What type of chocolate is best for lava cookies?
A mix of semi-sweet and bittersweet chocolate chunks offers the best balance of sweetness and rich flavor. Avoid low-quality chocolate as it may not melt smoothly.
Can I make these cookies gluten-free or vegan?
Absolutely. Use a gluten-free flour blend to replace all-purpose flour, and swap butter and eggs with plant-based alternatives like coconut oil and flax eggs for a vegan version.
How should I store leftover cookies?
Store cooled cookies in an airtight container at room temperature for up to 3 days or freeze them for longer. Reheat gently in the oven to bring back the molten center.
Pin This Recipe!
Ultimate Chocolate Lava Cookies
These ultimate chocolate lava cookies combine a soft cookie exterior with a gooey molten chocolate center, perfect for a quick and indulgent dessert treat.
- Prep Time: 10 minutes
- Cook Time: 12 minutes
- Total Time: 42 minutes
- Yield: 12 servings 1x
- Category: Dessert
- Cuisine: American
Ingredients
- 1/2 cup (113g) unsalted butter, softened
- 1/2 cup (100g) granulated sugar
- 1/4 cup (50g) packed brown sugar
- 1 large egg, room temperature
- 1 teaspoon pure vanilla extract
- 3/4 cup (95g) all-purpose flour
- 1/4 cup (25g) unsweetened cocoa powder
- 1/2 teaspoon baking powder
- 1/4 teaspoon salt
- 1 cup (175g) chocolate chunks or chips (mix of semi-sweet and bittersweet recommended)
- Optional: sea salt flakes for sprinkling
Instructions
- Preheat your oven to 350°F (175°C). Line a baking sheet with parchment paper or a silicone baking mat.
- In a large bowl, beat 1/2 cup softened unsalted butter, 1/2 cup granulated sugar, and 1/4 cup packed brown sugar together using an electric mixer or whisk until light and fluffy, about 2-3 minutes.
- Add 1 large room temperature egg and 1 teaspoon pure vanilla extract. Beat until fully combined, about 1 minute.
- In a separate bowl, sift together 3/4 cup all-purpose flour, 1/4 cup unsweetened cocoa powder, 1/2 teaspoon baking powder, and 1/4 teaspoon salt.
- Gradually fold the dry ingredients into the butter mixture gently with a rubber spatula until just combined.
- Fold in 1 cup chocolate chunks or chips.
- Cover the dough with plastic wrap and refrigerate for at least 30 minutes.
- Using a cookie scoop or spoon, portion dough balls about 2 tablespoons (30g) each and place them 2 inches apart on the prepared baking sheet.
- Bake for 10-12 minutes until edges are set but centers look soft and slightly underbaked.
- Let cookies rest on the baking sheet for 5 minutes before transferring to a cooling rack.
- Optional: Sprinkle sea salt flakes on top while cookies are still warm.
Notes
Chilling the dough before baking is crucial to prevent spreading and maintain the molten center. Do not overbake; the centers should look slightly underbaked for the perfect gooey texture. Use high-quality chocolate chunks for best flavor and melt.
Nutrition
- Serving Size: 1 cookie
- Calories: 200
- Sugar: 15
- Sodium: 110
- Fat: 12
- Saturated Fat: 7
- Carbohydrates: 23
- Fiber: 2
- Protein: 3
Keywords: chocolate lava cookies, molten chocolate cookies, easy chocolate dessert, molten center cookies, chocolate cookie recipe