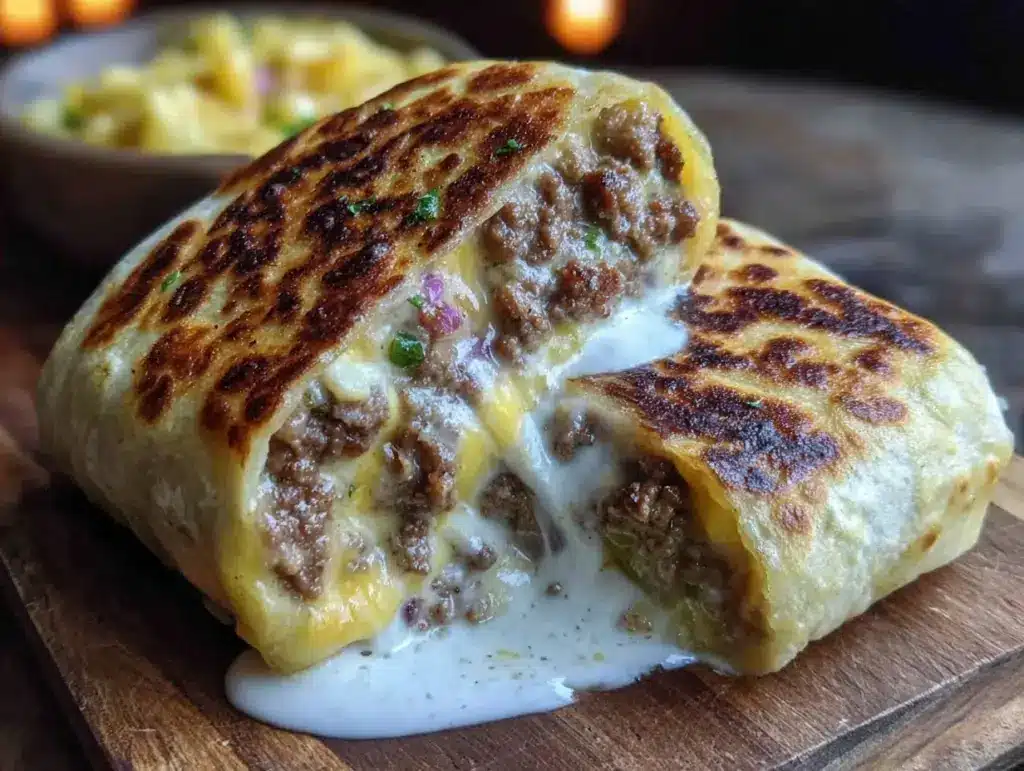
The sizzle of butter hitting a hot pan, the melty stretch of cheese wrapped in a warm, toasty tortilla—honestly, that’s the kind of comfort food moment I crave after a long day. I stumbled upon this quick easy grilled cheese burrito copycat recipe for dinner one evening when I was too tired to fuss over complicated meals but still wanted something cozy and satisfying. It reminded me of those fun late-night cravings we all get, but with a homemade twist that beats takeout any day.
What I love about this quick easy grilled cheese burrito is how it combines the gooey goodness of a grilled cheese with the handheld convenience of a burrito. It’s like two comfort foods had a delicious baby! I’ve made this recipe more times than I can count, tweaking the cheese blend and adding little extras here and there to make it just right. If you’re looking for a dinner idea that’s fast, fuss-free, and absolutely delicious, this grilled cheese burrito is going to be your new go-to.
Whether you’re cooking for one, feeding the kids on a busy weeknight, or just want something warm and cheesy without the wait, this recipe fits the bill perfectly. Plus, it’s a fun way to shake up the usual grilled cheese routine. I’m excited to share all my tips and tricks with you so you can nail this recipe every time.
Why You’ll Love This Recipe
After testing this quick easy grilled cheese burrito recipe multiple times, I can say it’s a total winner for many reasons. Here’s why it’s become a favorite in my kitchen:
- Quick & Easy: Ready in under 10 minutes, making it perfect for those evenings when time is tight but hunger is fierce.
- Simple Ingredients: No need for fancy stuff—just basic pantry staples and your favorite cheese.
- Perfect for Dinner or a Snack: Whether it’s a cozy dinner or a late-night bite, this recipe hits the spot every time.
- Crowd-Pleaser: Kids and adults both love the crispy, cheesy goodness wrapped up in a warm tortilla.
- Unbelievably Delicious: The crispy outside with melty cheese inside is just pure comfort food magic.
What sets this grilled cheese burrito apart? Honestly, it’s the balance between crispy and gooey, plus the little secret of adding a touch of seasoning to the cheese mix that gives it an extra flavor punch. And it’s not just another grilled cheese sandwich rolled up—it’s a creative spin that feels fresh but still classic.
This recipe is the kind that makes you pause after the first bite and smile because it’s so satisfying. It’s comfort food reimagined—fast, easy, and still soul-soothing. Plus, it’s a great way to impress your family or friends without any stress, turning a simple meal into something memorable and fun.
What Ingredients You Will Need
This quick easy grilled cheese burrito recipe keeps things straightforward with ingredients you probably already have on hand. Each one plays a role in creating the perfect combination of crispy, melty, and flavorful.
- Flour tortillas – Large size (10-inch works best) for easy wrapping and a nice crispy edge.
- Cheese blend – I recommend a mix of shredded sharp cheddar and Monterey Jack for gooey melt and great flavor. You can also use mozzarella for extra stretch.
- Butter – Unsalted, softened, for spreading on the outside of the tortilla to get that golden, crispy crust.
- Optional fillings: thinly sliced cooked chicken, crispy bacon bits, or sautéed veggies like bell peppers or onions (adds texture and flavor).
- Seasonings: A pinch of garlic powder and smoked paprika mixed into the cheese gives a subtle, smoky kick that really lifts the flavor.
- Sour cream or salsa – For dipping, though the burrito is perfectly tasty on its own.
If you want to switch things up, you can swap the flour tortilla for a gluten-free wrap or use a dairy-free cheese for dietary needs. I usually grab my cheese from [Brand] because it melts beautifully and tastes fresh. For the butter, a good quality unsalted version makes a difference in that crispy finish.
Feel free to get creative with add-ins—I’ve tried everything from jalapeños for heat to caramelized onions for sweetness, and they all work great. The beauty here is how adaptable this quick easy grilled cheese burrito recipe is.
Equipment Needed
- Non-stick skillet or cast-iron pan – A sturdy pan helps get that perfect even crisp without sticking.
- Spatula – For flipping the burritos carefully without losing that melty cheese inside.
- Cheese grater – If you’re shredding your own cheese, a medium-coarse grater works best.
- Optional: a sandwich press or panini maker can be used for quick, even grilling but is not necessary.
I usually stick with my trusty cast-iron skillet because it heats evenly and gives a great crust. If you don’t have one, a good-quality non-stick pan will do just fine. For budget-friendly options, basic non-stick pans from your local store work well—just be sure to keep the heat moderate to avoid burning the tortilla.
Also, keeping your spatula handy and flexible allows for easy flipping without tearing the tortilla. No fancy gadgets required here, which is part of what makes this recipe so accessible.
Preparation Method
- Prep your ingredients: Shred 1½ cups (about 170g) of your cheese blend and add a pinch each of garlic powder and smoked paprika. Mix well.
- Optional fillings: If using, warm up any add-ins like cooked chicken or sautéed veggies. Keep them handy.
- Assemble the burrito: Lay one large flour tortilla flat. Evenly spread the cheese mixture down the center, leaving about 2 inches free on each side.
- Add fillings: Place your optional fillings on top of the cheese (about ¼ cup, or 30g), then fold the sides in and roll tightly like a burrito. Don’t overstuff or it will be hard to seal.
- Butter the tortilla: Spread about 1 tablespoon (14g) of softened butter evenly on the outside of the rolled burrito for that golden crust.
- Cook: Heat your skillet over medium heat. Place the burrito seam side down first to seal it. Cook for about 2-3 minutes per side, pressing gently with your spatula, until all sides are golden brown and cheese is melted inside.
- Check doneness: The burrito should feel firm but not burnt. If it browns too fast, lower the heat and cook a bit longer.
- Serve: Remove from pan and let it rest for a minute before slicing in half. Serve with a dollop of sour cream or salsa on the side.
Pro tip: If your cheese isn’t melting fast enough, cover the pan briefly with a lid for a minute. This traps heat and helps the cheese get gooey without overcooking the tortilla.
This whole process takes about 8-10 minutes from start to finish, which is perfect for a quick dinner. I often make a batch and keep extras warm in a low oven when feeding a crowd.
Cooking Tips & Techniques
One key to perfecting this recipe is controlling the heat. Medium heat works best for getting crispy tortillas without burning. I’ve burned more than a few burritos by cranking the heat too high—lesson learned the hard way!
Another tip is to butter the tortilla generously but evenly. Not enough butter and it doesn’t crisp up; too much and it gets greasy. Spread it like you would for making classic grilled cheese.
Folding the burrito tightly is essential. If it’s loose, cheese and fillings can spill out while cooking. I find rolling it seam side down helps seal everything in place during cooking.
If you want a little extra flavor, sprinkle a tiny bit of chili powder or cumin into the cheese mix. It adds a subtle kick without overpowering the classic grilled cheese vibe.
When multitasking, start prepping your optional fillings first—like sautéing onions or warming chicken—while the skillet heats up. This way, everything comes together smoothly and fast.
Variations & Adaptations
This quick easy grilled cheese burrito recipe is like a canvas for creativity. Here are a few ways I’ve switched it up:
- Vegetarian: Swap out meat fillings for roasted mushrooms, spinach, or sun-dried tomatoes for a savory twist.
- Spicy: Add sliced jalapeños or a dash of hot sauce inside before rolling to fire up the flavor.
- Low-carb: Use a low-carb or keto-friendly tortilla and a blend of high-fat cheeses to keep it diet-friendly.
- Different cheeses: Try pepper jack for a spicy melt or smoked gouda for a deeper flavor.
- Cooking method: For a hands-off approach, try cooking the burrito in a sandwich press or air fryer for crispy, even results.
I remember one night when I tossed in some leftover shredded chicken and a handful of chopped cilantro—totally changed the vibe and made it feel like a Mexican street food snack. It’s fun to experiment!
Serving & Storage Suggestions
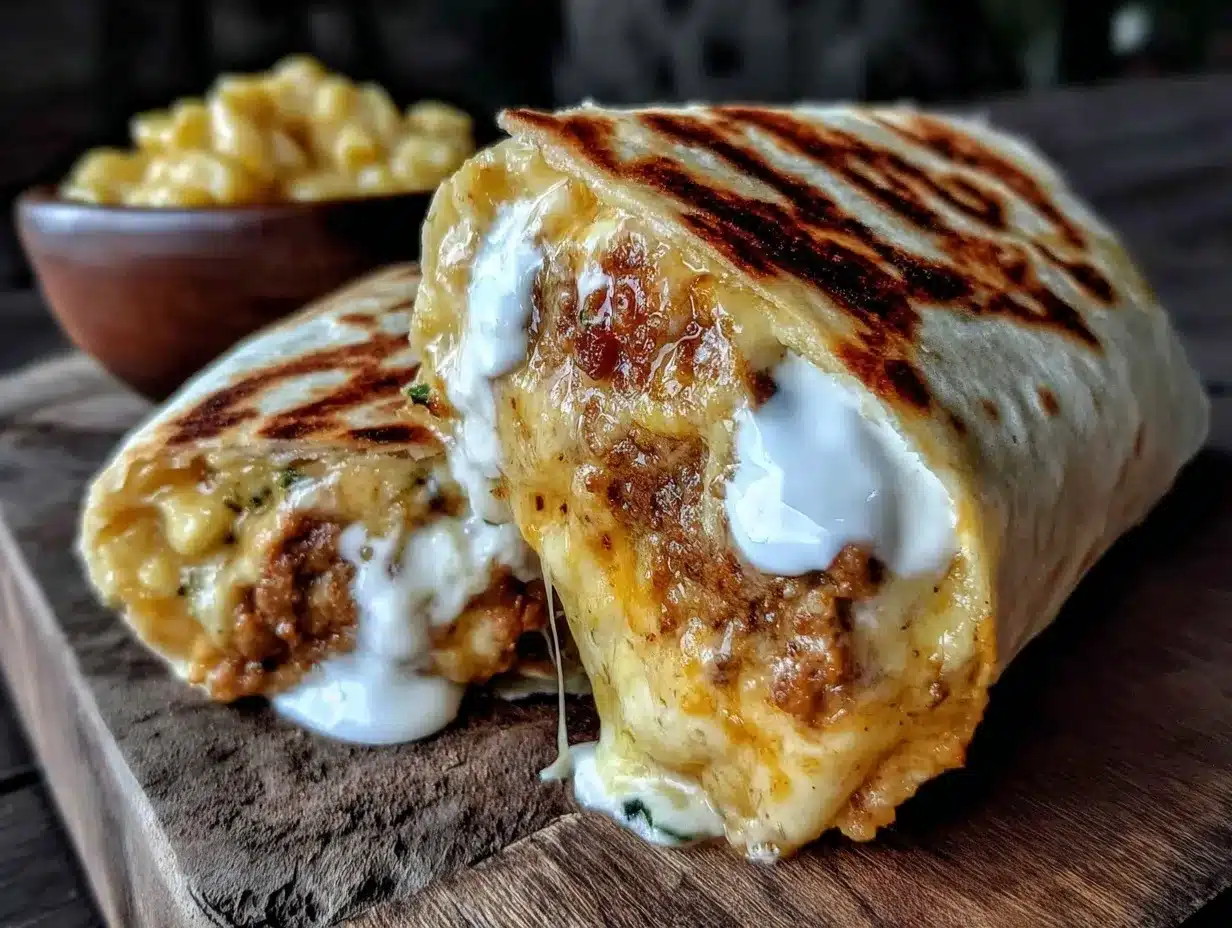
This grilled cheese burrito is best served hot and fresh for that crispy, melty experience. I usually slice mine diagonally for an inviting presentation and serve with sour cream or a fresh salsa.
Pairing it with a bowl of something cozy like the creamy tomato soup or loaded potato soup makes for an unbeatable comfort meal combo.
If you have leftovers, wrap them tightly in foil or plastic wrap and store in the fridge for up to 2 days. Reheat in a skillet over medium heat to bring back that crispy crust—microwaving tends to make the tortilla soggy.
Flavors actually deepen a bit after resting, so if you make these ahead, they still taste great reheated and make a perfect quick lunch.
Nutritional Information & Benefits
Here’s an estimate for one quick easy grilled cheese burrito made with a large flour tortilla and 1½ cups of cheese blend:
| Nutrient | Amount |
|---|---|
| Calories | 450-500 kcal |
| Protein | 20-25g |
| Fat | 30-35g |
| Carbohydrates | 30-35g |
| Calcium | Provides a good amount due to cheese content |
This recipe offers a solid protein boost from the cheese and optional fillings like chicken or bacon. The calcium content supports bone health, and the combination of carbs and fats gives you quick, lasting energy.
If you’re gluten-sensitive, just swap in gluten-free tortillas. For dairy-free options, use plant-based cheese and vegan butter alternatives. Just keep in mind that the texture may differ slightly.
Conclusion
This quick easy grilled cheese burrito recipe is my little secret for a comforting, fast dinner that never disappoints. It’s simple enough to whip up on a busy night but feels special enough to satisfy every craving for cheesy, crispy goodness.
Feel free to customize it with your favorite cheeses or fillings—this recipe is flexible and forgiving, so you can make it truly your own. I hope it becomes a staple in your kitchen as it is in mine, perfect for those moments when you want something warm, cheesy, and ready in a flash.
If you try it, I’d love to hear how you make it your own or what unexpected twist you added. Share your thoughts and variations below, and let’s keep the comfort food love going strong!
FAQs
Can I make the grilled cheese burrito ahead of time?
Yes! You can assemble them and keep wrapped in the fridge for a few hours before cooking. Just cook fresh when ready to eat for best crispiness.
What cheese works best for melting in this recipe?
A blend of sharp cheddar and Monterey Jack works beautifully for melt and flavor, but mozzarella or pepper jack are great alternatives.
Can I freeze these burritos?
You can freeze unbuttered, wrapped burritos. Thaw in the fridge overnight and cook as usual, adding butter to the outside before frying.
How do I prevent the tortilla from getting soggy?
Butter the outside evenly and cook over medium heat, flipping gently. Avoid overcrowding the pan to keep them crisp.
What can I serve with this grilled cheese burrito?
It pairs perfectly with warm soups like the creamy tomato soup or loaded potato soup for a hearty, comforting meal.
Pin This Recipe!
Quick Easy Grilled Cheese Burrito Recipe 5-Minute Dinner Idea

A fast and comforting grilled cheese burrito combining crispy tortillas with gooey melted cheese, perfect for a quick dinner or snack.
- Prep Time: 5 minutes
- Cook Time: 5 minutes
- Total Time: 10 minutes
- Yield: 1 serving 1x
- Category: Main Course
- Cuisine: American
Ingredients
- 1 large flour tortilla (10-inch)
- 1½ cups shredded cheese blend (sharp cheddar and Monterey Jack recommended, or mozzarella for extra stretch)
- 1 tablespoon unsalted butter, softened
- Optional fillings: ¼ cup thinly sliced cooked chicken, crispy bacon bits, or sautéed veggies like bell peppers or onions
- Pinch of garlic powder
- Pinch of smoked paprika
- Sour cream or salsa for dipping (optional)
Instructions
- Shred 1½ cups of your cheese blend and mix with a pinch each of garlic powder and smoked paprika.
- If using, warm up any optional fillings like cooked chicken or sautéed veggies.
- Lay one large flour tortilla flat and evenly spread the cheese mixture down the center, leaving about 2 inches free on each side.
- Add optional fillings on top of the cheese (about ¼ cup), then fold the sides in and roll tightly like a burrito.
- Spread about 1 tablespoon of softened butter evenly on the outside of the rolled burrito.
- Heat a skillet over medium heat and place the burrito seam side down to seal it.
- Cook for about 2-3 minutes per side, pressing gently with a spatula, until all sides are golden brown and cheese is melted inside.
- If cheese isn’t melting fast enough, cover the pan briefly with a lid for a minute.
- Remove from pan and let rest for a minute before slicing in half.
- Serve with sour cream or salsa on the side.
Notes
Control heat to medium to avoid burning the tortilla. Butter the tortilla evenly for a crispy crust. Roll burrito tightly and cook seam side down first to seal. Cover pan briefly if cheese melts slowly. Leftovers can be stored in the fridge for up to 2 days and reheated in a skillet to maintain crispiness.
Nutrition
- Serving Size: 1 burrito
- Calories: 450500
- Fat: 3035
- Carbohydrates: 3035
- Protein: 2025
Keywords: grilled cheese, burrito, quick dinner, easy recipe, comfort food, cheesy, tortilla, snack


