The smell of a perfectly baked potato wafting through the kitchen is one of those simple pleasures that never gets old. Honestly, I remember the first time I nailed the classic baked potatoes recipe — it was during a chilly Sunday afternoon when I wanted something cozy but fuss-free. The skin was so crispy you could hear it crackle, while the inside was fluffy and warm, the kind of bite that feels like a warm hug. I’ve made these classic baked potatoes more times than I can count, testing different potatoes, oven temps, and salt rubs, and I’m excited to share the version that always delivers comfort and crispiness in every bite.
Classic baked potatoes might seem straightforward, but getting that perfect balance of a crispy skin and a soft, pillowy center takes a little know-how. I love how versatile these are — whether it’s a no-fuss weeknight side or a base for loaded toppings, they hit the spot every time. Plus, they’re budget-friendly, naturally gluten-free, and can easily fit into any meal plan. If you’ve ever struggled with soggy skins or dry interiors, you’ll appreciate the tips I’ve picked up from baking these over and over.
For me, classic baked potatoes are more than just a side dish; they’re a canvas for creativity. I often pair them with hearty dishes like loaded potato soup or even a creamy chicken pot pie. This recipe is straightforward, reliable, and a perfect staple for any home cook wanting that crispy skin magic without the guesswork. You’ll find yourself coming back to this easy recipe again and again, trust me.
Why You’ll Love This Recipe
- Quick & Easy: Classic baked potatoes come together with minimal prep and cook hands-off in about an hour, perfect for busy nights or spontaneous meals.
- Simple Ingredients: No fancy or hard-to-find items here—just potatoes, olive oil, salt, and your favorite toppings.
- Perfect for Any Occasion: Whether it’s a weeknight dinner, a casual gathering, or a holiday potluck, these potatoes fit right in.
- Always Crispy Skin: Thanks to a light oil rub and a hot oven, the skins come out golden, crunchy, and irresistible every time.
- Fluffy Interior: The inside is soft and steamy, ideal for mashing with butter, sour cream, or whatever topping you love.
This recipe isn’t just your average baked potato — what sets it apart is the little technique of drying the skin before oiling it, which I swear by after testing dozens of ways. Also, the choice of potato matters: I stick to russets because their high starch content means fluffy insides and crispy outsides (but I’ll talk more about that soon). Honestly, after perfecting these classic baked potatoes, I rarely go back to microwaving or boiling—they just don’t compare.
Plus, this recipe is forgiving, so even if you’re new to baking potatoes, it’s hard to mess up. Once you try it, you’ll see why it’s a reliable go-to for simple meals that impress without stress.
What Ingredients You Will Need
This classic baked potatoes recipe calls for just a handful of ingredients that work together to create that perfect crispy skin and fluffy interior. I love how basic pantry staples transform into something so satisfying.
- Russet Potatoes: 4 medium-sized (about 6-8 ounces or 170-225 grams each). I recommend russets for their starchy texture that yields fluffy insides and crisp skins.
- Olive Oil: 2 tablespoons (extra virgin is fine) to coat the skins and help them crisp up beautifully.
- Coarse Kosher Salt: 1-2 teaspoons (for rubbing on the skin). This adds flavor and texture—don’t skip it!
- Freshly Ground Black Pepper: Optional, but a nice touch if you want a little extra seasoning.
- Butter: For serving (about 2 tablespoons). Makes the potato extra rich and silky.
- Sour Cream or Plain Greek Yogurt: Optional toppings for that classic baked potato experience.
- Chopped Chives or Green Onions: Optional for garnish and a fresh pop of color.
If you want to switch things up, Yukon Gold potatoes also work, though they won’t be quite as fluffy. For a dairy-free option, swap butter with olive oil or your favorite plant-based spread. And if you’re feeling fancy, adding a sprinkle of smoked paprika to the salt rub adds a subtle smoky note I adore.
For the best results, pick potatoes that are firm with no green spots or sprouts. I usually find mine at the local farmer’s market or the grocery store’s produce aisle, but any good-quality russet will do. You can also check out my loaded potato soup recipe where I use russet potatoes as well — they’re just so versatile!
Equipment Needed
- Oven: A standard kitchen oven that can reach 425°F (220°C) is essential for that crispy skin.
- Baking Sheet: A rimmed baking sheet or tray to place the potatoes on. I prefer one with a rim to catch any drips.
- Wire Rack (Optional): Placing the potatoes on a wire rack above the baking sheet helps air circulate for even crisping, but it’s not a must.
- Kitchen Towel or Paper Towels: For drying the potatoes before oiling.
- Fork or Skewer: To poke holes in the potatoes to allow steam to escape.
If you don’t have a wire rack, no worries—just place the potatoes directly on the baking sheet; they’ll still turn out great. For cleaning, I always recommend wiping the baking sheet right after use to prevent oil buildup. A good-quality baking sheet can last years and makes a difference in heat distribution.
Preparation Method

- Preheat the Oven: Set your oven to 425°F (220°C). This higher heat is key to achieving that crispy skin while cooking the potatoes through evenly. Preheating usually takes about 10-15 minutes.
- Wash and Dry the Potatoes: Scrub the potatoes under cold water to remove any dirt. Pat them completely dry with a kitchen towel or paper towels. This step is crucial because moisture on the skin prevents crisping.
- Prick the Potatoes: Use a fork or skewer to poke 4-5 holes around each potato. This lets steam escape during baking and helps avoid any bursting.
- Oil and Salt the Skin: Rub each potato with about 1/2 tablespoon of olive oil, making sure to cover the entire surface. Then sprinkle coarse kosher salt evenly over the potatoes, rubbing it in gently. This not only seasons the skin but also adds texture for that perfect crunch.
- Place on Baking Sheet: Arrange the potatoes on a wire rack over the baking sheet, or directly on the sheet if you don’t have one. Make sure they’re spaced so air can circulate around each.
- Bake: Place the potatoes in the oven and bake for 50-60 minutes. Flip the potatoes halfway through baking to promote even crisping. You’ll know they’re done when the skins are crispy and a fork or skewer slides in easily.
- Test for Doneness: Gently squeeze the potato with an oven mitt—it should feel soft inside but firm on the outside. If it feels too firm, bake for an additional 5-10 minutes.
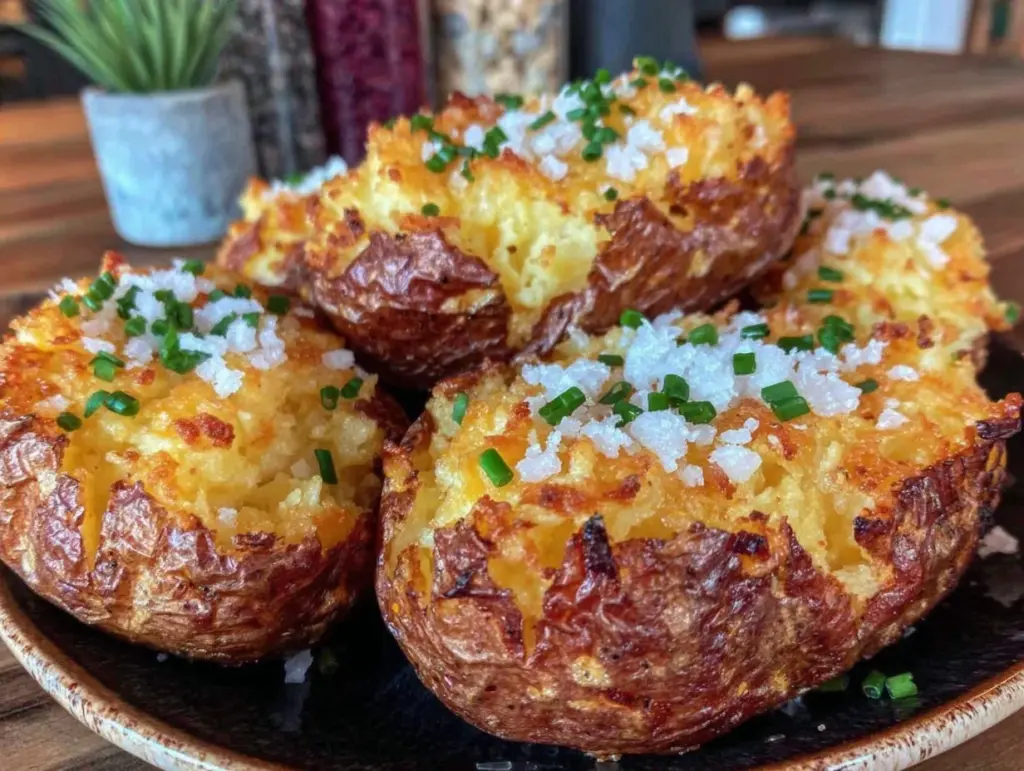
- Rest and Serve: Let the potatoes rest for a few minutes after removing from the oven. Then slice open, fluff the insides with a fork, and add your favorite toppings like butter, sour cream, chives, or cheese.
Pro tip: For even better results, some days I give the potatoes a quick dry-off midway through baking if I notice any moisture forming on the skins. It’s a little extra effort, but the crispiness is unbeatable. Also, flipping them halfway is a small step that really pays off in texture.
Cooking Tips & Techniques
Getting crispy skin and fluffy insides on baked potatoes is all about balance and a few kitchen tricks I’ve picked up. First, don’t skip drying the potatoes thoroughly—that moisture is the enemy of crispiness. I’ve made the mistake of rushing this step, and it shows in soggy skins every time.
Using a higher oven temperature (425°F/220°C) instead of a low-and-slow bake makes a huge difference. It seals the skin quickly, locking in moisture inside while crisping the outside. If you bake at lower temps, the skins tend to dry out and the center might be less fluffy.
Another tip is to use coarse kosher salt rather than fine table salt on the skins. The coarse grains create a nice crust and add a pleasant crunch. If you want to get fancy, try sprinkling with smoked sea salt for a subtle smoky flavor.
A common mistake is wrapping potatoes in foil before baking—it steams the potato and prevents crisping the skin. So if you love crispy skin, skip the foil entirely. I learned that the hard way when I was craving crispy skins but ended up with soft, mushy ones instead.
Finally, flipping the potatoes halfway through baking is a small step that helps them cook evenly. I usually set a timer so I don’t forget.
Variations & Adaptations
Classic baked potatoes are wonderfully adaptable, and you can tweak them to suit your dietary needs or flavor preferences.
- Sweet Potato Version: Swap russets for sweet potatoes. Bake similarly but reduce the time slightly (about 45-50 minutes) and enjoy a sweeter, nutrient-rich option.
- Herb-Infused Skins: Mix olive oil with garlic powder, rosemary, or thyme before rubbing the potatoes for an herby twist.
- Low-Carb Alternative: For a low-carb twist, try baking halved large mushrooms or even celeriac with the same technique.
- Microwave Start: To speed up baking, microwave the potatoes for 5-6 minutes first, then finish in the oven for 20-25 minutes to crisp the skin.
- Dairy-Free Toppings: Use mashed avocado, hummus, or dairy-free sour cream alternatives for serving.
Personally, I’ve tried the herb-infused skins on a lazy Sunday, and it added a fresh, savory note that pairs well with a simple topping like sour cream and chives. It’s an easy way to change things up without complicating the process.
Serving & Storage Suggestions
Serve your classic baked potatoes hot, straight from the oven, with a pat of butter melting into the fluffy center. I love topping mine with a dollop of sour cream, chopped chives, and a sprinkle of cracked black pepper. They also pair beautifully with hearty mains like roasted chicken or even a bowl of warm soup—think creamy vegetable soup or loaded potato soup for a cozy meal.
If you have leftovers, baked potatoes store well in the refrigerator for up to 3-4 days. Keep them wrapped tightly in foil or in an airtight container. To reheat, pop them back in a hot oven at 400°F (200°C) for 10-15 minutes to revive that crispy skin. Avoid microwaving if you want to keep the texture crisp.
Over time, the flavors of baked potatoes mellow and the skin softens. Reheating in the oven helps bring back that just-baked magic. If you want to meal prep, you can bake potatoes in advance and reheat as needed, making weeknight dinners a breeze.
Nutritional Information & Benefits
One medium russet potato (about 6-8 ounces/170-225 grams) contains roughly 160 calories, 37 grams of carbohydrates, 4 grams of protein, and almost no fat. Potatoes are a good source of vitamin C, potassium, and dietary fiber, especially if you eat the skin. Plus, they are naturally gluten-free and low in sodium when prepared simply.
Because they’re filling and nutrient-dense, classic baked potatoes can be part of a balanced diet. Pair them with protein and veggies for a wholesome meal. If you’re watching carbs, consider portion sizes or try the sweet potato or low-carb variations mentioned earlier.
From a wellness perspective, I appreciate how baked potatoes provide energy and satiety without added sugars or processed ingredients. They’re a comfort food that feels indulgent but can fit into many healthy eating plans.
Conclusion
Classic baked potatoes are that dependable, comforting dish you’ll want in your recipe arsenal. With just a few simple steps, you get crispy skins and fluffy insides that make every bite satisfying. Whether you’re serving them as a side or a base for your favorite toppings, this easy recipe never fails to impress.
Feel free to customize with herbs, spices, or alternative potatoes to suit your taste. It’s a forgiving recipe that welcomes creativity without complexity. Honestly, these baked potatoes remind me of cozy family dinners and lazy weekends—simple food done right.
Give this recipe a try, and I’d love to hear how you top your potatoes! Drop a comment, share your variations, or let me know if you paired them with a comforting soup like creamy vegetable soup. Here’s to crispy, fluffy, and perfectly baked potatoes that make every meal better!
FAQs About Classic Baked Potatoes
What type of potato is best for baking?
Russet potatoes are the best choice because their high starch content results in a fluffy interior and crispy skin. Yukon Golds work too but are less fluffy.
How do I get the skin crispy?
Dry the potatoes well before rubbing with olive oil and coarse salt, then bake at a high temperature (425°F/220°C). Avoid wrapping in foil, and flip halfway through baking.
Can I bake potatoes in the microwave?
You can microwave them to speed up cooking, but for crispy skin, finish baking in a hot oven for 20-25 minutes.
Should I prick the potatoes before baking?
Yes, poking holes with a fork lets steam escape and prevents the potatoes from bursting in the oven.
How do I store and reheat leftover baked potatoes?
Store cooked potatoes wrapped in foil or airtight containers in the fridge for up to 4 days. Reheat in a 400°F (200°C) oven for 10-15 minutes to restore crispiness. Avoid microwaving if you want crispy skin.
Pin This Recipe!

Classic Baked Potatoes

A simple and reliable recipe for perfectly crispy skin and fluffy interior baked potatoes, ideal as a side or base for toppings.
- Prep Time: 15 minutes
- Cook Time: 55 minutes
- Total Time: 1 hour 10 minutes
- Yield: 4 servings 1x
- Category: Side Dish
- Cuisine: American
Ingredients
- 4 medium russet potatoes (about 6–8 ounces or 170–225 grams each)
- 2 tablespoons olive oil (extra virgin preferred)
- 1–2 teaspoons coarse kosher salt
- Freshly ground black pepper (optional)
- 2 tablespoons butter (for serving)
- Sour cream or plain Greek yogurt (optional, for serving)
- Chopped chives or green onions (optional, for garnish)
Instructions
- Preheat the oven to 425°F (220°C).
- Wash and scrub the potatoes under cold water to remove dirt. Pat completely dry with a kitchen towel or paper towels.
- Use a fork or skewer to poke 4-5 holes around each potato to allow steam to escape.
- Rub each potato with about 1/2 tablespoon of olive oil, covering the entire surface.
- Sprinkle coarse kosher salt evenly over the potatoes and rub it in gently.
- Place the potatoes on a wire rack over a rimmed baking sheet, or directly on the baking sheet if no rack is available, spacing them for air circulation.
- Bake for 50-60 minutes, flipping the potatoes halfway through baking for even crisping.
- Test doneness by gently squeezing the potato with an oven mitt; it should feel soft inside but firm outside. If too firm, bake an additional 5-10 minutes.
- Remove from oven and let rest for a few minutes.
- Slice open, fluff the insides with a fork, and add desired toppings such as butter, sour cream, chives, or cheese.
Notes
Dry the potatoes thoroughly before oiling to ensure crispy skin. Flip potatoes halfway through baking for even crisping. Avoid wrapping potatoes in foil to prevent soggy skin. For extra crispiness, dry off moisture on skins midway through baking if needed. Russet potatoes are preferred for fluffy insides and crispy skins. Yukon Gold potatoes can be used but will be less fluffy. Microwave start can speed cooking but finish in oven for crisp skin.
Nutrition
- Serving Size: 1 medium baked potat
- Calories: 160
- Sugar: 2
- Sodium: 300
- Fat: 7
- Saturated Fat: 2
- Carbohydrates: 37
- Fiber: 4
- Protein: 4
Keywords: baked potatoes, crispy skin, russet potatoes, easy side dish, comfort food, gluten-free, oven baked potatoes


