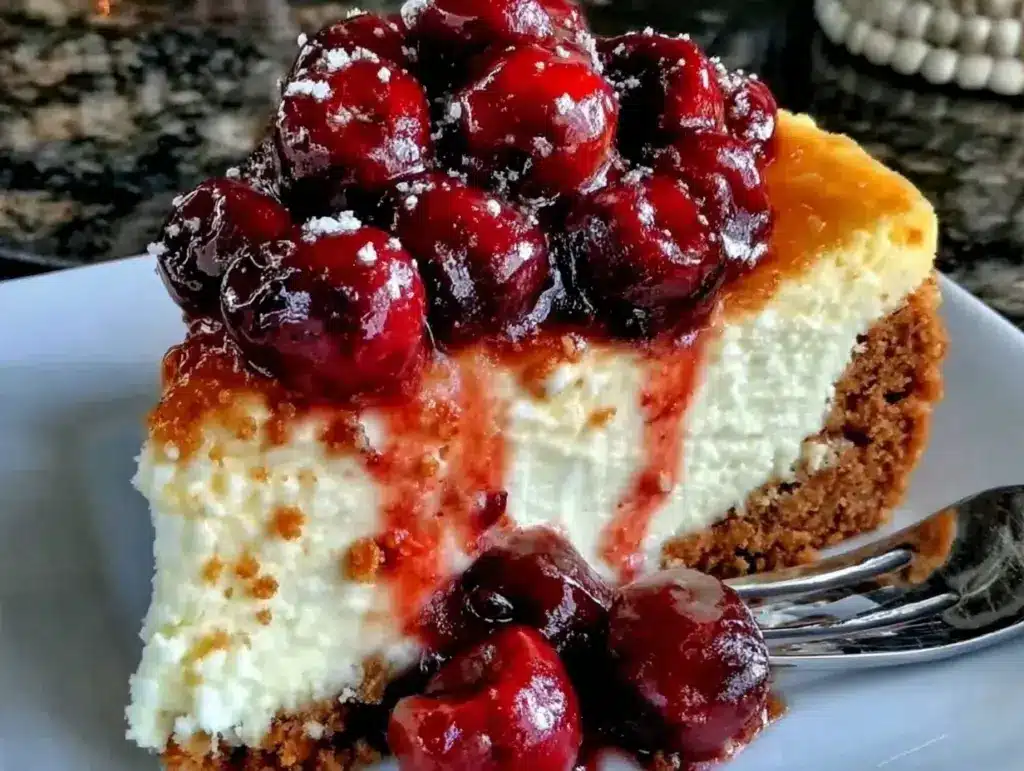
The smell of a classic cheesecake with cherry topping wafting through the kitchen instantly takes me back to those cozy holiday mornings spent with family. I remember the first time I made this dessert—it was a chilly December afternoon, and I wanted something comforting yet special for our holiday gathering. Honestly, this cheesecake quickly became my go-to recipe, not just for the holidays but whenever I crave that creamy, tangy-sweet combo that feels like a warm hug on a plate.
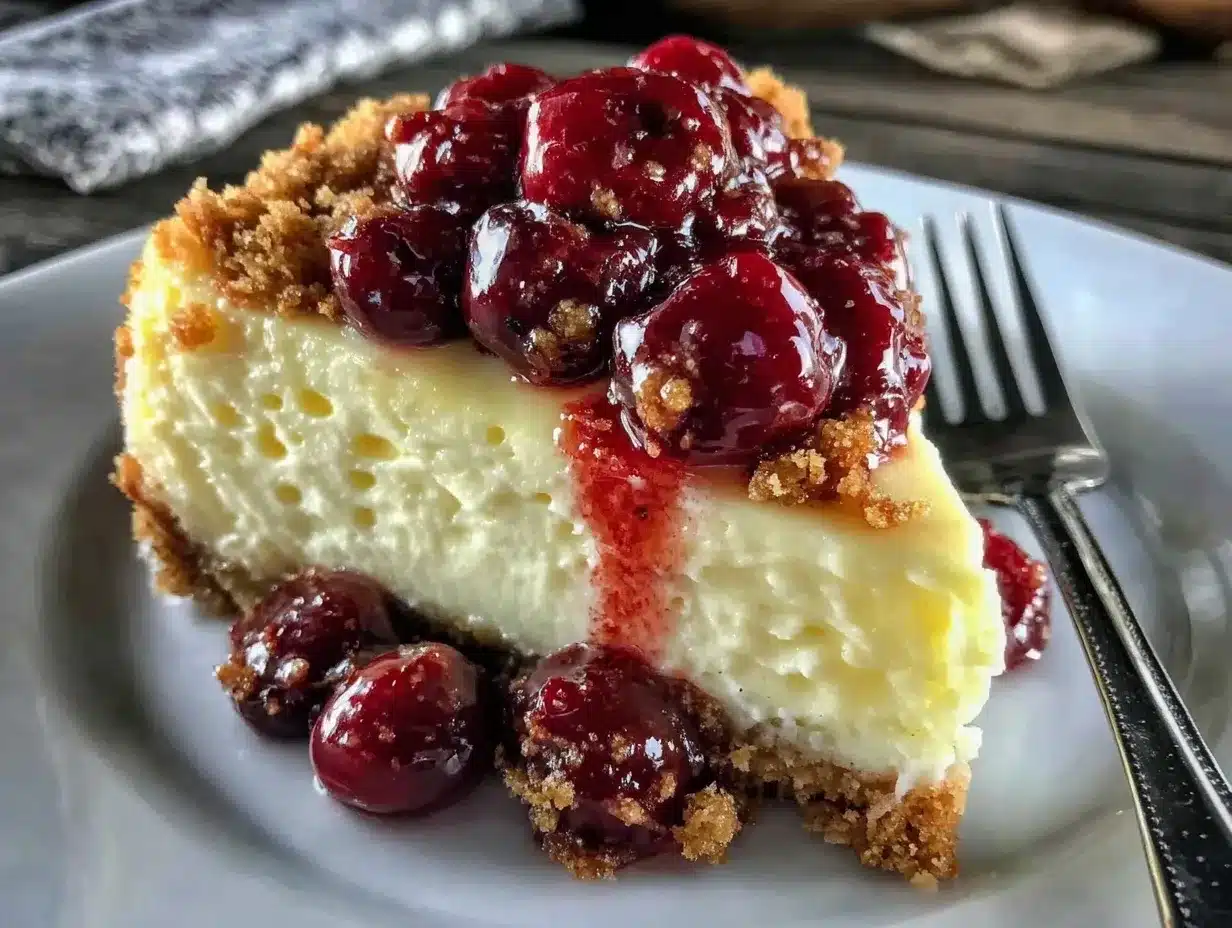
This classic cheesecake with cherry topping is more than just a dessert; it’s a story of tradition, warmth, and a little bit of indulgence. I’ve baked this recipe over a dozen times, tweaking it here and there to make sure the texture is just right—silky smooth, with a crust that has a perfect buttery crunch. Plus, the cherry topping adds that festive pop of color and tartness that balances the richness beautifully.
If you’re looking for a holiday dessert that’s easy to make but impresses every time, this cheesecake should be on your list. Whether you’re baking for a big family feast or a quiet night in, this classic cheesecake with cherry topping fits the bill perfectly. It’s great for busy home cooks because it comes together with straightforward ingredients you probably already have, and honestly, it’s a crowd-pleaser that even picky eaters adore. After all, who can resist that luscious cream cheese filling topped with bright, juicy cherries?
Why You’ll Love This Classic Cheesecake with Cherry Topping
After trying countless cheesecake recipes, I can say this one stands out for so many reasons. Here’s why you’ll want to keep this classic cheesecake with cherry topping in your holiday dessert rotation:
- Quick & Easy: You can whip this up in about 1 hour of active prep time, and then let the oven do its magic. Perfect for last-minute holiday plans or those cozy winter evenings.
- Simple Ingredients: No hunting for rare ingredients here. From cream cheese to graham crackers and canned cherry pie filling, it’s all pantry staples or easy to find at any grocery store.
- Perfect for Holiday Gatherings: Cherry topping adds that festive look and flavor, making it ideal for Christmas, Thanksgiving, or New Year’s celebrations.
- Crowd-Pleaser: Kids and adults alike love the creamy texture and the sweet-tart cherry contrast. It’s a guaranteed hit every time I bring it out.
- Unbelievably Delicious: The balance of tangy cream cheese and sweet cherries is just right, and the buttery crust seals the deal with a satisfying crunch.
This recipe is a step above the usual because I blend the cream cheese to a perfectly smooth consistency and bake it gently to avoid cracks, which, trust me, was a learning curve. The cherry topping isn’t just slapped on—it’s carefully spooned with just enough juice to give that glossy, jewel-like finish. This cheesecake isn’t just dessert; it’s the kind of treat you close your eyes for after one bite.
For those who love comfort food with a bit of flair, this cheesecake fits the bill like no other. It’s also a nice complement to hearty meals like loaded potato soup, making your holiday dinner feel complete from start to finish.
What Ingredients You Will Need
This classic cheesecake with cherry topping uses simple, wholesome ingredients to deliver that bold, creamy flavor and satisfying texture without fuss. The ingredients break down neatly into three parts: the crust, the cheesecake batter, and the cherry topping.
- For the Crust:
- 1 ½ cups graham cracker crumbs (about 10 full sheets, finely crushed) – I prefer Nabisco for consistent flavor
- ¼ cup granulated sugar (adds just a touch of sweetness)
- 6 tablespoons unsalted butter, melted (room temperature for easy mixing)
- For the Cheesecake Batter:
- 4 (8-ounce) packages cream cheese, softened (full-fat for the best richness)
- 1 cup granulated sugar
- 1 teaspoon pure vanilla extract (fresh vanilla is a game-changer)
- 4 large eggs, room temperature (helps the batter blend smoothly)
- 2/3 cup sour cream (adds creaminess and slight tang)
- 2/3 cup heavy cream (for that luscious texture)
- For the Cherry Topping:
- 1 can (21 ounces) cherry pie filling (I like to use Stonemill Farms for a natural flavor)
- Optional: Fresh cherries or a handful of frozen cherries for extra texture and freshness
If you want to make this gluten-free, swapping the graham cracker crumbs with almond flour or gluten-free graham crackers works well. For a dairy-free twist, try using cream cheese alternatives and coconut cream, though I haven’t tested that version extensively yet.
Equipment Needed
- 9-inch Springform Pan: Essential for easy cheesecake removal without ruining the crust. If you don’t have one, a regular cake pan lined with parchment can work, but be gentle with removal.
- Electric Mixer or Stand Mixer: For blending the cream cheese until smooth and fluffy. You can do it by hand, but it’s a workout.
- Mixing Bowls: Several sizes to mix the crust and batter separately.
- Measuring Cups and Spoons: Precision matters in baking, especially for sugar and cream cheese.
- Spatula and Wooden Spoon: For folding ingredients and scraping down the bowl.
- Aluminum Foil: If you plan to use a water bath (recommended to prevent cracks), wrap your springform pan to avoid leaks.
I’ve tried different pans over the years, and honestly, a good springform pan makes this cheesecake experience 10 times easier. If you want to save a few bucks, there are budget-friendly options that still do the trick. Just remember to lightly grease the pan for easy release.
Preparation Method
- Preheat and Prep: Set your oven to 325°F (163°C). Grease the bottom and sides of your 9-inch springform pan with butter or non-stick spray. For a smooth crust release, you can line the bottom with parchment paper.
- Make the Crust (10 minutes): In a medium bowl, combine 1½ cups graham cracker crumbs and ¼ cup sugar. Pour in 6 tablespoons melted butter and stir until crumbs are evenly moistened. Press this mixture firmly and evenly into the bottom of the springform pan using the back of a spoon or a flat-bottomed glass. Set aside.
- Prepare the Cheesecake Batter (20 minutes): In a large bowl, beat 4 packages (32 ounces) of softened cream cheese with an electric mixer on medium speed until smooth and creamy—no lumps! Add 1 cup sugar and continue beating for 2-3 minutes until fluffy. Mix in 1 teaspoon vanilla extract.
- Add Eggs One at a Time: Beat in 4 large eggs slowly, one at a time, making sure each is fully incorporated before adding the next to avoid overmixing.
- Incorporate Dairy: Blend in 2/3 cup sour cream and 2/3 cup heavy cream on low speed until the batter is silky and smooth. Scrape down the sides often to keep everything combined.
- Pour and Smooth: Carefully pour the batter over the prepared crust. Tap the pan gently on the counter to release any air bubbles. This step takes patience but is key to a creamy texture.
- Bake (55-70 minutes): Place the pan in the oven. Bake at 325°F (163°C) for about 55 to 70 minutes. The edges should be set, but the center will still jiggle slightly when you gently shake the pan—this prevents overbaking, which can crack the cheesecake.
- Cool and Chill: Turn off the oven, crack the door open, and let the cheesecake cool inside for 1 hour. Then remove it and refrigerate uncovered for at least 4 hours or overnight. This chilling step is crucial for a firm, sliceable cheesecake.
- Add Cherry Topping: Before serving, spoon the cherry pie filling evenly over the cheesecake. If you want a fresher touch, scatter some fresh or thawed frozen cherries on top.
Pro tip: If cracks appear on your cheesecake, don’t stress! A simple patch-up with extra cherry topping or some whipped cream can hide imperfections. Also, using a water bath can help prevent cracking, but I find with this recipe and careful baking, it’s not always necessary.
Cooking Tips & Techniques for Perfect Cheesecake
From my baking adventures (and occasional flops), I’ve learned a few key tidbits to keep your cheesecake creamy and crack-free.
- Room Temperature Ingredients: It’s worth the wait to let cream cheese, eggs, and dairy come to room temp. This helps everything blend smoothly without lumps.
- Don’t Overmix: Mix just until combined. Overworking the batter adds air that causes cracks during baking.
- Gentle Heat: Bake low and slow at 325°F (163°C). High heat can make the edges dry and crack.
- Water Bath Option: Wrapping the springform pan in foil and placing it in a water bath can add moisture and prevent cracking, especially in dry ovens.
- Cooling Gradually: Letting the cheesecake cool in the oven with the door cracked helps prevent sudden temperature changes, reducing cracks.
One time, I forgot to soften the cream cheese and ended up with a lumpy batter. Lesson learned: patience matters! Also, tapping the pan to release air bubbles before baking is a small step that makes a big difference in texture.
Variations & Adaptations
This classic cheesecake with cherry topping is a great base for customizing. Here are some tasty tweaks I’ve tried or recommend:
- Seasonal Fruit Toppings: Swap the cherry topping with blueberry compote in summer or spiced apple slices in fall for a fresh twist.
- Chocolate Swirl: Add melted dark chocolate swirled into the batter before baking for a rich, marbled effect.
- Gluten-Free Crust: Use almond flour mixed with a bit of coconut sugar and butter for a nutty, gluten-free crust.
- Dairy-Free Option: Try vegan cream cheese and coconut cream, though expect a slightly different texture and flavor.
- Spiced Crust: Mix cinnamon or nutmeg into the crust for a warm holiday flavor.
Personally, I love adding a splash of orange zest to the batter for a subtle citrus note that pairs beautifully with the cherry topping. It’s a fun way to bring a little extra something to the table without complicating the recipe.
Serving & Storage Suggestions
This cheesecake is best served chilled but not ice-cold—let it sit at room temperature for 10 minutes before slicing to get the creamiest texture. I like to serve it with a dollop of whipped cream or a sprinkle of toasted almonds for crunch.
It pairs wonderfully with a cup of strong coffee or a glass of dessert wine, making it a perfect finale for any holiday feast. If you’re interested in hearty comfort food ideas to round out a meal, you might enjoy pairing this dessert after a warm bowl of creamy tomato soup or a comforting creamy chicken pot pie.
Store leftover cheesecake covered in the fridge for up to 5 days. For longer storage, wrap tightly and freeze for up to 2 months. When ready to eat, thaw overnight in the fridge and bring to room temp before serving. The flavors and texture actually mellow and improve after a day or two in the fridge.
Nutritional Information & Benefits
Per slice (based on 12 servings), this classic cheesecake with cherry topping contains approximately:
| Calories | 350-400 |
|---|---|
| Protein | 7 grams |
| Fat | 25 grams |
| Carbohydrates | 30 grams |
Key ingredients like cream cheese provide a good source of calcium and protein, while the cherry topping adds antioxidants and vitamins. This dessert is naturally gluten-containing due to the graham cracker crust, but can be adapted for gluten-free diets. It’s a treat best enjoyed in moderation but offers a satisfying dose of comfort and traditional holiday flavors.
Conclusion
This classic cheesecake with cherry topping isn’t just a holiday dessert; it’s a slice of tradition that brings people together. It’s simple enough to make without stress, yet impressive enough to earn compliments from even the toughest dessert critics. I love how this cheesecake balances rich creaminess with a bright, fruity topping—always leaving me wanting just one more bite.
Feel free to experiment with your own toppings or crusts to make it truly yours. And when you do, I’d love to hear how it turns out! Drop a comment below to share your tips, tricks, or favorite variations. Happy baking—and here’s to many sweet holiday moments!
Frequently Asked Questions
How do I prevent cracks in my cheesecake?
Use room temperature ingredients, avoid overmixing, bake at a low temperature, and let the cheesecake cool gradually in the oven with the door cracked open. A water bath can also help maintain moisture and prevent cracking.
Can I make this cheesecake ahead of time?
Absolutely! In fact, chilling it overnight helps develop flavor and texture. Just add the cherry topping right before serving for the best presentation.
What’s the best way to slice cheesecake cleanly?
Use a sharp knife dipped in hot water and wiped dry between each cut. This helps create smooth slices without dragging or crumbling.
Can I use fresh cherries instead of canned pie filling?
Yes! Fresh or frozen cherries can be cooked down with a little sugar and cornstarch to make your own topping, or simply spooned on fresh for a lighter option.
Is it okay to freeze leftover cheesecake?
Definitely. Wrap tightly in plastic wrap and foil, then freeze for up to 2 months. Thaw in the fridge overnight and bring to room temperature before serving.
Pin This Recipe!
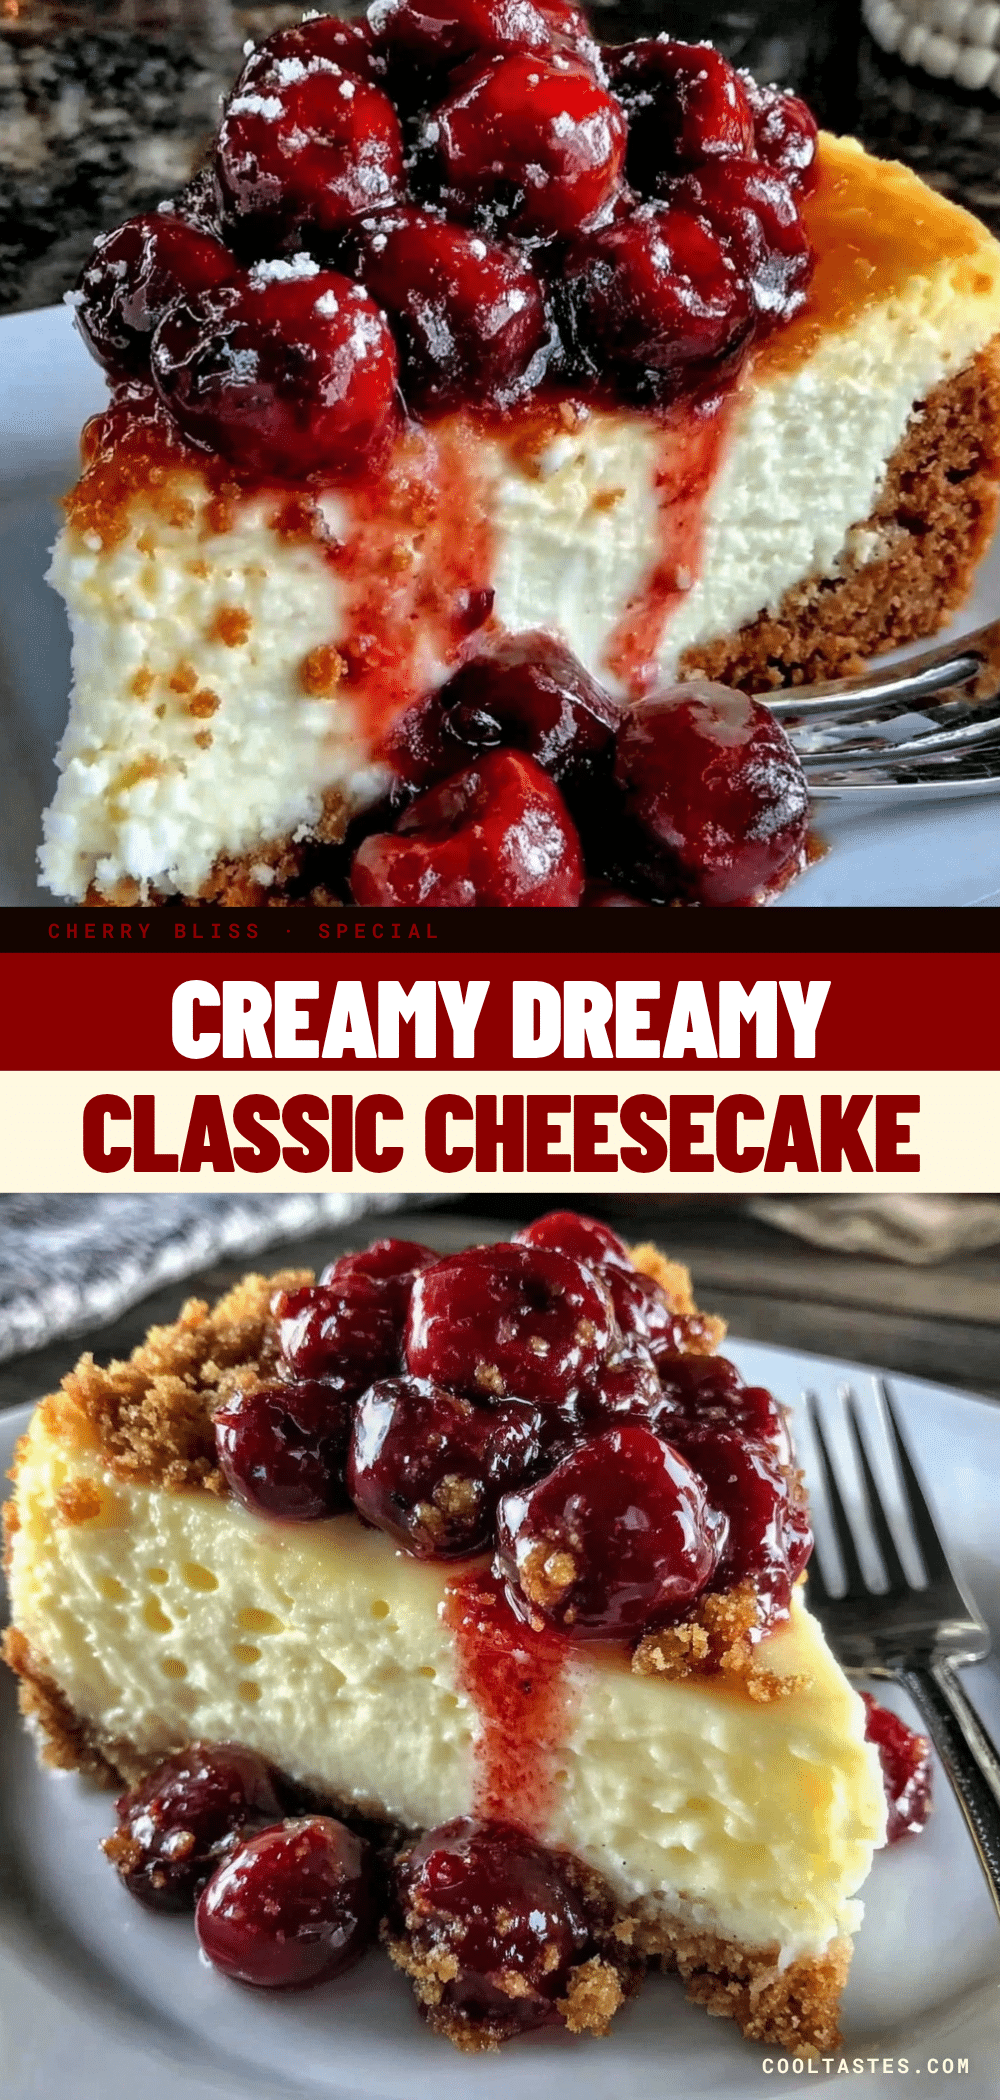
Classic Cheesecake with Cherry Topping
A creamy, silky smooth classic cheesecake with a buttery graham cracker crust and a festive cherry topping, perfect for holiday gatherings and cozy winter evenings.
- Prep Time: 30 minutes
- Cook Time: 1 hour 10 minutes
- Total Time: 5 hours 40 minutes
- Yield: 12 servings 1x
- Category: Dessert
- Cuisine: American
Ingredients
- 1 ½ cups graham cracker crumbs (about 10 full sheets, finely crushed)
- ¼ cup granulated sugar
- 6 tablespoons unsalted butter, melted
- 4 (8-ounce) packages cream cheese, softened
- 1 cup granulated sugar
- 1 teaspoon pure vanilla extract
- 4 large eggs, room temperature
- 2/3 cup sour cream
- 2/3 cup heavy cream
- 1 can (21 ounces) cherry pie filling
- Optional: Fresh cherries or a handful of frozen cherries
Instructions
- Preheat oven to 325°F (163°C). Grease the bottom and sides of a 9-inch springform pan with butter or non-stick spray. Optionally line the bottom with parchment paper.
- In a medium bowl, combine graham cracker crumbs and ¼ cup sugar. Pour in melted butter and stir until crumbs are evenly moistened. Press mixture firmly and evenly into the bottom of the springform pan. Set aside.
- In a large bowl, beat softened cream cheese with an electric mixer on medium speed until smooth and creamy. Add 1 cup sugar and beat for 2-3 minutes until fluffy. Mix in vanilla extract.
- Beat in eggs one at a time, ensuring each is fully incorporated before adding the next.
- Blend in sour cream and heavy cream on low speed until batter is silky and smooth. Scrape down sides often.
- Pour batter over prepared crust. Tap pan gently on counter to release air bubbles.
- Bake for 55 to 70 minutes until edges are set but center jiggles slightly when shaken.
- Turn off oven, crack door open, and let cheesecake cool inside for 1 hour. Remove and refrigerate uncovered for at least 4 hours or overnight.
- Before serving, spoon cherry pie filling evenly over cheesecake. Optionally scatter fresh or thawed frozen cherries on top.
Notes
Use room temperature ingredients for smooth batter. Avoid overmixing to prevent cracks. Baking at 325°F low and slow helps maintain creamy texture. Cooling gradually in the oven with door cracked prevents cracking. A water bath wrapped in foil can help prevent cracks but is optional. Tap pan to release air bubbles before baking. For gluten-free, substitute crust with almond flour or gluten-free graham crackers. Dairy-free alternatives can be used but not tested extensively.
Nutrition
- Serving Size: 1 slice (1/12 of che
- Calories: 375
- Fat: 25
- Carbohydrates: 30
- Protein: 7
Keywords: classic cheesecake, cherry topping, holiday dessert, creamy cheesecake, graham cracker crust, easy cheesecake recipe, festive dessert