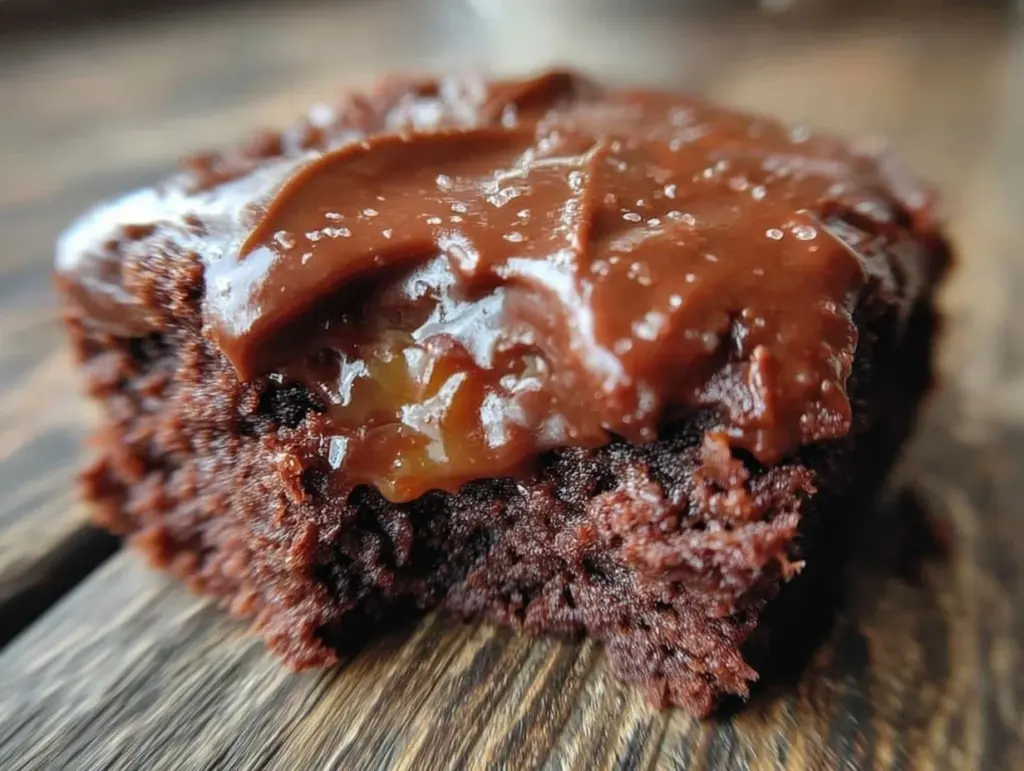
The smell of rich chocolate and buttery fudge wafting from the oven instantly takes me back to school lunchrooms and those cherished moments sneaking a bite of the infamous “Lunch Lady Brownies.” Honestly, I wasn’t sure if these fudgy delights were just a nostalgic myth, but after countless attempts perfecting this recipe, I can confidently say these brownies live up to the hype — and then some. The fudgy lunch lady brownies recipe I’m sharing is my homage to that classic treat, but homemade, easy, and totally crowd-friendly.
I first stumbled upon this recipe while helping out with a school bake sale. The recipe card was handwritten, smudged with chocolate fingerprints, and said, “Best fudgy brownies ever.” Naturally, I had to test it at home. Over time, I tweaked the balance of cocoa, sugar, and butter, learning how to get that perfect fudgy center that melts in your mouth. I’ve baked these for potlucks, birthday parties, and even impromptu office snack days — and every time, they disappear fast.
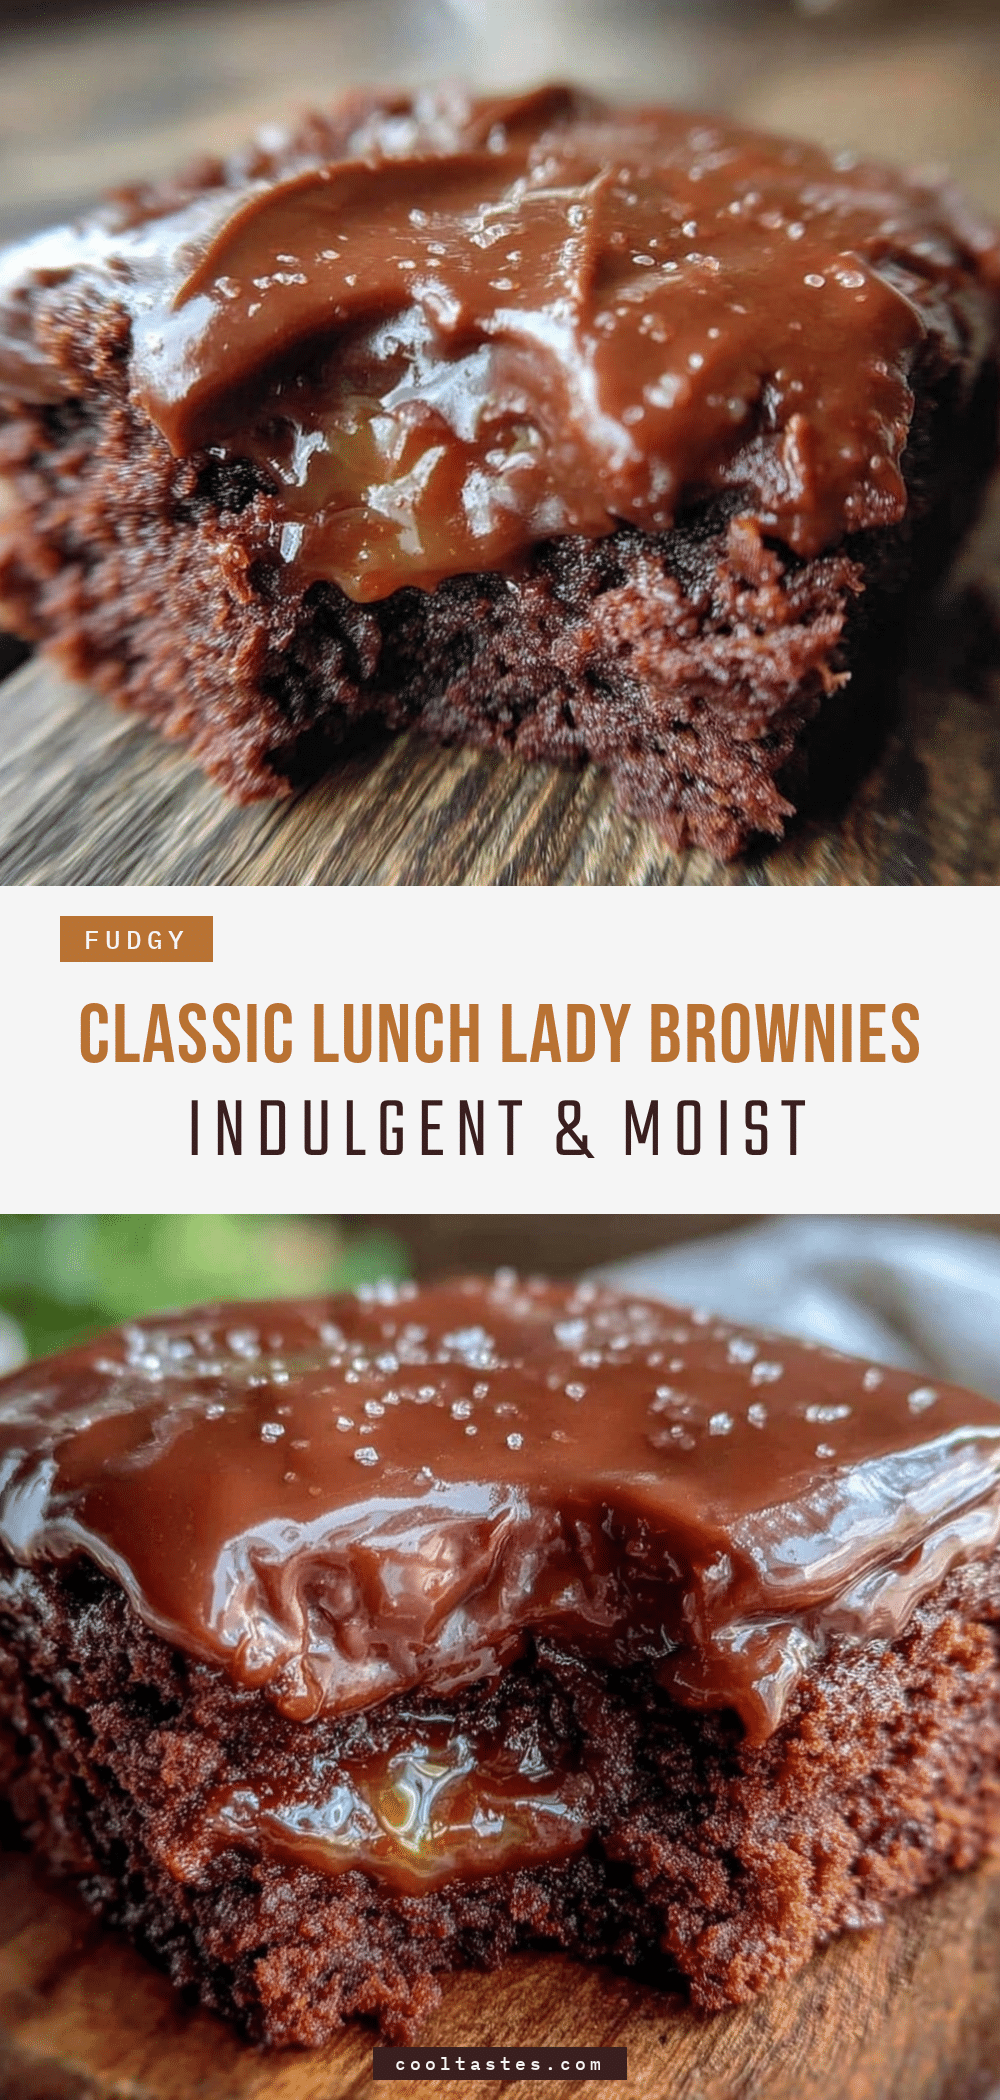
What makes these fudgy lunch lady brownies so worth making? They’re simple, packed with deep chocolate flavor, and have a moist, chewy texture that’s just right. Plus, they work for busy families or anyone needing a quick, satisfying baked treat that’s perfect for sharing. If you’re looking for an easy homemade potluck treat that will impress without stress, these brownies might just become your new favorite.
Why You’ll Love This Recipe
After baking these fudgy lunch lady brownies over and over, here’s what I’ve learned that makes them stand out from your average brownie:
- Quick & Easy: From start to finish, this recipe takes about 35 minutes — no fancy techniques or long wait times.
- Simple Ingredients: No need for hard-to-find items. You probably already have everything in your pantry, which means less fuss and more baking fun.
- Perfect for Potlucks: These brownies cut into perfect little squares that travel well and please all ages, making them ideal for school events, office parties, or casual get-togethers.
- Crowd-Pleaser: Kids love the fudgy texture and adults appreciate the deep chocolate flavor — it’s a universal win.
- Unbelievably Delicious: The glossy crackly top with that dense, chewy center hits all the right chocolate notes. Honestly, it’s the kind of treat that makes you close your eyes after the first bite.
What sets this recipe apart is the perfect balance of ingredients and a couple of little tricks I picked up over time — like mixing the cocoa powder with melted butter before adding the sugar, which gives the brownies that signature fudgy texture without being greasy. Plus, I use a blend of semi-sweet and dark chocolate to deepen the chocolate flavor without it getting too bitter.
These brownies aren’t just good; they’re the kind of comfort food you want to bring to every potluck or share with friends when you want a little chocolate love. No stress, just pure fudgy joy.
What Ingredients You Will Need
This fudgy lunch lady brownies recipe relies on straightforward ingredients to deliver that rich, chocolatey goodness without any fuss. Most of these are pantry staples, and you can find everything at your local grocery store. Here’s what you’ll need:
- Unsalted butter (1/2 cup / 115g, melted) — I prefer using Land O’Lakes for its creamy flavor.
- Cocoa powder (1/3 cup / 35g, unsweetened) — Use a high-quality Dutch-processed cocoa for the best depth.
- Granulated sugar (1 cup / 200g) — The sweetness balances the cocoa’s bitterness.
- Large eggs (2, room temperature) — Essential for structure and moisture.
- Vanilla extract (1 tsp) — Adds a subtle warmth.
- All-purpose flour (3/4 cup / 95g) — For that tender crumb.
- Salt (1/4 tsp) — Enhances the chocolate flavor.
- Semi-sweet chocolate chips (1/2 cup / 90g, optional) — For little pockets of melty chocolate.
Substitution tips: For gluten-free brownies, swap the all-purpose flour with a 1:1 gluten-free baking flour blend. If you want a dairy-free version, replace butter with coconut oil and use dairy-free chocolate chips. I’ve done this before, and it still tastes fantastic.
Look for firm, fresh eggs and fresh cocoa powder — stale ingredients are the enemy of good brownies! If you want a slightly richer taste, you can swap half the sugar for brown sugar, which adds a hint of molasses flavor.
Equipment Needed
- 8×8-inch (20×20 cm) square baking pan: This size works perfectly for these brownies. I’ve tried larger pans, but the thickness just isn’t the same.
- Mixing bowls: One medium and one small for melting butter and mixing dry ingredients.
- Whisk or wooden spoon: To combine ingredients smoothly.
- Rubber spatula: For folding ingredients and scraping the bowl clean.
- Measuring cups and spoons: Accuracy matters here for that perfect fudgy texture.
If you don’t have an 8×8 pan, a 9×9-inch works but expect slightly thinner brownies. I’ve also used a metal pan for crisper edges and a glass pan for softer edges; both work great depending on your texture preference.
For melting butter, I usually use a small saucepan on low heat or the microwave in short bursts—avoid overheating or you’ll risk burning the butter.
Preparation Method

- Preheat your oven to 325°F (163°C) and lightly grease your 8×8-inch pan or line it with parchment paper for easier cleanup. This temperature helps achieve that perfect fudgy center without drying out the edges.
- Melt the butter: Place 1/2 cup (115g) unsalted butter in a small saucepan over low heat or microwave in 30-second intervals until melted. Let it cool slightly — hot butter can cook the eggs if added too soon.
- Combine cocoa powder and melted butter: In a medium bowl, whisk together 1/3 cup (35g) unsweetened cocoa powder and melted butter until smooth. This step is crucial for that luscious fudgy texture.
- Add sugar: Stir in 1 cup (200g) granulated sugar until fully combined. The mixture will be thick and glossy.
- Mix in eggs and vanilla: Beat in 2 large eggs, one at a time, followed by 1 teaspoon vanilla extract. The batter will lighten slightly and become smoother. If the eggs are cold, the batter might seize a bit but will come back once mixed well.
- Incorporate dry ingredients: Sift together 3/4 cup (95g) all-purpose flour and 1/4 teaspoon salt. Gently fold these into the wet mixture using a rubber spatula, just until no flour streaks remain. Overmixing can lead to cakier brownies, so keep it light.
- Add chocolate chips (optional): Fold in 1/2 cup (90g) semi-sweet chocolate chips for extra gooey pockets of chocolate.
- Pour batter into the pan: Spread evenly with the spatula, smoothing the top for an even bake.
- Bake for 28-32 minutes: Check at 28 minutes by inserting a toothpick near the center — it should come out with moist crumbs but not wet batter. The fudgy center is key here, so don’t overbake!
- Cool completely: Let the brownies cool in the pan on a wire rack for at least an hour before slicing. This resting time allows the fudge texture to set perfectly.
Pro tip: If your brownies are baking unevenly, try rotating the pan halfway through baking. Also, for that signature shiny crackly top, resist opening the oven door too often.
Cooking Tips & Techniques
Getting fudgy brownies just right can be a bit of a balancing act, but here are some tips I’ve picked up to help you nail this recipe every time:
- Butter temperature matters: Melted butter should be warm, not hot, to avoid cooking the eggs prematurely, which can cause texture issues.
- Don’t overmix: Once you add the flour, fold gently and stop as soon as it’s incorporated. Overworking the batter creates more gluten, resulting in cakier brownies instead of fudgy ones.
- Use fresh cocoa powder: Old cocoa loses its punch, and you want the chocolate flavor front and center.
- Baking time is key: Start checking your brownies a few minutes before the minimum bake time. Remember, they continue cooking slightly as they cool.
- Let them cool fully: Cutting into warm brownies can cause crumbly edges; patience pays off with a cleaner slice.
- Pan prep: I always line my pan with parchment paper for easy removal. This also helps keep edges intact and makes cleanup a breeze.
I once forgot to let the butter cool and ended up with a weird scrambled egg texture in the batter — lesson learned! Also, when I tried baking at a higher temperature, the brownies set too quickly on the outside and stayed too gooey inside. So trust me, low and slow is the way with this recipe.
Variations & Adaptations
While I love the classic fudgy lunch lady brownies, there’s plenty of room to mix things up depending on your mood or dietary needs:
- Nutty version: Add 1/2 cup chopped walnuts or pecans for a satisfying crunch that pairs well with the fudgy texture.
- Gluten-free option: Swap all-purpose flour with a gluten-free baking blend. I’ve used Bob’s Red Mill 1-to-1 with great results.
- Mocha twist: Stir in 1 teaspoon instant espresso powder with the cocoa for a subtle coffee kick that deepens the chocolate flavor.
- Frosted brownies: Top with a simple chocolate ganache or cream cheese frosting for an extra special treat.
- Dairy-free adaptation: Replace butter with melted coconut oil and use dairy-free chocolate chips. The flavor is slightly different but still delicious.
Personally, I often add a handful of mini marshmallows or swirl in peanut butter before baking for a fun surprise. And if you’re planning a potluck with a mix of tastes, try creamy chicken pot pie for your savory dish and balance the meal perfectly.
Serving & Storage Suggestions
These fudgy lunch lady brownies are best served at room temperature so the texture can be appreciated fully. They also pair beautifully with a cold glass of milk or a warm cup of coffee or tea.
For potlucks, I like to cut them into small squares—about 2-inch pieces—perfect for sharing without the guilt of a huge slice. They travel well when stored in an airtight container, and I’ve taken them to picnics, family gatherings, and office parties with zero mess.
Storage tips: Keep brownies in an airtight container at room temperature for up to 3 days. For longer storage, refrigerate for up to a week or freeze in a sealed container for up to 3 months. To reheat, warm them in the microwave for 10-15 seconds to bring back that melty fudginess.
Interestingly, the flavors deepen after a day or two, so if you can wait, resting them overnight wrapped tightly makes for an even better experience. If you’re heading to a chilly fall potluck, these brownies make a sweet companion to a bowl of loaded potato soup, balancing creamy and savory with rich chocolate.
Nutritional Information & Benefits
One serving (about a 2-inch square) of these fudgy lunch lady brownies contains roughly 180 calories, 10 grams of fat, 22 grams of carbohydrates, and 2 grams of protein. While they’re definitely a treat, the use of real cocoa powder offers antioxidants and some minerals like iron and magnesium.
For those watching dietary concerns, this recipe can be adapted to gluten-free and dairy-free versions, making it accessible to more people. It’s not a health food, but it’s a satisfying, homemade alternative to store-bought sweets with artificial additives.
From a wellness standpoint, making these brownies at home means you control the ingredients, avoid preservatives, and enjoy fresh baked goodness — which, in my book, counts for quite a bit.
Conclusion
If you’re craving a potluck treat that’s easy, utterly delicious, and sure to disappear fast, these fudgy lunch lady brownies should be your go-to. They bring back the nostalgic charm of school lunch treats but with a homemade touch that lets you control the quality and flavor. Plus, they’re simple enough to whip up anytime the chocolate craving hits.
Feel free to experiment with add-ins or toppings to make these brownies your own — whether it’s nuts, espresso, or a swirl of peanut butter. I love how this recipe feels like a little chocolate hug in every bite, and I hope you’ll feel the same.
Give these brownies a try and let me know how you customize them! I’d love to hear your potluck stories or any fun twists you add. Happy baking!
FAQs About Fudgy Lunch Lady Brownies
What makes these brownies fudgy instead of cakey?
The key is the ratio of butter and cocoa to flour, combined with minimal mixing once the flour is added. Melting the butter with cocoa powder before adding sugar also helps create a dense, fudgy texture.
Can I use baking chocolate instead of cocoa powder?
You can, but you’ll need to adjust the butter and sugar amounts since baking chocolate contains fat and sugar. This recipe is designed specifically for cocoa powder for simplicity and consistent results.
How do I know when the brownies are done?
Look for a shiny, crackly top and edges that pull slightly away from the pan. A toothpick inserted near the center should come out with moist crumbs but not wet batter.
Can I make these brownies ahead of time?
Absolutely! They store well at room temperature for a few days and even taste better after resting overnight. Just keep them sealed airtight to maintain freshness.
What’s the best way to cut brownies cleanly?
Use a sharp knife and wipe it clean between cuts. For even cleaner slices, chill the brownies for about 30 minutes before cutting to firm up the texture.
Pin This Recipe!
Fudgy Lunch Lady Brownies Recipe Easy Homemade Potluck Treat
A nostalgic, fudgy brownie recipe reminiscent of school lunch treats, easy to make and perfect for potlucks with a rich chocolate flavor and moist, chewy texture.
- Prep Time: 10 minutes
- Cook Time: 30 minutes
- Total Time: 40 minutes
- Yield: 16 servings 1x
- Category: Dessert
- Cuisine: American
Ingredients
- 1/2 cup (115g) unsalted butter, melted
- 1/3 cup (35g) unsweetened cocoa powder (Dutch-processed recommended)
- 1 cup (200g) granulated sugar
- 2 large eggs, room temperature
- 1 teaspoon vanilla extract
- 3/4 cup (95g) all-purpose flour
- 1/4 teaspoon salt
- 1/2 cup (90g) semi-sweet chocolate chips (optional)
Instructions
- Preheat your oven to 325°F (163°C) and lightly grease an 8×8-inch pan or line it with parchment paper.
- Melt the butter in a small saucepan over low heat or microwave in 30-second intervals until melted. Let it cool slightly.
- In a medium bowl, whisk together cocoa powder and melted butter until smooth.
- Stir in granulated sugar until fully combined and glossy.
- Beat in eggs one at a time, then add vanilla extract, mixing until smooth.
- Sift together flour and salt, then gently fold into the wet mixture until no flour streaks remain. Avoid overmixing.
- Fold in chocolate chips if using.
- Pour batter evenly into the prepared pan and smooth the top.
- Bake for 28-32 minutes, checking at 28 minutes with a toothpick; it should come out with moist crumbs but not wet batter.
- Cool completely in the pan on a wire rack for at least one hour before slicing.
Notes
Melted butter should be warm, not hot, to avoid cooking the eggs prematurely. Avoid overmixing after adding flour to keep brownies fudgy. Let brownies cool completely before slicing for clean cuts. Rotate pan halfway through baking if needed for even cooking. For gluten-free, substitute flour with a 1:1 gluten-free baking blend. For dairy-free, replace butter with coconut oil and use dairy-free chocolate chips.
Nutrition
- Serving Size: 1 piece (about 2-inc
- Calories: 180
- Fat: 10
- Carbohydrates: 22
- Protein: 2
Keywords: fudgy brownies, lunch lady brownies, homemade brownies, potluck dessert, easy brownies, chocolate brownies, fudgy chocolate treat


