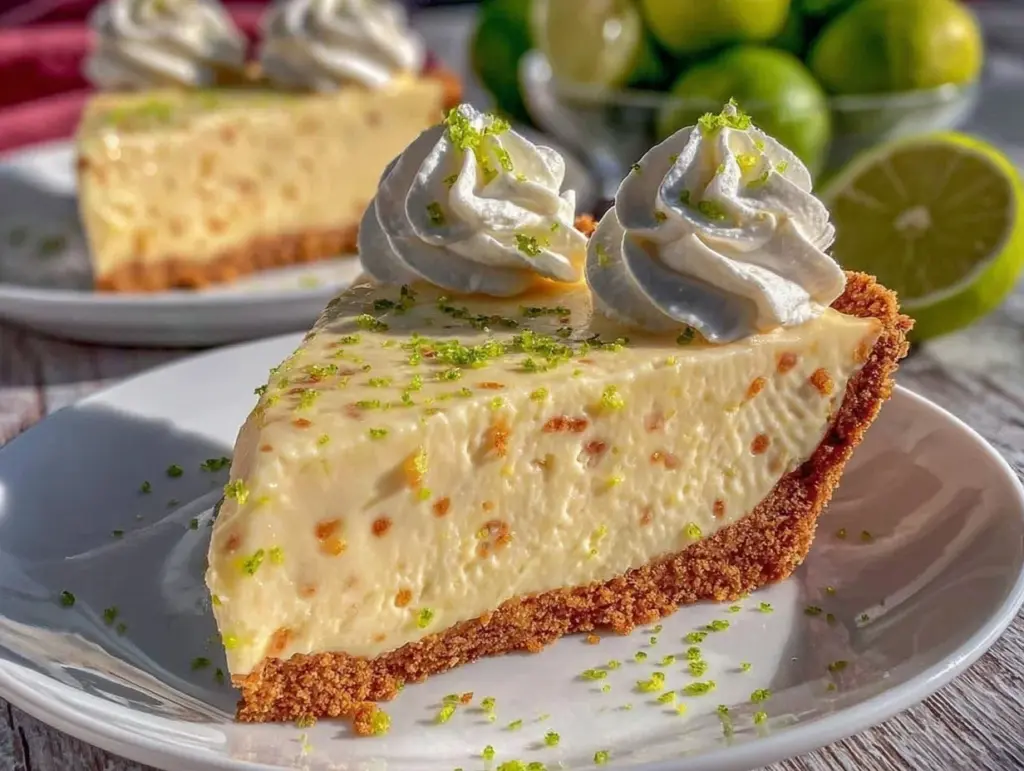
The first time I tasted a no bake key lime pie, I was sitting on a breezy porch in Florida, the kind where the air smells like salt and citrus. That tart, creamy slice melted on my tongue, and honestly, it was one of those rare desserts that felt like a burst of sunshine. I’ve since made this no bake key lime pie recipe countless times, especially when I want something bright and fresh without heating up the kitchen. It’s become my go-to when friends drop by unexpectedly or when I’m craving a dessert that’s both tangy and smooth.
What’s cool about this no bake key lime pie is that it captures all the essence of classic key lime pie but without the fuss of baking. You know, sometimes you just want that zesty, creamy punch without the oven battle. As someone who’s played around with many citrus desserts, I can say this version hits the spot every time — it’s refreshing, light, and just sweet enough to feel indulgent.
This recipe is perfect for anyone who loves desserts that feel fresh but also want something quick and approachable. Whether you’re new to pie-making or you’ve got a kitchen full of eager taste testers, this no bake key lime pie will surprise you with how easy it is to whip up yet how impressive it tastes. Plus, it’s a fantastic alternative to heavier desserts, especially on hot days when you want to keep things cool. After making it for family dinners and casual get-togethers, I can honestly say this pie brings smiles all around.
Why You’ll Love This No Bake Key Lime Pie Recipe
After testing this no bake key lime pie multiple times, I can confidently say it’s a winner for so many reasons. Here’s what stands out and why it’s earned a permanent spot in my dessert rotation:
- Quick & Easy: You can have this pie ready in about 15 minutes, then just let it chill. No oven, no stress—ideal for busy days or last-minute dessert plans.
- Simple Ingredients: No complicated shopping trips needed. The ingredients are pantry staples, and you probably have most of them hanging out in your fridge or cupboard.
- Perfect for Summer & Beyond: This pie is a bright, citrusy treat that works great for summer barbecues, spring brunches, or even winter when you need a little tropical cheer.
- Crowd-Pleaser: Kids, adults, picky eaters — everyone loves the balance of sweet and tart. It’s one of those desserts that disappears fast.
- Rich Texture, Light Feel: Thanks to the creamy filling and crisp crust, it’s indulgent but never heavy. Plus, the no bake method keeps it silky smooth.
What sets this no bake key lime pie apart is the little twists I’ve added over time—like a graham cracker crust that’s perfectly buttery and the use of fresh key lime juice whenever I can find it. It’s not just another pie; it’s my best version. You know that moment when a recipe makes you close your eyes and savor every bite? That’s this pie. It’s comfort food in a glassy, tangy form, perfect for impressing guests or treating yourself on a whim.
What Ingredients You Will Need
This no bake key lime pie recipe uses simple, wholesome ingredients to deliver that classic tangy flavor and creamy texture without complicating things. Most are pantry staples, and if you grab a few fresh items, you’re good to go.
- Graham Cracker Crust:
- 1 1/2 cups graham cracker crumbs (about 10 full sheets, finely crushed)
- 1/3 cup unsalted butter, melted (I like using Land O Lakes for richness)
- 1/4 cup granulated sugar (balances the tartness)
- Filling:
- 1 can (14 oz / 396 g) sweetened condensed milk (store brand or Eagle Brand both work great)
- 1/2 cup fresh key lime juice (about 20-25 key limes) or regular lime juice if unavailable
- 1 cup heavy whipping cream, chilled (for that fluffy finish)
- 1 tablespoon lime zest (adds extra zing)
- 1 teaspoon vanilla extract (optional, but I swear it rounds out the flavor)
- Topping:
- Additional whipped cream or store-bought Cool Whip (for garnish)
- Lime slices or extra zest (for decoration)
Ingredient tips: When selecting graham crackers, the classic honey-flavored ones work best for that nostalgic taste. For the key lime juice, fresh is ideal, but bottled lime juice is a decent backup if you’re in a pinch. I’ve also tried this with a gluten-free graham cracker alternative for a friend, and it still turned out delicious.
Equipment Needed
- 9-inch (23 cm) pie pan or springform pan (I prefer glass so I can see the layers)
- Mixing bowls (medium and large)
- Electric mixer or hand whisk (an electric mixer definitely makes whipping cream easier)
- Measuring cups and spoons
- Microplane or fine grater (for zesting the limes)
- Citrus juicer (optional but handy for getting every drop of juice)
- Spatula (for folding the whipped cream into the filling)
If you don’t have an electric mixer, a sturdy whisk will do, but be prepared to get a little workout. I’ve also found that a springform pan makes serving easier if you want clean slices, though a classic pie pan works just fine. For budget-friendly options, basic kitchen sets often have all you need to get started.
Preparation Method
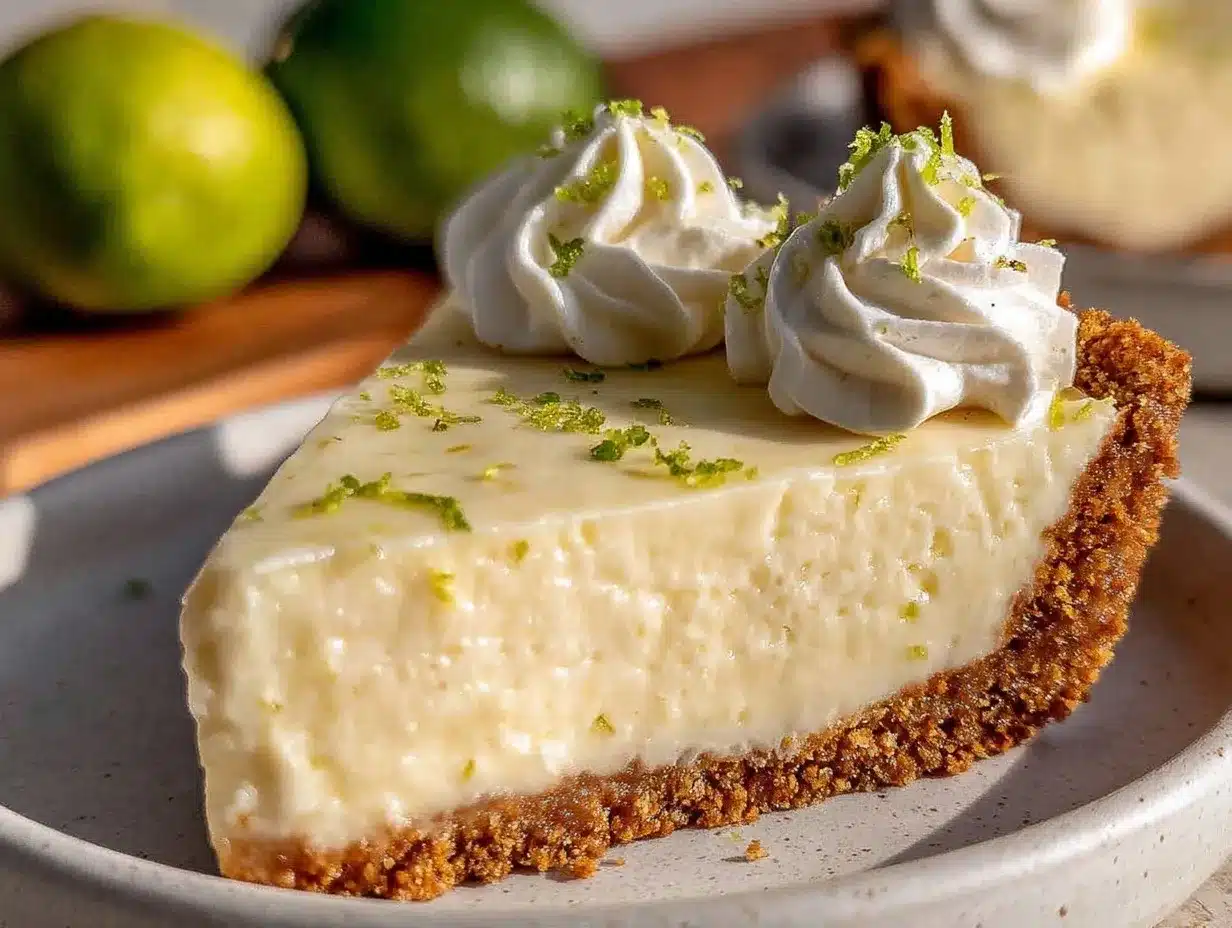
- Make the Crust: In a medium bowl, mix 1 1/2 cups graham cracker crumbs, 1/3 cup melted butter, and 1/4 cup sugar until the mixture resembles wet sand. Press this mixture firmly into the bottom and up the sides of your 9-inch pie pan. Use the bottom of a glass to compact it tightly. Chill in the fridge while you prepare the filling (about 10 minutes). This helps the crust set nicely.
- Prepare the Filling Base: In a large bowl, whisk together the sweetened condensed milk and fresh key lime juice until well combined. You’ll notice the mixture starts to thicken slightly—that’s the magic of the lime juice reacting with the milk, giving the pie its creamy texture. Add the lime zest and vanilla extract, mixing gently.
- Whip the Cream: Using an electric mixer, beat the chilled heavy whipping cream until stiff peaks form. This usually takes about 3 to 5 minutes on medium-high speed. Be careful not to overbeat, or you’ll end up with butter instead of fluffy cream.
- Combine Cream and Filling: Gently fold the whipped cream into the condensed milk and lime mixture. Use a spatula and fold carefully to keep the airy texture intact. This step is key to achieving that light, mousse-like filling.
- Assemble and Chill: Pour the filling over your chilled crust and smooth the top with a spatula. Cover with plastic wrap and refrigerate for at least 3 hours, preferably overnight. The chilling time lets the pie set firm and the flavors meld perfectly.
Note: If you want to speed up chilling, pop the pie in the freezer for about an hour but don’t forget it or it might freeze too hard. A good tip I picked up is to zest the lime directly over the bowl to catch those oils that add extra punch. And if your whipped cream seems a bit loose, chill your mixing bowl and beaters for 10 minutes before whipping—that helped me a ton on humid days.
Cooking Tips & Techniques
Getting this no bake key lime pie just right is mostly about little details. Here are some tips I’ve learned through trial and error:
- Fresh Juice Matters: Freshly squeezed key lime juice makes all the difference. Bottled juice is fine but can taste a bit flat, so if you can find real key limes, grab them! If not, regular limes work.
- Press the Crust Firmly: Don’t skimp on packing the crust tightly. If it’s loose, the crust might crumble when slicing. Using the bottom of a glass helps create a solid base.
- Whip Cream to Stiff Peaks: Underwhipped cream can cause the filling to be runny, while overwhipped cream turns grainy. Stop whipping once you see peaks that hold their shape.
- Folding is Key: When mixing the whipped cream into the filling, fold gently to keep the mixture light. Stirring too aggressively deflates the air you worked hard to add.
- Chill Thoroughly: The pie needs time to set. Don’t rush the chilling — at least 3 hours is best, and overnight is ideal for clean slices.
One funny mistake I made was forgetting to zest the lime until after mixing the filling. It was still tasty but missed that fresh kick. Lesson learned! Also, if you want a smoother crust texture, pulse your graham crackers in a food processor for a finer crumb. For a creamier filling, some people add a little cream cheese, but I prefer this classic version.
Variations & Adaptations
Want to tweak this no bake key lime pie? Here are some ways I’ve customized it to fit different tastes and occasions:
- Gluten-Free Crust: Swap graham crackers for gluten-free cookie crumbs or crushed nuts like almonds or pecans mixed with a bit of butter. It adds a nutty twist!
- Vegan-Friendly: Use coconut condensed milk and coconut cream for the filling and a dairy-free butter substitute for the crust. The texture shifts a bit but still deliciously tangy.
- Berry Twist: Add a thin layer of raspberry or blueberry jam on the crust before pouring in the filling. It’s a colorful surprise that pairs beautifully with lime.
- Frozen Key Lime Pie: After chilling, freeze the pie for a few hours. Serve it partially thawed for a sorbet-like texture, which is fantastic on hot days.
- My Personal Favorite: Sometimes I sprinkle toasted coconut flakes on top for a tropical vibe — it adds a lovely crunch and flavor contrast.
Also, if you want to switch things up, try creamy chicken pot pie for a savory twist on easy comfort food, or cool down with a creamy tomato soup after your citrusy dessert for a balanced meal.
Serving & Storage Suggestions
This no bake key lime pie is best served chilled straight from the fridge. For presentation, a dollop of freshly whipped cream on each slice and a thin lime wheel or zest sprinkle makes it look extra inviting. It pairs wonderfully with a cup of iced tea or a light white wine if you’re entertaining.
Store leftovers tightly wrapped in the refrigerator for up to 3 days. The flavors actually deepen a bit overnight, so it’s great for making ahead. If you want to save it longer, you can freeze the pie (wrapped well) for up to a month. When reheating, thaw overnight in the fridge and serve chilled.
An interesting note: I’ve found the crust softens slightly the longer it sits, which some folks like, but if you want to keep it crisp, store the crust and filling separately and assemble before serving. Also, if you’re craving another cool treat afterward, try the neapolitan ice cream cake for a fun layered dessert idea.
Nutritional Information & Benefits
This no bake key lime pie recipe is a lighter dessert option thanks to its fresh citrus base and no baking required. A typical slice contains approximately 320 calories, with about 20 grams of sugar and 18 grams of fat, mostly from the cream and butter crust.
Key limes bring a boost of vitamin C and antioxidants, which support immune health. The graham cracker crust offers whole grain benefits if you opt for whole wheat crackers. If you’re watching carbs, you can reduce sugar or try almond flour crust alternatives mentioned earlier.
Keep in mind the sweetened condensed milk adds richness and sweetness, so if you want to cut back, try mixing in some plain Greek yogurt for tang and protein — it’s a trick I use when I want a bit more nutrition without sacrificing creaminess.
Conclusion
If you’re after a dessert that’s quick, refreshing, and has that perfect balance of tang and creaminess, this no bake key lime pie is worth making. It’s a recipe that feels like a little celebration in every forkful — light, zesty, and effortlessly impressive. Honestly, it’s one of those desserts I come back to time and again because it just works.
Feel free to customize it with your favorite toppings or crust variations. I love hearing how others make it their own, so don’t hesitate to leave a comment sharing your twists or questions. Whether you’re serving it at a sunny brunch or a cozy dinner, this pie is sure to bring a little zest to your day!
FAQs About No Bake Key Lime Pie
Can I use regular lime juice instead of key lime juice?
Yes, regular lime juice works well if you can’t find key limes. The flavor will be slightly different but still deliciously tangy.
How long does the no bake key lime pie need to chill?
At least 3 hours in the fridge is best, but overnight chilling gives the best texture and flavor development.
Can I make this pie ahead of time?
Absolutely! It keeps well in the fridge for up to 3 days, making it a great make-ahead dessert.
What if I don’t have graham crackers for the crust?
You can use crushed digestive biscuits, shortbread, or even nuts mixed with butter as a crust substitute.
Is it possible to freeze the pie?
Yes, you can freeze it, but thaw it in the fridge before serving for the best texture. Frozen pie can last up to a month.
Pin This Recipe!

No Bake Key Lime Pie Recipe Easy 5-Step Refreshing Dessert
A quick and easy no bake key lime pie that is bright, tangy, and creamy, perfect for a refreshing dessert without heating up the kitchen.
- Prep Time: 15 minutes
- Cook Time: 0 minutes
- Total Time: 3 hours 15 minutes
- Yield: 8 servings 1x
- Category: Dessert
- Cuisine: American
Ingredients
- 1 1/2 cups graham cracker crumbs (about 10 full sheets, finely crushed)
- 1/3 cup unsalted butter, melted
- 1/4 cup granulated sugar
- 1 can (14 oz / 396 g) sweetened condensed milk
- 1/2 cup fresh key lime juice (about 20–25 key limes) or regular lime juice
- 1 cup heavy whipping cream, chilled
- 1 tablespoon lime zest
- 1 teaspoon vanilla extract (optional)
- Additional whipped cream or store-bought Cool Whip (for garnish)
- Lime slices or extra zest (for decoration)
Instructions
- Make the Crust: In a medium bowl, mix 1 1/2 cups graham cracker crumbs, 1/3 cup melted butter, and 1/4 cup sugar until the mixture resembles wet sand. Press this mixture firmly into the bottom and up the sides of your 9-inch pie pan. Use the bottom of a glass to compact it tightly. Chill in the fridge for about 10 minutes.
- Prepare the Filling Base: In a large bowl, whisk together the sweetened condensed milk and fresh key lime juice until well combined. Add the lime zest and vanilla extract, mixing gently.
- Whip the Cream: Using an electric mixer, beat the chilled heavy whipping cream until stiff peaks form, about 3 to 5 minutes on medium-high speed.
- Combine Cream and Filling: Gently fold the whipped cream into the condensed milk and lime mixture using a spatula to keep the airy texture intact.
- Assemble and Chill: Pour the filling over the chilled crust and smooth the top with a spatula. Cover with plastic wrap and refrigerate for at least 3 hours, preferably overnight.
Notes
Use fresh key lime juice for best flavor; bottled lime juice is an acceptable substitute. Press the crust firmly to avoid crumbling. Whip cream to stiff peaks but avoid overwhipping. Fold whipped cream gently into filling to maintain light texture. Chill pie for at least 3 hours or overnight for best results. For a gluten-free crust, substitute graham crackers with gluten-free cookie crumbs or nuts. Vegan adaptations include using coconut condensed milk and coconut cream.
Nutrition
- Serving Size: 1 slice (1/8 of pie)
- Calories: 320
- Sugar: 20
- Sodium: 150
- Fat: 18
- Saturated Fat: 10
- Carbohydrates: 35
- Fiber: 1
- Protein: 4
Keywords: no bake key lime pie, easy key lime pie, no bake dessert, key lime pie recipe, quick dessert, summer dessert, creamy pie