The first time I truly nailed the perfect melt-in-your-mouth chicken breast, I was honestly shocked. I’d spent years battling dry, tough chicken that left me wondering if I should just switch to steak forever. But then, one rainy Sunday afternoon, I stumbled upon a technique that changed everything—juicy, tender chicken breasts that practically dissolve on your tongue. It’s funny because it’s such a simple recipe, yet so many folks overcomplicate chicken breast cooking, leading to disappointments.
This perfect melt-in-your-mouth chicken breast recipe has become my go-to for quick dinners when I want something healthy but satisfying. You know that craving for comfort food that’s both easy and impressive? This hits that spot every time. I’ve made it dozens of times, tweaked it here and there, and it never fails to wow my family and friends.
Whether you’re cooking for picky eaters, meal prepping for the week, or just want a delicious homemade dinner without the fuss, this recipe is your new best friend. It’s a simple, juicy chicken breast that’s full of flavor and texture, perfect for pairing with everything from fresh salads to hearty sides like the cozy loaded potato soup. Honestly, once you try this, you’ll never fear dry chicken again.
Why You’ll Love This Recipe
- Quick & Easy: Ready in under 30 minutes, making it perfect for busy weeknights or spontaneous dinners.
- Simple Ingredients: No specialty items needed—just pantry staples and fresh chicken breast.
- Perfect for Any Occasion: Whether you’re hosting a casual meal or cooking for yourself, it fits right in.
- Crowd-Pleaser: Kids, adults, and picky eaters alike always ask for seconds.
- Unbelievably Delicious: The secret little tricks here guarantee juicy, tender chicken every time.
This recipe isn’t just another chicken breast method tossed online. It involves a thoughtful brining step and a cooking technique that locks in moisture—kind of like the magic behind a great creamy garlic parmesan chicken fillet but simpler and faster. After testing this multiple times, I can say it’s the perfect balance of flavor and texture without fuss or fancy ingredients.
It’s that kind of meal that makes you pause, smile, and savor each bite. The kind you can whip up any night and feel proud serving. Honestly, it’s become my secret weapon for easy homemade dinners that impress without stress.
What Ingredients You Will Need
This recipe uses simple, wholesome ingredients to deliver juicy, tender chicken with a subtle flavor boost. Most of these are probably already in your kitchen, which makes this an easy go-to.
- Chicken breasts: 2 boneless, skinless chicken breasts (about 6-8 ounces / 170-225 grams each) – I recommend looking for firm, fresh chicken for best results.
- Salt: 1 tablespoon kosher salt – essential for a quick brine to keep the chicken moist.
- Sugar: 1 teaspoon granulated sugar – balances the salt and enhances browning.
- Water: 2 cups (480 ml) – for the brine solution.
- Olive oil: 1 tablespoon – helps with browning and adds a subtle richness.
- Black pepper: ½ teaspoon freshly ground – for seasoning.
- Garlic powder: ½ teaspoon – adds a gentle savory note.
- Paprika: ½ teaspoon smoked or sweet paprika – gives a hint of color and warmth.
- Lemon juice: 1 tablespoon fresh lemon juice – brightens the flavor and tenderizes.
- Fresh herbs (optional): A few sprigs of thyme or rosemary to add aroma during cooking.
If you want to switch things up, swapping olive oil for avocado oil works great, especially if you want a neutral flavor. And if you’re curious about a gluten-free twist, this recipe is naturally gluten-free since it doesn’t call for any flour or breading.
Equipment Needed
- Large bowl: For the brine – something big enough to hold the chicken and liquid comfortably.
- Cast iron skillet or heavy-bottomed frying pan: I personally love using cast iron for the perfect sear and even heat distribution.
- Tongs: For safely flipping the chicken breasts without piercing.
- Instant-read thermometer: A must-have to check the internal temperature and avoid overcooking. I use a Thermapen for quick and accurate readings.
- Measuring spoons and cups: For precise seasoning and liquid measurements.
- Cutting board and sharp knife: For prepping the chicken.
Don’t worry if you don’t have a cast iron pan; a heavy nonstick skillet works just fine. Just keep an eye on the heat to avoid burning. Investing in a good instant-read thermometer makes a huge difference in getting perfectly cooked chicken every time—trust me, it’s a game-changer.
Preparation Method
- Prepare the brine: In a large bowl, dissolve 1 tablespoon kosher salt and 1 teaspoon sugar in 2 cups (480 ml) cold water. Stir until fully dissolved. Brining helps the chicken retain moisture during cooking.
- Brine the chicken: Add the chicken breasts to the brine, ensuring they’re fully submerged. Cover and refrigerate for 15 to 30 minutes. I don’t recommend longer than 30 minutes as it can get too salty.
- Preheat your pan: After brining, remove the chicken and pat dry thoroughly with paper towels. This step is crucial—moisture on the surface can steam the chicken instead of searing it. Heat 1 tablespoon olive oil in a cast iron skillet over medium-high heat until shimmering, about 2 minutes.
- Season the chicken: Sprinkle both sides with ½ teaspoon black pepper, ½ teaspoon garlic powder, and ½ teaspoon paprika. Drizzle the lemon juice over the chicken for a bright flavor boost.
- Sear the chicken: Place the breasts in the hot pan without crowding. Cook undisturbed for 5-6 minutes until the underside is golden brown and releases easily from the pan.
- Flip and finish cooking: Turn the breasts over using tongs. Reduce heat to medium-low, add fresh herbs (if using) around the chicken, and cover the pan loosely with a lid. Cook for another 6-8 minutes, or until the internal temperature reaches 160°F (71°C). Using a thermometer here avoids drying out the meat.
- Rest the chicken: Transfer the chicken to a plate and tent loosely with foil. Let it rest for 5 minutes—this step lets the juices redistribute, making the chicken tender and juicy.
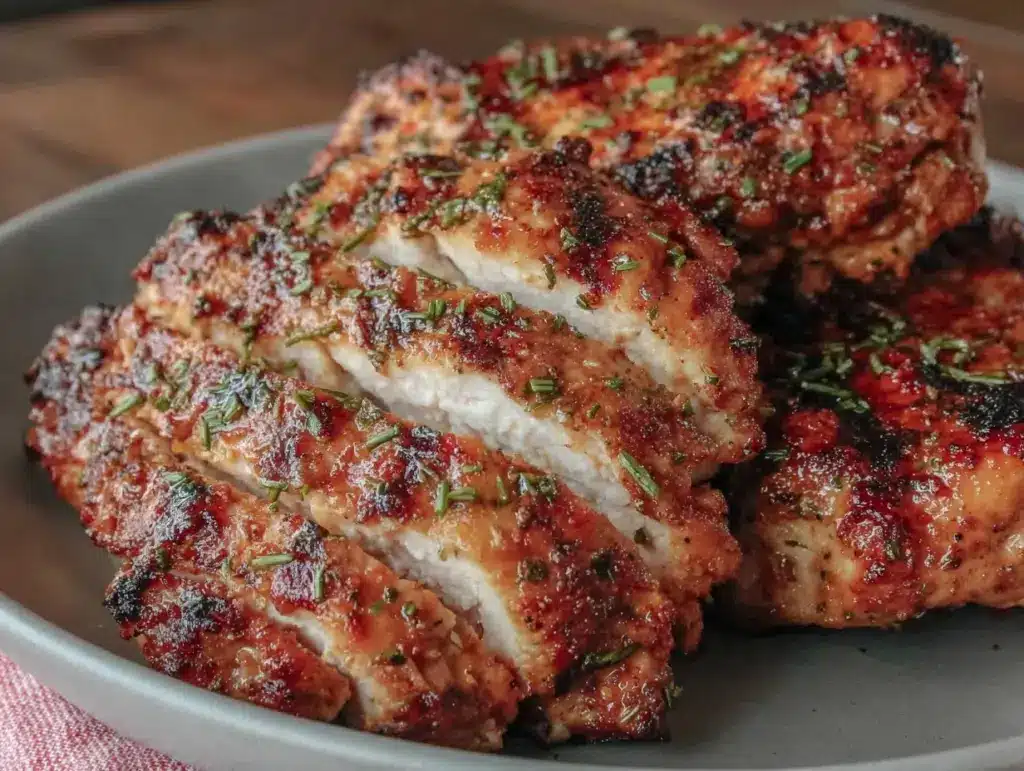
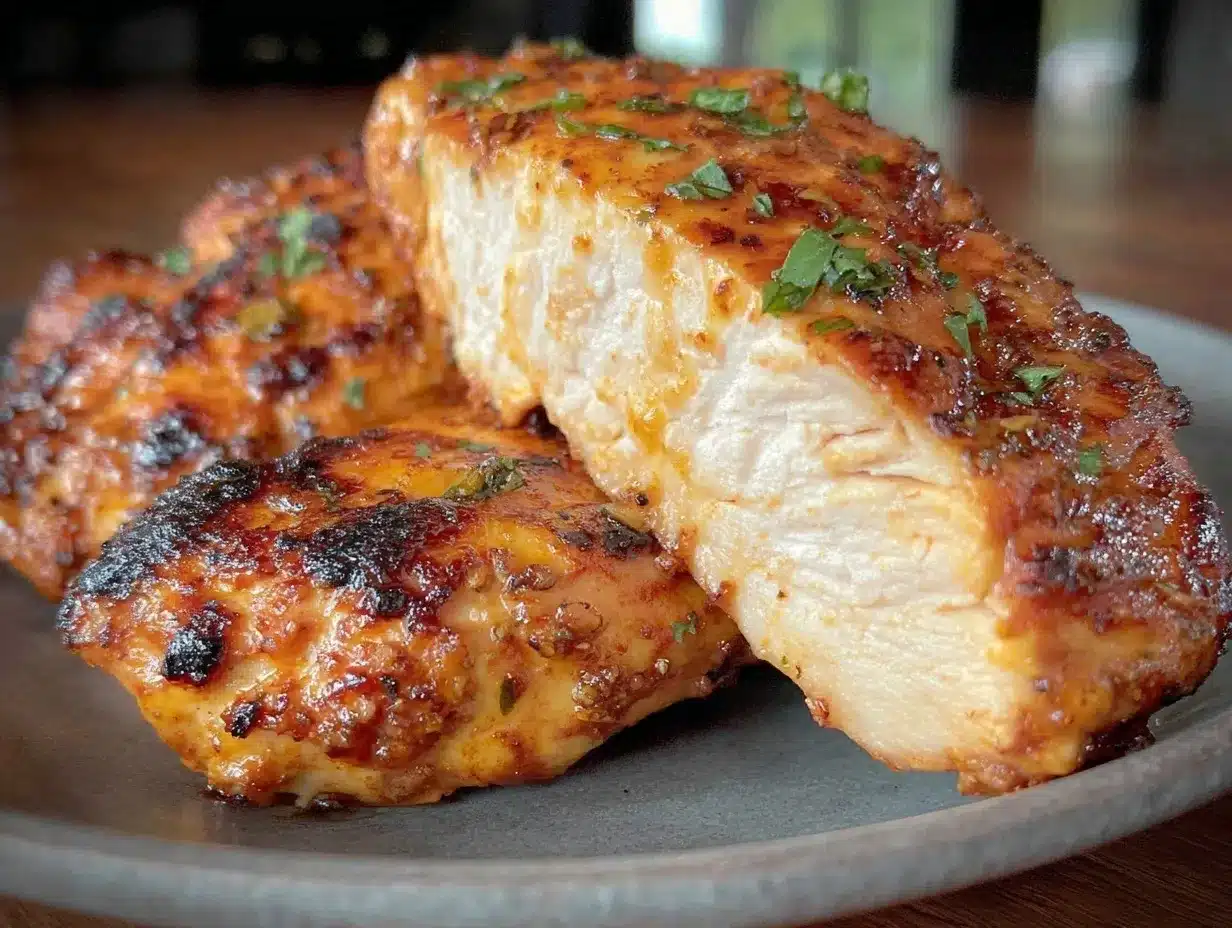
- Slice and serve: Slice against the grain for the most tender bites. Serve immediately with your favorite sides or slice cold for salads or sandwiches.
One time, I skipped patting the chicken dry, and what a difference—steaming instead of searing made the texture rubbery. So don’t skip that step! Also, resting is non-negotiable; trust me, it’s where the magic happens.
Cooking Tips & Techniques
Getting perfectly juicy chicken breast is part science, part feel. Here’s what I’ve learned through some trial and error:
- Brining is your best friend: Even a short 15-minute soak makes a huge difference in moisture retention.
- Don’t overcrowd the pan: Give your chicken room to brown properly. Crowding leads to steaming and less flavor.
- Use an instant-read thermometer: Guesswork can lead to overcooking. Aim for 160°F (71°C) internal temperature—carryover heat will finish it off.
- Pat the chicken dry before searing: Moisture is enemy number one for a good crust.
- Resting is key: Always let your chicken rest after cooking to lock in juices—skip this and you’ll lose moisture fast.
- Multitasking tip: While the chicken rests, whip up a quick sauce or side like the creamy tomato soup from my easy creamy tomato soup recipe for a cozy meal.
I once tried cooking chicken straight from the fridge—big mistake. Always bring it close to room temp before cooking for even heat distribution. Also, if you notice the chicken browning too fast, lower your heat slightly to avoid burning the spices.
Variations & Adaptations
This recipe is a great base for many flavor profiles and dietary tweaks. Here are some ways I’ve customized it:
- Herb & garlic twist: Add minced fresh garlic and chopped rosemary or thyme to the brine for extra aroma.
- Spicy kick: Mix in smoked paprika and cayenne pepper for a little heat without overpowering the chicken.
- Low-sodium option: Reduce salt in the brine by half and rely more on herbs and fresh lemon juice for flavor.
- Oven finish: After searing, pop the skillet into a preheated 375°F (190°C) oven for 8-10 minutes if you prefer a hands-off approach.
- Dairy-free sauce: Serve with a simple avocado or tahini sauce instead of cream-based toppings.
One fun variation I tried was using this chicken as a base for a quick chicken pot pie filling, inspired by my creamy chicken pot pie recipe. The tender chicken soaked up all those cozy flavors beautifully!
Serving & Storage Suggestions
This chicken is best served warm, right off the pan, sliced thick or thin depending on your dish. It pairs wonderfully with simple sides like steamed veggies, rice, or even mashed potatoes. For a comforting combo, try it alongside the loaded potato soup for a hearty, satisfying meal.
Store any leftovers in an airtight container in the fridge for up to 3 days. When reheating, warm gently in a skillet over low heat or microwave covered with a damp paper towel to keep moisture locked in. If you want to freeze, slice the chicken first and wrap tightly—frozen portions last about 2 months.
Flavors actually deepen after a day in the fridge, so the next-day chicken can be even more delicious in salads, wraps, or sandwiches.
Nutritional Information & Benefits
This perfect melt-in-your-mouth chicken breast is a lean source of protein, low in fat and carbs, making it ideal for most diets including low-carb, keto, and gluten-free. Each 6-ounce (170g) serving provides roughly 180 calories and 40 grams of protein, supporting muscle repair and satiety.
Using fresh lemon and herbs not only boosts flavor but adds antioxidants and vitamins. The simple olive oil contributes heart-healthy fats without overwhelming the dish. This recipe fits well into a balanced, wholesome eating plan.
From a personal wellness perspective, having a reliable, easy protein option like this keeps me on track with healthy eating without sacrificing taste or time.
Conclusion
If you’ve been struggling with dry, bland chicken breasts, this perfect melt-in-your-mouth chicken breast recipe is your answer. It’s straightforward, fast, and packed with juicy flavor that makes homemade dinners feel special. Customize it with your favorite herbs or spices, and serve it alongside comforting dishes like creamy soups or fresh salads for a balanced meal.
Personally, I love how this recipe transforms a simple protein into something that feels like a treat rather than just another dinner chore. I’d love to hear how you make it your own or any tips you discover along the way—feel free to share in the comments!
Give it a try tonight, and I promise you’ll wonder why you ever settled for dry chicken before. Happy cooking!
FAQs About Perfect Melt-In-Your-Mouth Chicken Breast
How long should I brine chicken breasts?
For this recipe, 15 to 30 minutes is ideal. Longer than 30 minutes can make the chicken too salty and affect texture.
Can I use frozen chicken breasts?
It’s best to use fully thawed chicken breasts for even cooking and accurate timing.
What if I don’t have an instant-read thermometer?
Cooking times can vary, but aim to cook the chicken about 12-14 minutes total, flipping halfway. However, a thermometer really helps avoid overcooking.
Can I bake this chicken instead of pan-searing?
Yes! After seasoning, bake in a 375°F (190°C) oven for 20-25 minutes or until internal temperature reaches 160°F (71°C).
How do I store leftovers to keep chicken moist?
Store in airtight containers in the fridge and reheat gently with a bit of moisture to avoid drying out.
Pin This Recipe!

Perfect Melt-In-Your-Mouth Chicken Breast Recipe Easy Juicy Homemade Dinner

A simple and quick recipe for juicy, tender chicken breasts that are perfect for any occasion. This method uses a quick brine and pan-searing to lock in moisture and flavor.
- Prep Time: 10 minutes
- Cook Time: 12-14 minutes
- Total Time: 25 minutes
- Yield: 2 servings 1x
- Category: Main Course
- Cuisine: American
Ingredients
- 2 boneless, skinless chicken breasts (6–8 ounces / 170–225 grams each)
- 1 tablespoon kosher salt
- 1 teaspoon granulated sugar
- 2 cups (480 ml) cold water
- 1 tablespoon olive oil
- ½ teaspoon freshly ground black pepper
- ½ teaspoon garlic powder
- ½ teaspoon smoked or sweet paprika
- 1 tablespoon fresh lemon juice
- A few sprigs of thyme or rosemary (optional)
Instructions
- Prepare the brine: In a large bowl, dissolve 1 tablespoon kosher salt and 1 teaspoon sugar in 2 cups (480 ml) cold water. Stir until fully dissolved.
- Brine the chicken: Add the chicken breasts to the brine, ensuring they’re fully submerged. Cover and refrigerate for 15 to 30 minutes.
- Preheat your pan: Remove the chicken from the brine and pat dry thoroughly with paper towels. Heat 1 tablespoon olive oil in a cast iron skillet over medium-high heat until shimmering, about 2 minutes.
- Season the chicken: Sprinkle both sides with ½ teaspoon black pepper, ½ teaspoon garlic powder, and ½ teaspoon paprika. Drizzle the lemon juice over the chicken.
- Sear the chicken: Place the breasts in the hot pan without crowding. Cook undisturbed for 5-6 minutes until the underside is golden brown and releases easily from the pan.
- Flip and finish cooking: Turn the breasts over using tongs. Reduce heat to medium-low, add fresh herbs (if using) around the chicken, and cover the pan loosely with a lid. Cook for another 6-8 minutes, or until the internal temperature reaches 160°F (71°C).
- Rest the chicken: Transfer the chicken to a plate and tent loosely with foil. Let it rest for 5 minutes.
- Slice and serve: Slice against the grain and serve immediately with your favorite sides.
Notes
Pat chicken dry before searing to avoid steaming. Use an instant-read thermometer to avoid overcooking. Rest chicken after cooking to lock in juices. Do not brine longer than 30 minutes to prevent saltiness. Can finish cooking in oven at 375°F for 8-10 minutes if preferred.
Nutrition
- Serving Size: 1 chicken breast (6-
- Calories: 180
- Sugar: 1
- Sodium: 600
- Fat: 5
- Saturated Fat: 1
- Carbohydrates: 1
- Protein: 40
Keywords: chicken breast, juicy chicken, easy chicken recipe, quick dinner, healthy chicken, pan-seared chicken, brined chicken


