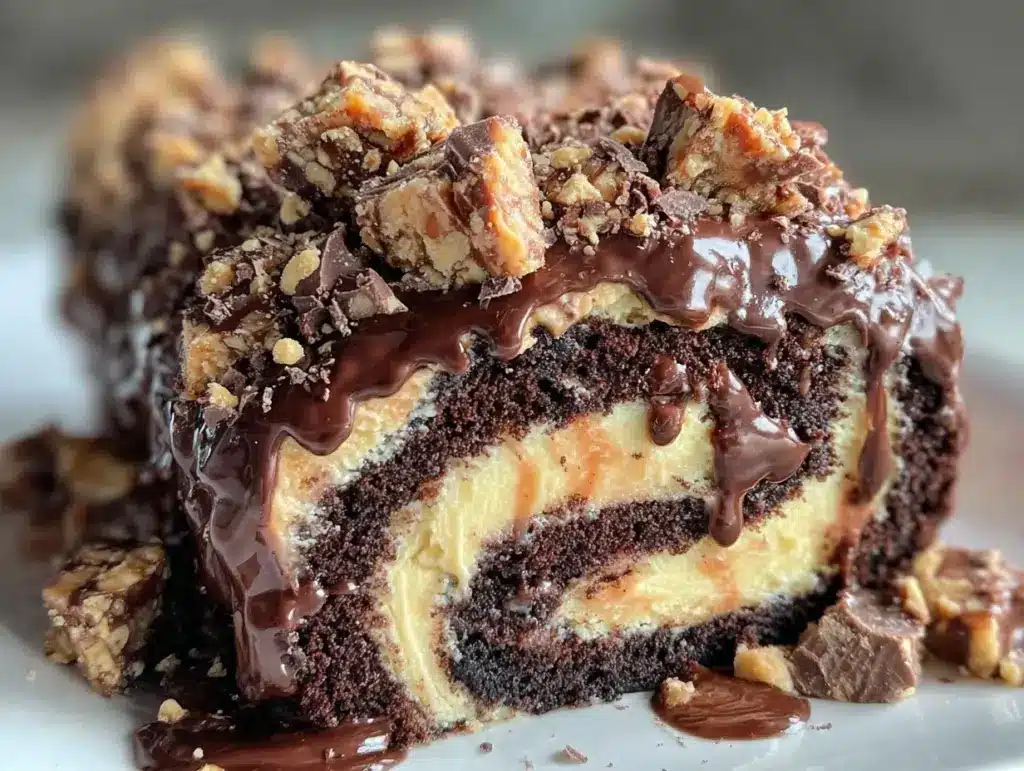
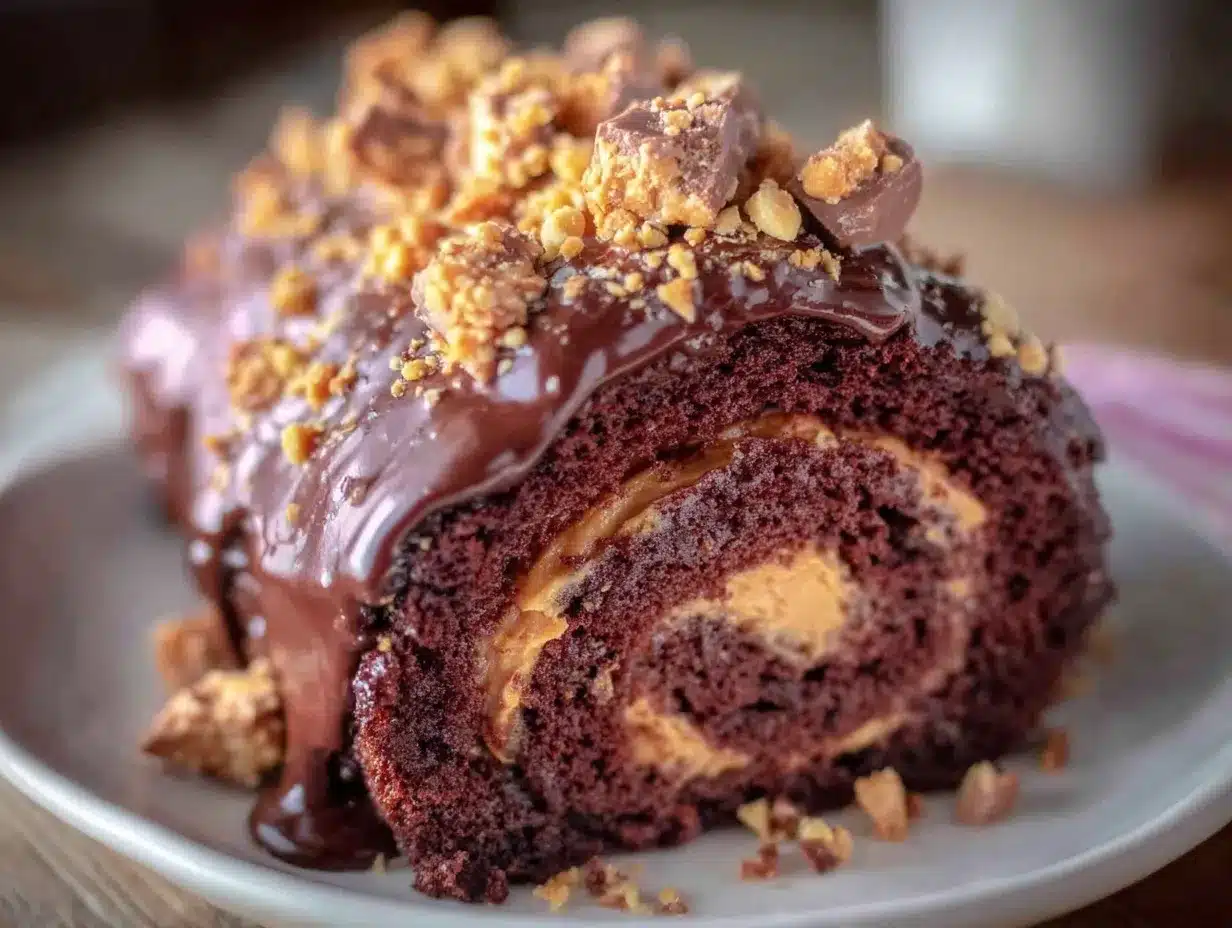
The first time I made the ultimate peanut butter cup chocolate roll, I was craving something wildly indulgent but also a bit nostalgic. You know that feeling when you want a dessert that tastes like your favorite childhood candy bar but with a homemade twist? That’s exactly what this chocolate roll delivers. It’s a rich, fudgy chocolate sponge cake rolled with a creamy peanut butter filling and pockets of melty peanut butter cups. The smell of chocolate and roasted peanuts filling my kitchen instantly reminded me of those sweet moments sneaking candy after school.
Honestly, I’ve tried my share of chocolate rolls, but this one stands out because it captures the perfect balance between silky chocolate and nutty peanut butter without being too heavy or overly sweet. I’ve baked this recipe multiple times, tweaking it until I got that smooth, moist cake with an irresistibly creamy center. It’s become a staple for weekend treats and a real crowd-pleaser when friends come over. If you love the classic peanut butter cup candy, this dessert is like a giant, soft version of that — only better because it’s homemade and fresh.
Whether you’re a dessert novice or a seasoned baker, this ultimate peanut butter cup chocolate roll recipe is surprisingly straightforward and rewarding. Plus, it’s perfect for celebrations or just when you want to spoil yourself (guilty as charged). I’m excited to share how to make this showstopper right in your own kitchen!
Why You’ll Love This Recipe
After testing this ultimate peanut butter cup chocolate roll more times than I can count, I’ve learned a few reasons why it’s an absolute winner:
- Quick & Easy: The batter comes together in under 20 minutes, and the baking time is just right for busy days when you want dessert fast.
- Simple Ingredients: No obscure items here — just everyday pantry staples like cocoa powder, peanut butter, and eggs, plus your favorite peanut butter cups.
- Perfect for Any Occasion: Whether it’s a birthday, potluck, or just a cozy night in, this chocolate roll fits the bill for all dessert cravings.
- Crowd-Pleaser: I’ve served this to picky eaters and peanut butter aficionados alike, and it always gets rave reviews.
- Unbelievably Delicious: The contrast between the soft, fluffy chocolate cake and the creamy peanut butter filling is just dreamy.
What makes this recipe truly special is the technique I use to whip the egg whites separately for that light, airy sponge. It’s not your dense chocolate cake but a tender, melt-in-your-mouth roll that holds up beautifully when sliced. Plus, adding peanut butter cups inside creates these little bursts of gooey chocolate-peanut goodness that take every bite to another level.
This isn’t just a dessert; it’s an experience that brings back those comforting candy bar memories, but with an adult twist — less sugar, more texture, and all the flavor. I love how this recipe transforms a simple roll cake into a festive centerpiece, much like the glazed orange creamsicle cake I made last summer, which also combines nostalgic flavors with fresh, homemade charm.
What Ingredients You Will Need
This ultimate peanut butter cup chocolate roll relies on straightforward, quality ingredients that come together for a rich and creamy dessert experience. Here’s what you’ll need:
- For the Chocolate Sponge Cake Batter:
- 4 large eggs, separated (room temperature for better volume)
- ¾ cup (150g) granulated sugar, divided
- ⅓ cup (35g) unsweetened cocoa powder (I prefer Valrhona for its deep flavor)
- ½ cup (65g) all-purpose flour, sifted
- ¼ teaspoon salt
- 1 teaspoon vanilla extract
- For the Peanut Butter Filling:
- 1 cup (250g) creamy peanut butter (natural or smooth, depending on texture preference)
- ½ cup (60g) powdered sugar, sifted
- ¼ cup (60ml) heavy cream or full-fat coconut cream (for dairy-free)
- 1 teaspoon vanilla extract
- Additional:
- 1 cup (about 150g) mini peanut butter cups, chopped roughly (I like Reese’s for authentic flavor)
- Powdered sugar for dusting (optional but adds a nice touch)
All of these ingredients are pretty easy to find, and you probably have most of them already in your pantry. If you want a gluten-free version, swapping the all-purpose flour with a gluten-free blend works well, just be sure it’s a 1:1 substitution. For those avoiding dairy, the coconut cream keeps the filling rich and luscious without any coconut flavor overpowering the peanut butter.
Choosing quality peanut butter cups makes a big difference here — I’ve tried cheaper brands before, and they can get too sweet or waxy. The chopped peanut butter cups inside the roll add those delightful pockets of gooey chocolate and peanut butter that honestly make this dessert unforgettable.
Equipment Needed
Here’s what you’ll want to have on hand to make this ultimate peanut butter cup chocolate roll come together smoothly:
- 9×13-inch Jelly Roll Pan: This is essential for baking the thin chocolate sponge. If you don’t have one, a shallow baking sheet with sides will do, but make sure it’s roughly the same size.
- Mixing Bowls: At least two — one for whipping egg whites and another for the batter.
- Electric Mixer or Stand Mixer: Whipping the egg whites to stiff peaks is key, so a mixer helps immensely. You can do it by hand but expect a workout!
- Spatula: A flexible silicone spatula for folding ingredients gently.
- Kitchen Towel: To roll the cake while it’s warm without cracking (it’s a neat trick I’ve learned over time).
- Wire Rack: For cooling the cake after baking.
If you’re on a budget or just getting started with baking, you can find affordable jelly roll pans online or at local stores. I’ve used vintage pans that have a bit of character but still do the job perfectly. Just make sure to line your pan with parchment paper to avoid sticking — trust me, it saves so much cleanup hassle!
Preparation Method
- Preheat your oven to 350°F (175°C). Line your jelly roll pan with parchment paper and lightly grease it. This helps the cake release easily after baking.
- Separate the eggs. Place the egg whites in a clean, dry bowl and the yolks in another. Make sure no yolk gets into the whites — even a tiny bit of fat can stop them from whipping properly.
- Whisk the egg yolks with ½ cup (100g) sugar and vanilla extract. Beat until pale and slightly thickened, about 2-3 minutes. This gives the batter richness and color.
- Sift together the cocoa powder, flour, and salt. Gradually fold into the egg yolk mixture until combined but don’t overmix — you want to keep it light.
- Whip the egg whites. Using your electric mixer, beat the egg whites on medium speed until soft peaks form. Gradually add the remaining ¼ cup (50g) sugar and continue beating until stiff, glossy peaks appear. This step is crucial for that tender sponge texture.
- Gently fold the egg whites into the chocolate batter. Use a spatula and fold in thirds, being careful not to deflate the mixture. The batter should be airy and smooth.
- Pour the batter into the prepared pan. Spread evenly with a spatula and bake for 12-15 minutes. The cake will spring back lightly when touched and a toothpick inserted should come out with moist crumbs.
- Remove cake from oven. Immediately invert the pan onto a clean kitchen towel dusted with powdered sugar. Carefully peel off the parchment paper. While still warm, roll the cake up in the towel from the short side. This prevents cracking later. Let it cool completely.
- Prepare the peanut butter filling. In a bowl, beat the peanut butter, powdered sugar, cream, and vanilla until smooth and fluffy. Adjust cream quantity if needed for spreading consistency.
- Unroll the cooled cake gently. Spread the peanut butter filling evenly over the surface, then sprinkle the chopped peanut butter cups over the filling.
- Roll the cake back up without the towel. Wrap tightly in plastic wrap and refrigerate for at least 1 hour to set.
- Before serving, dust with powdered sugar if desired. Slice with a sharp knife, wiping it clean between slices for neat rounds.
Tip: If you notice your cake cracking slightly when rolling, make sure it’s warm enough to be pliable. Also, folding the egg whites gently keeps the sponge light and prevents it from becoming dense.
Cooking Tips & Techniques
From my experience, a few tricks make this ultimate peanut butter cup chocolate roll truly shine:
- Whip Egg Whites Properly: Use a clean bowl with no grease. I learned the hard way that even a tiny trace of oil ruins the volume. Also, room temperature eggs whip better.
- Fold Gently: When combining your egg whites with the batter, folding — not stirring — is key. It keeps the air bubbles intact for a fluffy sponge.
- Roll While Warm: Rolling the cake right out of the oven in a towel dusted with powdered sugar prevents cracks. Letting it cool rolled prevents the cake from snapping when you add the filling.
- Use High-Quality Peanut Butter: I prefer creamy natural peanut butter without added sugar or oil. It blends better with the powdered sugar and cream for a silky filling.
- Chill Before Slicing: Refrigerate the roll to firm up the filling, making slicing easier and prettier.
One time, I forgot to fold the egg whites gently and ended up with a dense, flat cake — such a bummer! Now, I always remind myself to be patient with this step. Also, multitasking by whipping the filling while the cake cools saves time and keeps the process smooth.
Variations & Adaptations
This recipe is flexible and easy to adapt to different tastes or dietary needs.
- Vegan Version: Use a flax egg or aquafaba to replace eggs, coconut cream for the filling, and dairy-free chocolate peanut butter cups.
- Nut-Free: Swap peanut butter with sunflower seed butter and omit the peanut butter cups, or use a nut-free chocolate caramel candy instead.
- Extra Chocolatey: Fold in mini chocolate chips into the batter or drizzle melted chocolate over the finished roll.
- Seasonal Twist: Add a swirl of raspberry jam before rolling for a fruity contrast, similar to how the triple chocolate raspberry mousse cake balances rich chocolate with bright berries.
Personally, I once tried a salted caramel drizzle on top for a decadent finish—it was a total crowd-pleaser, though a bit messy! Feel free to experiment with your favorite candies or fillings to make it your own.
Serving & Storage Suggestions
This chocolate roll is best served chilled or slightly below room temperature, which lets the peanut butter filling hold its shape but stays soft enough to melt in your mouth. I like to serve it with a simple glass of cold milk or a cup of coffee to balance the rich flavors.
For storing, wrap the roll tightly in plastic wrap and keep it refrigerated. It stays fresh for up to 4 days. You can also freeze it wrapped well for up to 2 months—just thaw overnight in the fridge before serving.
Reheating isn’t recommended, but letting slices sit out for 10-15 minutes before serving helps soften the filling and enhances the flavor. The flavors actually deepen after a day, making it perfect for making ahead of a party.
If you’re looking for more cozy dessert ideas to pair with this roll, you might enjoy the loaded potato soup for a comforting meal followed by something sweet.
Nutritional Information & Benefits
Each slice of this ultimate peanut butter cup chocolate roll packs a satisfying amount of protein and healthy fats from the peanut butter, along with antioxidants from the cocoa powder. While it’s definitely a treat, it’s more balanced than you might expect compared to store-bought sweets.
Approximate nutrition per slice (based on 10 slices):
| Calories | Fat | Carbohydrates | Protein | Sugar |
|---|---|---|---|---|
| 320 kcal | 20g | 28g | 7g | 18g |
This dessert is gluten-containing unless you swap the flour as noted. It’s also nut-heavy, so not suitable for those with peanut allergies. From a wellness standpoint, I appreciate how the peanut butter adds sustained energy, making it a great post-dinner treat that won’t leave you crashing.
Conclusion
The ultimate peanut butter cup chocolate roll is a dessert that brings together nostalgia, flavor, and a touch of elegance all rolled into one. It’s an easy homemade dessert idea that’s perfect for celebrations, casual get-togethers, or just treating yourself on a quiet evening. I love how adaptable it is—you can customize the filling, add mix-ins, or dress it up for parties.
After making this roll several times, it’s become one of my go-to recipes when I want to impress without the fuss. I hope you’ll enjoy making and sharing it as much as I do. If you try it, please drop a comment below and let me know how it turned out or if you made any fun tweaks! Sharing your experience is the best part of cooking.
Happy baking and don’t forget to savor every bite!
FAQs
Can I make the peanut butter cup chocolate roll ahead of time?
Absolutely! You can prepare the roll a day in advance and refrigerate it wrapped tightly. The flavors often improve after resting overnight.
What if I don’t have peanut butter cups? Can I substitute something else?
You can swap them with chopped chocolate bars, caramel candies, or even chopped nuts for added texture and flavor.
How do I prevent the cake from cracking when rolling?
Rolling the cake while it’s still warm and using a powdered sugar-dusted towel helps prevent cracks. Also, roll gently without forcing it.
Is there a gluten-free option for this recipe?
Yes! Use a gluten-free all-purpose flour blend in place of regular flour. Ensure your cocoa powder and other ingredients are also gluten-free.
Can I freeze the peanut butter cup chocolate roll?
Yes, wrap it tightly in plastic wrap and freeze for up to two months. Thaw it overnight in the refrigerator before serving.
Pin This Recipe!
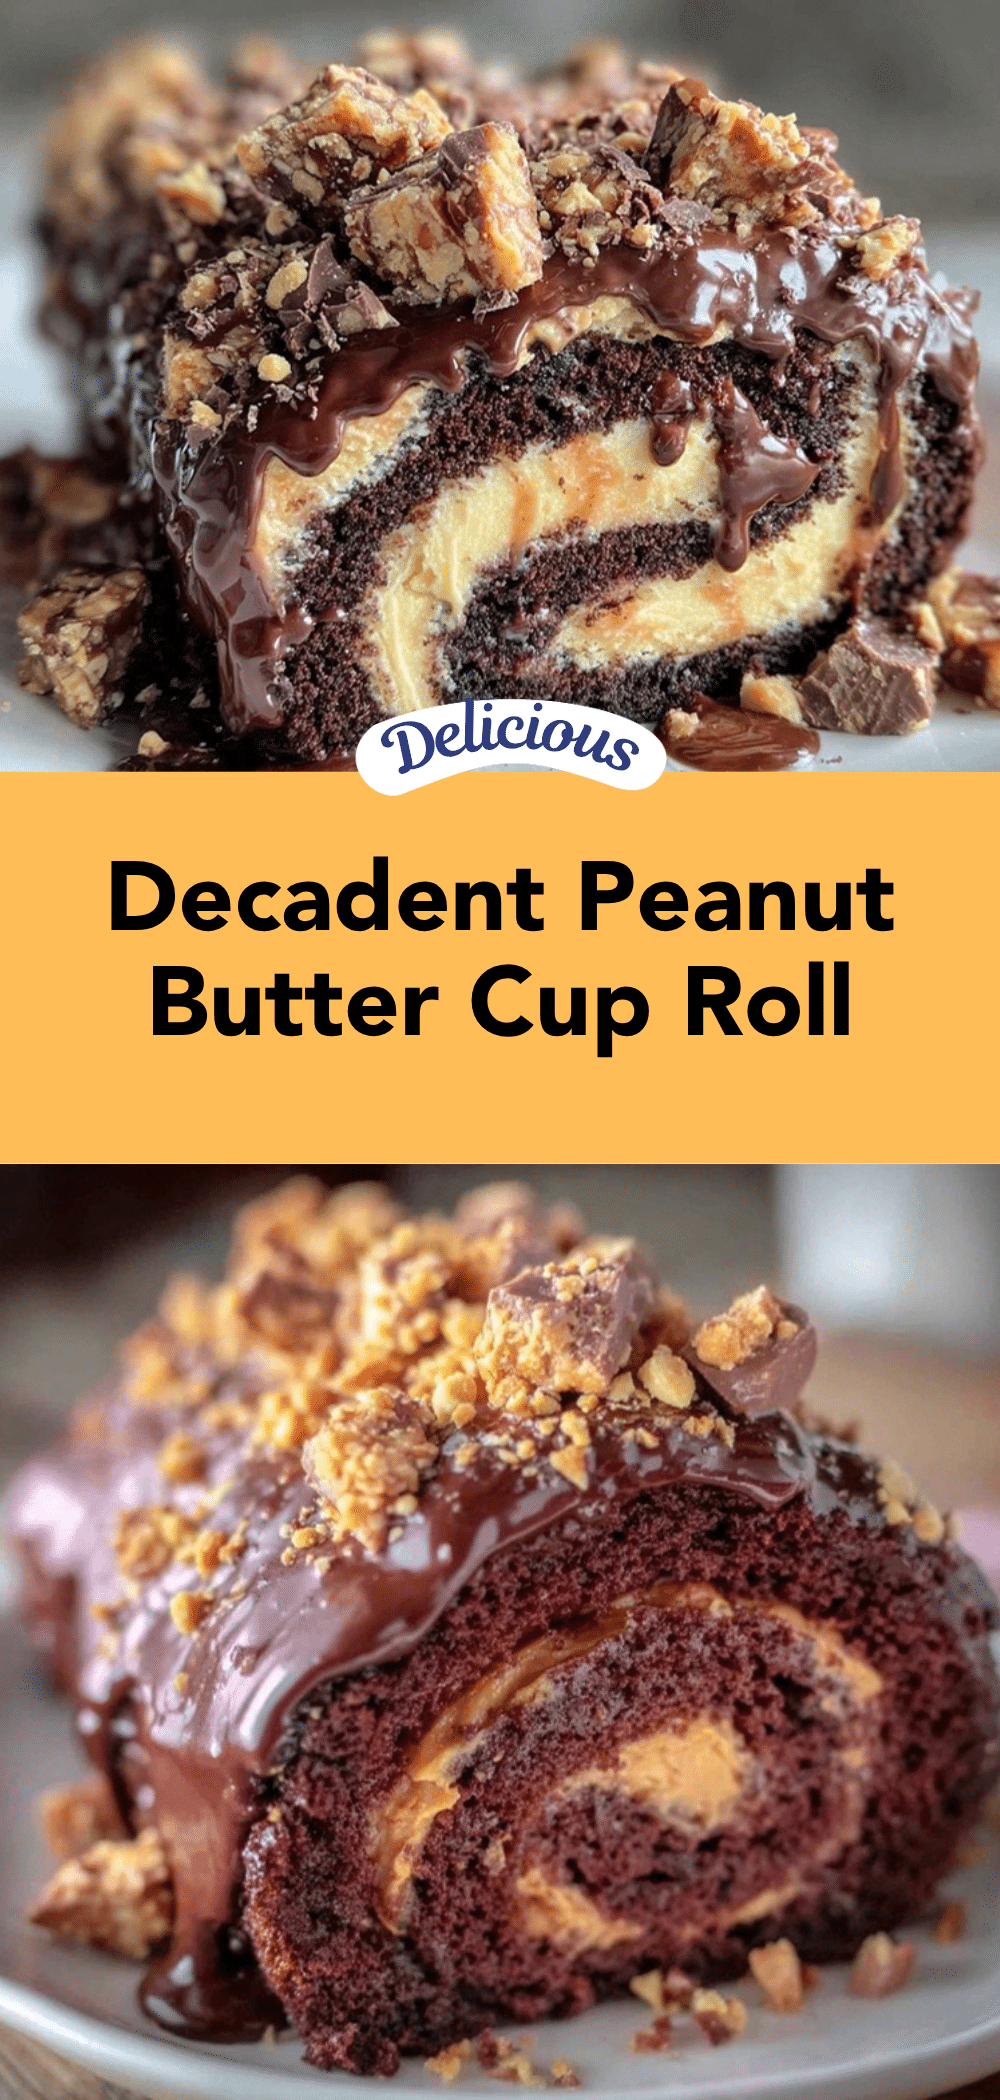
Ultimate Peanut Butter Cup Chocolate Roll
A rich, fudgy chocolate sponge cake rolled with a creamy peanut butter filling and pockets of melty peanut butter cups, delivering a nostalgic and indulgent homemade dessert.
- Prep Time: 20 minutes
- Cook Time: 15 minutes
- Total Time: 1 hour 35 minutes
- Yield: 10 servings 1x
- Category: Dessert
- Cuisine: American
Ingredients
- 4 large eggs, separated (room temperature)
- 3/4 cup (150g) granulated sugar, divided
- 1/3 cup (35g) unsweetened cocoa powder
- 1/2 cup (65g) all-purpose flour, sifted
- 1/4 teaspoon salt
- 1 teaspoon vanilla extract
- 1 cup (250g) creamy peanut butter (natural or smooth)
- 1/2 cup (60g) powdered sugar, sifted
- 1/4 cup (60ml) heavy cream or full-fat coconut cream
- 1 teaspoon vanilla extract
- 1 cup (about 150g) mini peanut butter cups, chopped roughly
- Powdered sugar for dusting (optional)
Instructions
- Preheat your oven to 350°F (175°C). Line your jelly roll pan with parchment paper and lightly grease it.
- Separate the eggs, placing the whites in a clean, dry bowl and the yolks in another.
- Whisk the egg yolks with 1/2 cup (100g) sugar and vanilla extract until pale and slightly thickened, about 2-3 minutes.
- Sift together the cocoa powder, flour, and salt. Gradually fold into the egg yolk mixture until combined but do not overmix.
- Whip the egg whites on medium speed until soft peaks form. Gradually add the remaining 1/4 cup (50g) sugar and continue beating until stiff, glossy peaks appear.
- Gently fold the egg whites into the chocolate batter in thirds, being careful not to deflate the mixture.
- Pour the batter into the prepared pan and spread evenly. Bake for 12-15 minutes until the cake springs back lightly and a toothpick comes out with moist crumbs.
- Remove cake from oven and immediately invert the pan onto a clean kitchen towel dusted with powdered sugar. Peel off parchment paper and roll the cake up in the towel from the short side. Let cool completely.
- Prepare the peanut butter filling by beating peanut butter, powdered sugar, cream, and vanilla until smooth and fluffy.
- Unroll the cooled cake gently and spread the peanut butter filling evenly over the surface. Sprinkle chopped peanut butter cups over the filling.
- Roll the cake back up without the towel, wrap tightly in plastic wrap, and refrigerate for at least 1 hour to set.
- Before serving, dust with powdered sugar if desired. Slice with a sharp knife, wiping it clean between slices.
Notes
Use room temperature eggs for better volume. Whip egg whites in a clean, grease-free bowl. Fold egg whites gently to keep sponge light. Roll cake while warm in a powdered sugar-dusted towel to prevent cracking. Use high-quality peanut butter and peanut butter cups for best flavor. Refrigerate roll before slicing for easier, cleaner cuts. For gluten-free, substitute all-purpose flour with a 1:1 gluten-free blend. For dairy-free, use coconut cream instead of heavy cream.
Nutrition
- Serving Size: 1 slice (1/10th of r
- Calories: 320
- Sugar: 18
- Fat: 20
- Carbohydrates: 28
- Protein: 7
Keywords: peanut butter cup, chocolate roll, chocolate sponge cake, peanut butter filling, homemade dessert, easy dessert, nostalgic dessert


