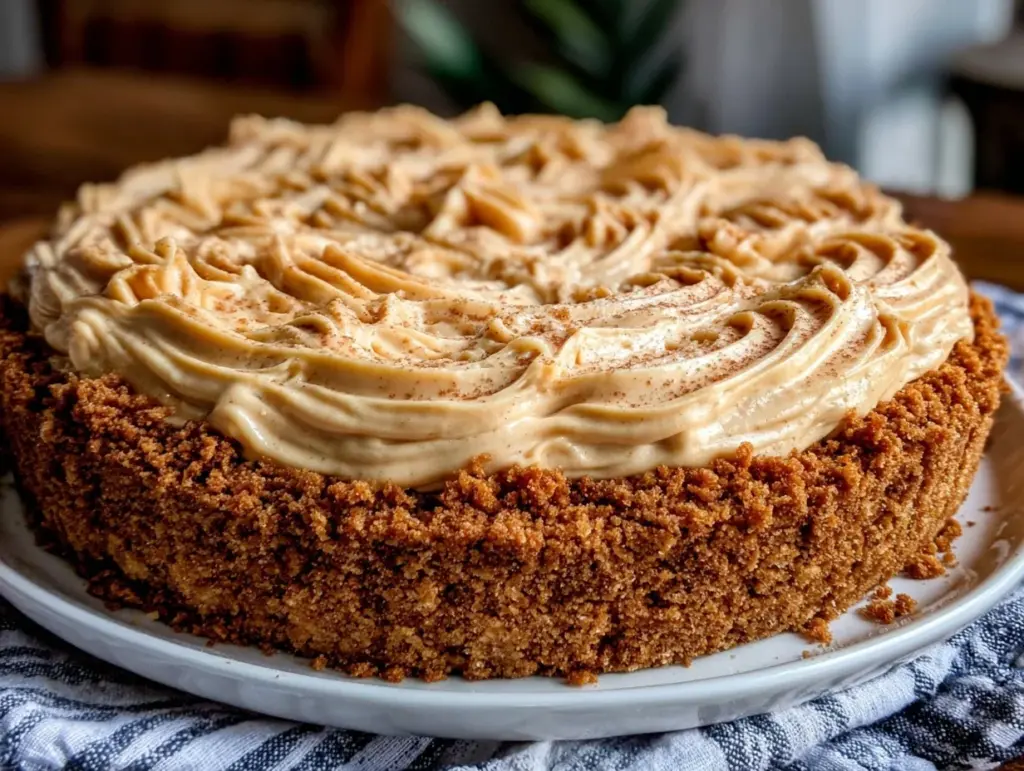
The first time I brought this no-bake peanut butter pie to a potluck, it vanished faster than anything else on the table. Honestly, I wasn’t even sure it would hold up without baking, but the rich, creamy texture and that hint of peanut butter sweetness completely won everyone over. It’s funny how a simple recipe like this can become a crowd favorite, especially when you don’t want to fuss over an oven during a busy day.
This no-bake peanut butter pie recipe has a bit of a backstory for me. I stumbled across it during a summer gathering when the heat made turning on the oven feel like a bad idea. I wanted a dessert that was easy, indulgent, and perfect for sharing. After several tweaks—like switching up the crust and balancing the sweetness just right—this pie became my go-to. It’s creamy yet light, with that classic peanut butter punch that’s so comforting.
If you’re hunting for a dessert that’s quick to throw together, doesn’t require baking skills, and still feels special, you’ll love this pie. Whether you’re bringing it to a potluck, family dinner, or just craving a no-fuss treat, this recipe fits the bill. I’ve made it countless times, and it’s surprisingly versatile—plus, it pairs wonderfully with cozy meals like the loaded potato soup I often serve on chilly evenings. So, let’s talk about how to whip up this delicious no-bake peanut butter pie that’s perfect for any gathering.
Why You’ll Love This Recipe
- Quick & Easy: You can have this pie ready in about 20 minutes, making it perfect for last-minute potluck invites or surprise guests.
- Simple Ingredients: No need for specialty stores—just pantry staples like peanut butter, cream cheese, and graham crackers.
- Perfect for Potlucks: It travels well, doesn’t melt easily, and impresses without any stress.
- Crowd-Pleaser: Kids and adults alike rave about the creamy texture and peanut butter flavor.
- Unbelievably Delicious: The silky, no-bake filling balanced with a crunchy crust hits all the right notes.
What sets this no-bake peanut butter pie apart? It’s the creamy filling made by blending cream cheese and peanut butter just right, giving it that smooth, luscious mouthfeel without being too heavy. Plus, the crust is a simple graham cracker base that holds up without getting soggy. I also like adding a touch of vanilla and a pinch of salt to balance the sweetness, which brings out the peanut butter flavor beautifully.
This recipe isn’t just another peanut butter dessert—it’s the result of a few trial runs where I learned how to get the texture just so. It’s the kind of pie that makes you close your eyes after the first bite and smile. It’s a little indulgent, a little nostalgic, and perfect for sharing with friends and family. If you love the comfort of peanut butter but want something fuss-free, this is for you.
What Ingredients You Will Need
This recipe uses straightforward ingredients that most of us keep on hand. The goal is to get bold peanut butter flavor, creamy texture, and a crunchy crust without complicated steps or obscure items.
- For the crust:
- 1 ½ cups graham cracker crumbs (about 10-12 full sheets, crushed finely)
- 6 tablespoons unsalted butter, melted (adds richness and helps the crust hold together)
- 2 tablespoons granulated sugar (for a touch of sweetness)
- For the filling:
- 1 cup creamy peanut butter (I like Skippy or Jif for smooth texture)
- 8 ounces cream cheese, softened (full-fat for best richness)
- 1 cup powdered sugar (sifted, to avoid lumps)
- 1 teaspoon pure vanilla extract (balances sweetness and adds depth)
- 1 cup heavy whipping cream (cold, for whipping to stiff peaks)
- Pinch of fine sea salt (enhances peanut butter flavor)
- For the topping (optional):
- ½ cup chopped peanuts or chopped Reese’s peanut butter cups (adds crunch and decadence)
- Whipped cream (for decoration)
- Chocolate shavings or drizzle (if you want to get fancy!)
For a gluten-free option, you can swap the graham crackers with gluten-free crackers or crushed nuts. If you want to make it dairy-free, use coconut cream instead of heavy cream and a dairy-free cream cheese alternative. I often recommend these tweaks depending on the crowd. Also, make sure to use creamy peanut butter rather than chunky for that velvety filling texture.
Equipment Needed
- 9-inch pie pan (glass or metal works fine; glass lets you see the crust layer, which I like)
- Mixing bowls (one large for the filling, one small for the crust)
- Electric mixer or stand mixer with a whisk attachment (helps whip the cream perfectly)
- Measuring cups and spoons (for accurate ingredient amounts)
- Spatula (for folding ingredients gently)
- Food processor or zip-top bag and rolling pin (for crushing graham crackers; the bag method is budget-friendly)
If you don’t have a mixer, you can whip the cream by hand with a whisk, but be prepared for a bit of a workout! I’ve found that using a stand mixer saves time and gives the best results. For pie pans, if you don’t have a 9-inch one, a similar sized round cake pan with removable sides can work in a pinch.
Preparation Method
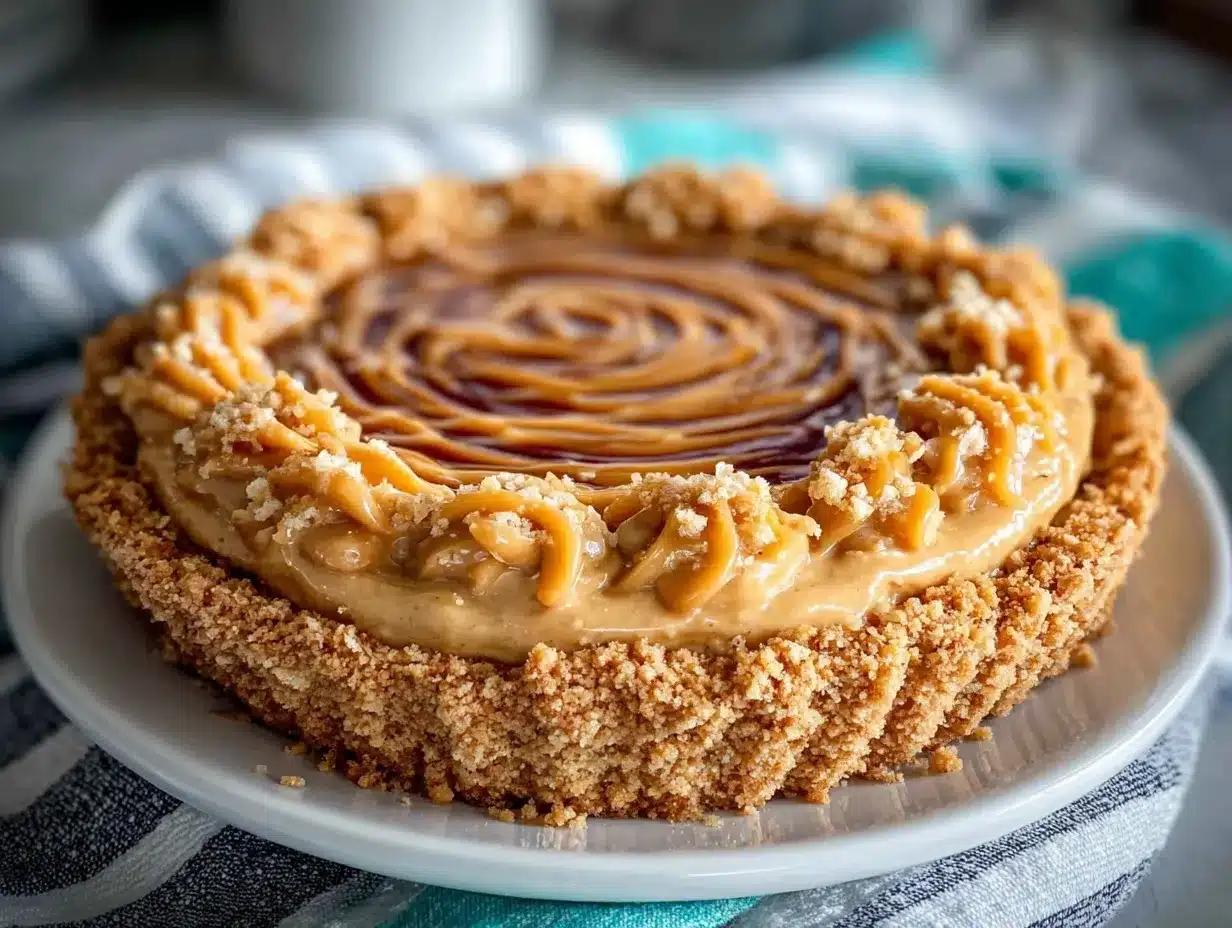
- Make the crust: Crush the graham crackers finely using a food processor or by placing them in a zip-top bag and rolling with a rolling pin. In a medium bowl, mix the crumbs, melted butter, and sugar until the mixture resembles wet sand. Press firmly into the bottom and up the sides of your 9-inch pie pan. Use the back of a spoon or a flat-bottomed cup to smooth the surface. Chill in the fridge for about 15 minutes to set.
- Prepare the filling base: In a large bowl, beat the softened cream cheese and peanut butter together with an electric mixer on medium speed until smooth and creamy—no lumps! This usually takes about 2-3 minutes. Add the powdered sugar, vanilla extract, and salt, then continue beating until everything is well combined.
- Whip the cream: In another chilled bowl, whip the heavy cream on high speed until stiff peaks form. This means when you lift the whisk, the peaks stand straight without drooping. This step is key for the light, airy texture of the pie.
- Fold the whipped cream into the peanut butter mixture: Gently fold about one-third of the whipped cream into the peanut butter mixture to lighten it. Then fold in the remaining cream until the filling is uniform and fluffy, but don’t overmix or you’ll lose airiness.
- Assemble and chill: Spoon the filling over the chilled crust and smooth the top with a spatula. Refrigerate for at least 4 hours, preferably overnight, so the pie firms up and the flavors meld. Before serving, add optional toppings like chopped peanuts, whipped cream dollops, or chocolate drizzle for extra flair.
If you notice the crust seems crumbly when pressing, just add a tiny splash of melted butter and press again—this usually fixes it. Also, if the filling feels too dense after folding in the whipped cream, give it a gentle stir to lighten it without deflating the cream. The smell at this stage—sweet peanut butter and vanilla—is just irresistible!
Cooking Tips & Techniques
Here are some tips I picked up after making this no-bake peanut butter pie more times than I can count:
- Use room temperature cream cheese: It blends much easier and smoother, avoiding clumps that can ruin the texture.
- Don’t rush chilling: The pie needs time in the fridge to set properly. Cutting it too soon can make the slices fall apart.
- Whip cream carefully: Under-whipped cream won’t hold the filling’s lightness; over-whipped may turn grainy. Stop when stiff peaks form.
- Folding technique: Fold gently with a spatula using a cutting motion to keep the whipped cream airy.
- Crust tips: For an extra crunch, toast the graham cracker crumbs lightly before mixing with butter.
One time, I forgot to chill the crust before adding the filling and the bottom got a little soggy. Lesson learned: chilling is non-negotiable. Also, if you’re short on time, you can speed up chilling by popping the pie in the freezer for about 1 hour instead of the fridge, but watch it close so it doesn’t freeze solid.
Variations & Adaptations
This no-bake peanut butter pie is a great base for creativity. Here are some of my favorite twists:
- Chocolate Peanut Butter Pie: Add ½ cup melted semi-sweet chocolate to the filling before folding in the whipped cream. Top with chocolate shavings for a rich combo.
- Low-Sugar Version: Use a powdered sugar substitute like erythritol and a sugar-free peanut butter to make it diet-friendly without sacrificing flavor.
- Nut-Free Alternative: Swap peanut butter with sunflower seed butter and use a nut-free crust for allergy-friendly guests.
- Seasonal Fruit Twist: Top with fresh sliced bananas or strawberries for a fresh contrast to the richness.
- Crunchy Surprise: Mix in some crushed pretzels or toffee bits into the filling for added texture.
I once added a swirl of caramel sauce into the filling for a decadent treat that disappeared in minutes. Also worth noting, if you prefer a firmer crust, try using crushed digestive biscuits instead of graham crackers—they hold up nicely.
Serving & Storage Suggestions
Serve this pie chilled straight from the fridge for the best texture. It slices cleanly when properly chilled—warm it up a bit, and it gets messy. For presentation, add a few dollops of whipped cream and a sprinkle of chopped peanuts or chocolate shavings on top.
This pie pairs wonderfully with simple coffee or milk, and it’s a welcome finish after hearty meals like the creamy chicken pot pie from my recipe collection. It’s also a fun, no-heat dessert option for summer barbecues or potluck dinners.
Store leftovers tightly covered in the refrigerator for up to 3 days. You can also freeze the pie for up to a month; thaw overnight in the fridge before serving. Keep in mind that freezing may slightly change the texture of the crust but the filling holds up well. Over time, the peanut butter flavor deepens, making the pie even more luscious the next day.
Nutritional Information & Benefits
This no-bake peanut butter pie provides a good dose of protein and healthy fats, thanks to peanut butter and cream cheese. Of course, it’s a dessert with sugar and calories, so moderation is key. A typical slice (1/8 of the pie) contains roughly 350-400 calories, 25 grams of fat, 10 grams of protein, and 20 grams of sugar.
Peanut butter delivers heart-healthy monounsaturated fats and some fiber, while cream cheese adds calcium and vitamin A. Using natural peanut butter with no added sugars or hydrogenated oils is a smarter choice for wellness. For those watching carbs, swapping regular sugar with a low-carb sweetener can make this dessert fit better into a lower-carb lifestyle.
If you have allergies, peanuts are a common allergen, so take care with substitutions. Overall, this pie feels indulgent but can fit into a balanced diet when enjoyed occasionally.
Conclusion
This no-bake peanut butter pie is truly one of those recipes you’ll want to keep in your back pocket for potlucks, holidays, or when you just want a fuss-free dessert that tastes like a dream. It’s simple, creamy, and has that peanut butter goodness that makes people smile.
Feel free to tweak the toppings or try out the variations to suit your taste. I love how this pie brings people together—whether it’s a casual get-together or a special occasion. It’s definitely one of my favorite go-to recipes for hassle-free, impressive desserts.
If you give it a try, I’d love to hear how it turned out or any creative spins you put on it! Drop a comment below or share your photos—let’s keep the peanut butter pie love going!
FAQs About No-Bake Peanut Butter Pie
Can I make this pie ahead of time?
Absolutely! In fact, it tastes even better after chilling overnight. Just cover it tightly and keep refrigerated until ready to serve.
What if I don’t have graham crackers for the crust?
You can use digestive biscuits, vanilla wafers, or even crushed pretzels for a salty-sweet crust alternative.
How long does it take to whip the cream?
Usually about 3-5 minutes with an electric mixer on high speed. Stop when stiff peaks form—test by lifting the whisk to see if the peaks hold their shape.
Can I use crunchy peanut butter?
For the smoothest texture, creamy peanut butter is best. Crunchy can work but might make the filling less silky.
Is this recipe suitable for freezing?
Yes, you can freeze the pie for up to a month. Thaw it overnight in the fridge before serving. The crust may soften slightly, but the filling stays delicious.
Pin This Recipe!
No-Bake Peanut Butter Pie
A rich, creamy, and easy no-bake peanut butter pie perfect for potlucks and gatherings, featuring a crunchy graham cracker crust and luscious peanut butter filling.
- Prep Time: 20 minutes
- Cook Time: 0 minutes
- Total Time: 4 hours 20 minutes
- Yield: 8 servings 1x
- Category: Dessert
- Cuisine: American
Ingredients
- 1 ½ cups graham cracker crumbs (about 10–12 full sheets, crushed finely)
- 6 tablespoons unsalted butter, melted
- 2 tablespoons granulated sugar
- 1 cup creamy peanut butter
- 8 ounces cream cheese, softened
- 1 cup powdered sugar, sifted
- 1 teaspoon pure vanilla extract
- 1 cup heavy whipping cream, cold
- Pinch of fine sea salt
- ½ cup chopped peanuts or chopped Reese’s peanut butter cups (optional)
- Whipped cream (optional, for decoration)
- Chocolate shavings or drizzle (optional)
Instructions
- Crush the graham crackers finely using a food processor or by placing them in a zip-top bag and rolling with a rolling pin.
- In a medium bowl, mix the graham cracker crumbs, melted butter, and sugar until the mixture resembles wet sand.
- Press the crust mixture firmly into the bottom and up the sides of a 9-inch pie pan. Smooth the surface with the back of a spoon or flat-bottomed cup.
- Chill the crust in the fridge for about 15 minutes to set.
- In a large bowl, beat the softened cream cheese and peanut butter together with an electric mixer on medium speed until smooth and creamy.
- Add the powdered sugar, vanilla extract, and salt to the cream cheese mixture and continue beating until well combined.
- In another chilled bowl, whip the heavy cream on high speed until stiff peaks form.
- Gently fold about one-third of the whipped cream into the peanut butter mixture to lighten it, then fold in the remaining whipped cream until uniform and fluffy. Avoid overmixing.
- Spoon the filling over the chilled crust and smooth the top with a spatula.
- Refrigerate the pie for at least 4 hours, preferably overnight, to allow it to firm up and the flavors to meld.
- Before serving, add optional toppings such as chopped peanuts, whipped cream dollops, or chocolate drizzle.
Notes
Use room temperature cream cheese for smooth blending. Chill the crust before adding filling to prevent sogginess. Whip cream to stiff peaks for best texture. Fold whipped cream gently to maintain airiness. Toast graham cracker crumbs lightly for extra crunch. Pie can be frozen for up to a month; thaw overnight before serving.
Nutrition
- Serving Size: 1 slice (1/8 of pie)
- Calories: 375
- Sugar: 20
- Sodium: 220
- Fat: 25
- Saturated Fat: 10
- Carbohydrates: 30
- Fiber: 2
- Protein: 10
Keywords: no-bake peanut butter pie, easy peanut butter dessert, potluck dessert, creamy peanut butter pie, no-bake pie